Awards
The Awards tool enables instructors to provide merit-based awards to students. There are two types of awards: Badges, and Certificates. Currently, only the badge awards are ready to use. You can manually give an award to a student or automate the process so that the student receives an award based on certain criterion.
Create a new award
- From the top Navigation panel, go to Course Tools > Edit Course.
- Sort the tools by Category and select the option Awards under Assessments.
-
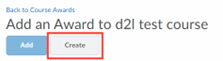
Navigate to Course Awards and then click Add Award to Course.

-
Click Create.
-
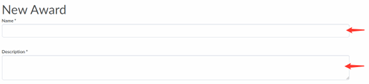
Enter a name and description for the new award.
-
Select an award type from the drop-down list. It can be either Badges or Certificates.

-
Under Availability, you can select the awards to be distributed for all your courses or distribute the award to all other instructors.

-
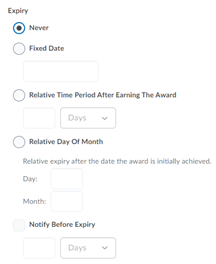
Under Expiry, select different expiry options for your awards.
- If the award will not expire, select Never. Examples of awards that never expire are certificates of merit for passing a course, or badges for perfect attendance.
- If the award will expire on a specific date, select Fixed date. Examples of awards that will expire on a specific date are certifications for a skill that must be renewed, such as first aid training and WHMIS training.
-
If the award will expire on a day relative to the day the award was granted, select Relative Day of the Month. Examples of awards that expire on a relative date are badges for Learner of the Week or for having achieved 100% on a test or assignment.
-
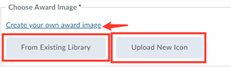
In the Choose Award Image area, do one of the following:
- If the image already exists in the image library, click From Existing Library.
- If you want to add a new icon to the image library, click Upload New Icon.
- If you want to add a new icon to the image library, click Upload New Icon.
-
To launch the OpenBadges website, click Create your own award image. OpenBadges is a free website that allows you to create custom icons.
-
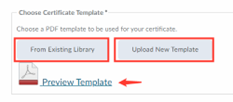
If you have set the Awards type to certificate, you also have to choose certificate template., in the Choose Certificate Template area, do one of the ollowing:
- If the PDF template already exists in the image library, click From Existing Library.
- If you want to add a new template to the image library, click Upload New Template.
-
You can also preview the certificate template by clicking Preview Template.
-
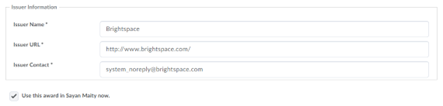
Verify that the Issuer Information is correct.
-
Click Save and Close.

If you want to notify the award recipient before an award expires, select the check box, and indicate the number of days of lead time.
Add release conditions to an award
Setting up a release condition will automatically release the awards once it has been earned. For example, the student received a certain score on a Quiz, or completed an Assignment, or posted in a discussion forum, etc.
- From the top Navigation panel, go to Course Tools > Edit Course.
- Sort the tools by Category and select the option Awards under Assessments.
-
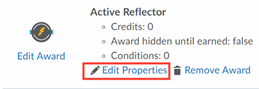
Under a specific award, click Edit Properties.
-
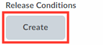
Under Release Conditions, Click Create.
-
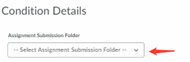
From the Condition Type drop-down list, select the release condition.

-
Complete the associated Condition Details.
-
Click Create.

-
Click Save.
View Awards for a Classlist
- From the top Navigation panel, go to Course Tools > Edit Course.
- Sort the tools by Category and select the option Awards under Assessments.
-
Click Classlist Awards.

-
Select the sort order.

-
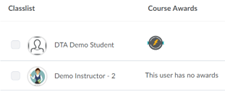
Review the Classlist and associated Course Awards.
Manually Grant Awards
- From the top Navigation panel, go to Course Tools > Edit Course.
- Sort the tools by Category and select the option Awards under Assessments.
-
Click Classlist Awards.
-
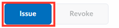
Select one or more learners in the Classlist. And click Issue.
-
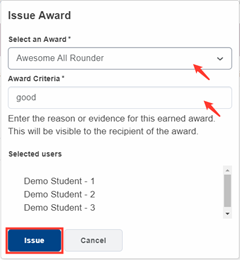
From the drop-down list, Select an Award. and in the Award Criteria field, enter a reason for granting the award. Click Issue.
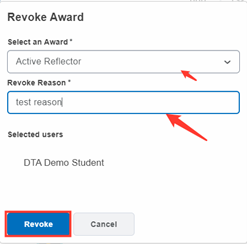
Revoke Awards
- From the top Navigation panel, go to Course Tools > Edit Course.
- Sort the tools by Category and select the option Awards under Assessments.
- Click Classlist Awards. And select one or more learners in the Classlist.
-
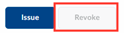
Click Revoke.
-
From the drop-down list, select an award. In the Revoke Reason field, enter a reason for revoking the award. Click Revoke.