O365 Forms
What is Microsoft Forms
Microsoft Forms is used for creating surveys, quizzes, or polls. The Form can be standalone and shared via a link, QR code, or email; or it can be integrated into Microsoft Teams to either poll a chat/group chat or participants during a meeting
Accessing Forms
To access Microsoft Forms, click here to access through the web. Sign in with your @smu.ca email address and password. Then click on Forms on the left-hand side.
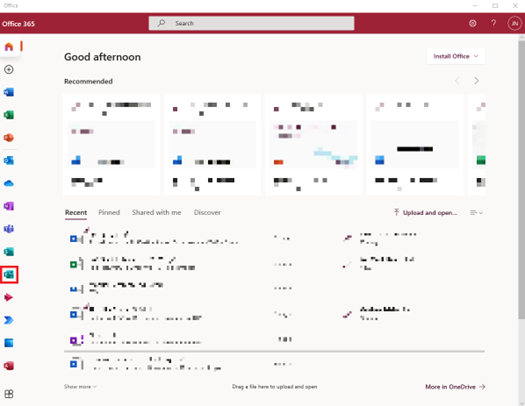
You can also click the Office App (if you have Office 365 installed on your device). To do so, click the start button and search for Office. Click on the Office App, then select Forms from the left-hand side.
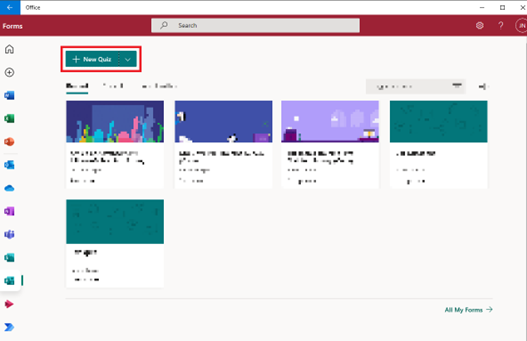
Click either New Quiz to create a Quiz or click the drop-down and select New Form. A webpage will open to start the creation of the Form or Quiz.
A form is like a survey or a poll – there is no correct answer. A quiz can have answers and scores as well as math equations. You can also provide feedback on users’ answers depending on if the answer is right or wrong
Creating a Form (questions tab)
-
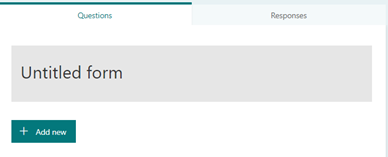
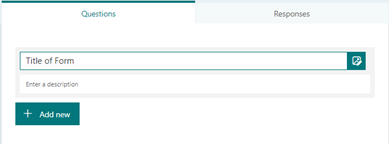
Title - Enter a title on the title box of the form.
-
Description - If you want to have a short description for the form, enter it below the title.
-
Theme - To choose a theme for the form, click the Theme button in the top-right.
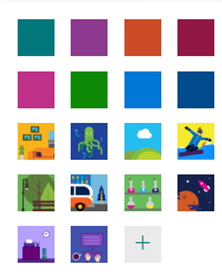
 A new side bar will open. Here you can select the colour scheme or background/theme of the form. You can also create your own theme by selecting the + button. A new side bar screen will load, and you can choose an image and colour scheme.
-
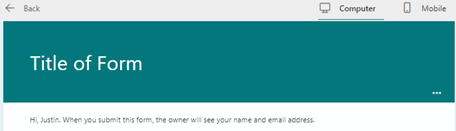
Preview - To preview your form/quiz click the Preview button in the top-right. This will allow you see how participants would see the form. You can also preview to see how it would look on a computer compared to a mobile device. Click the button to go back to the form creation page.

-
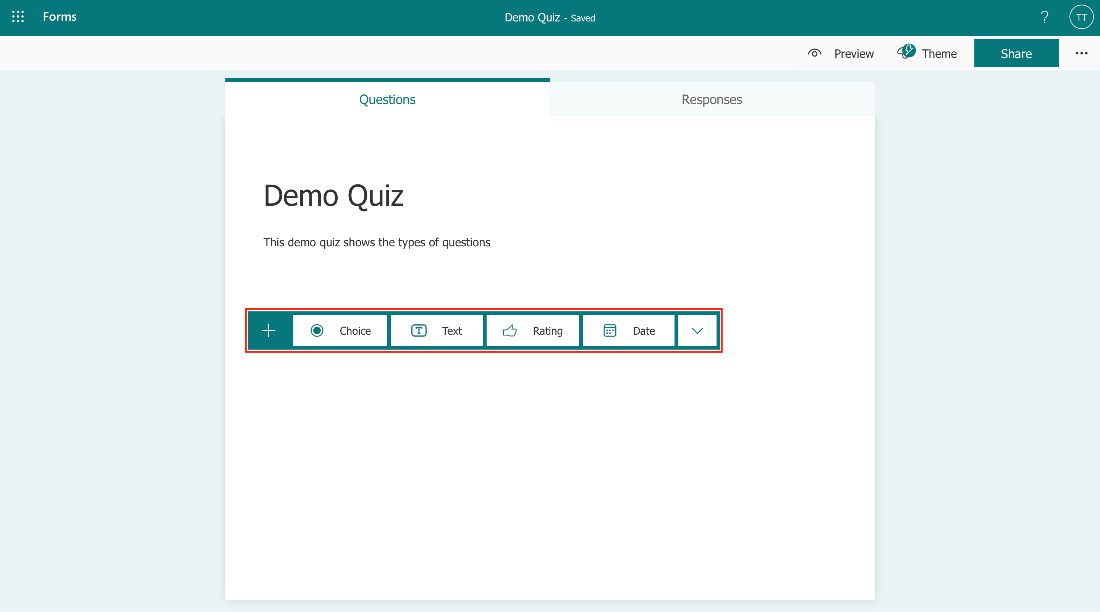
Select
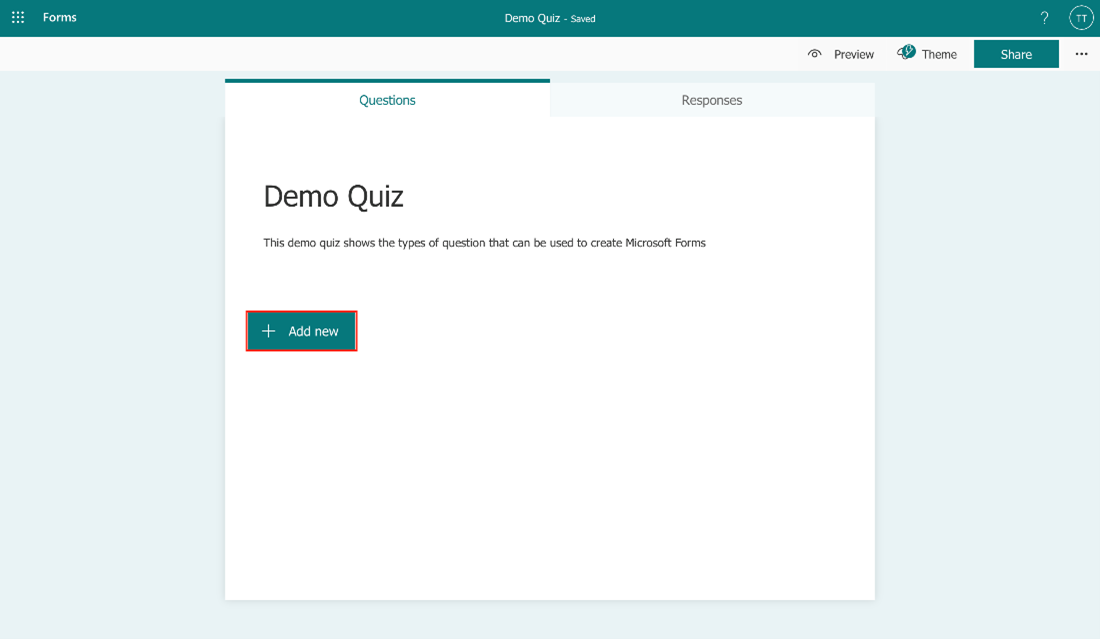
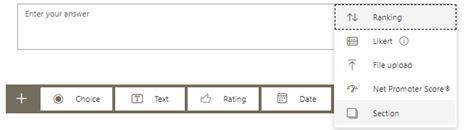
 Add new to add a new question in your form.
-
Select the type of question you want to add for example, Choice, Text, Rating or Date. You can also click on the drop-down list
 to view more question types such as Ranking, Likert, File upload or Net Promoter Score.
-
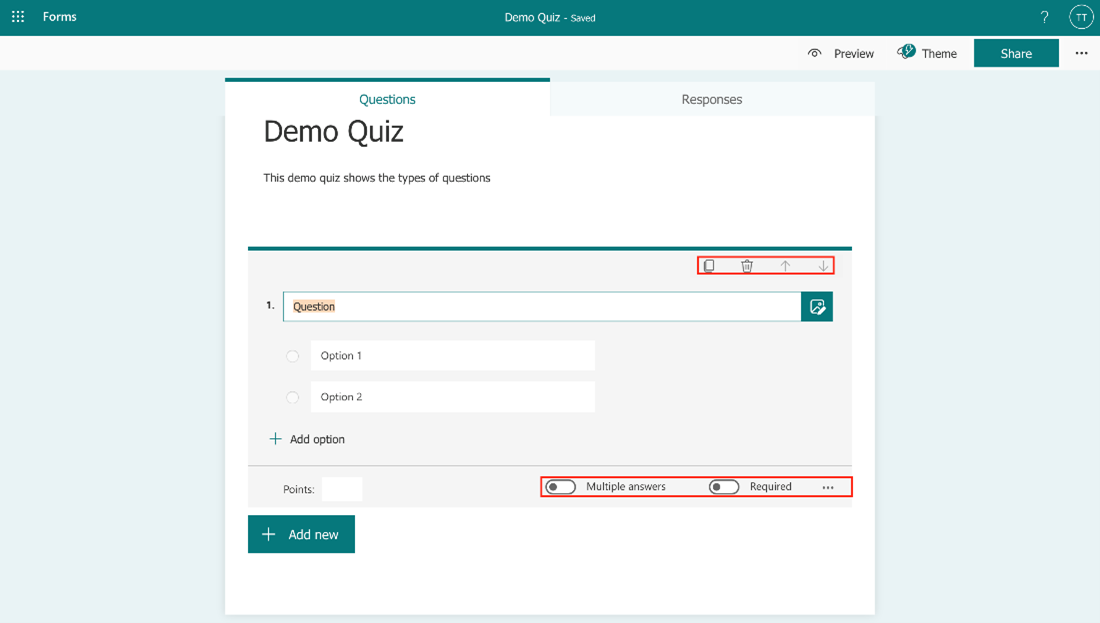
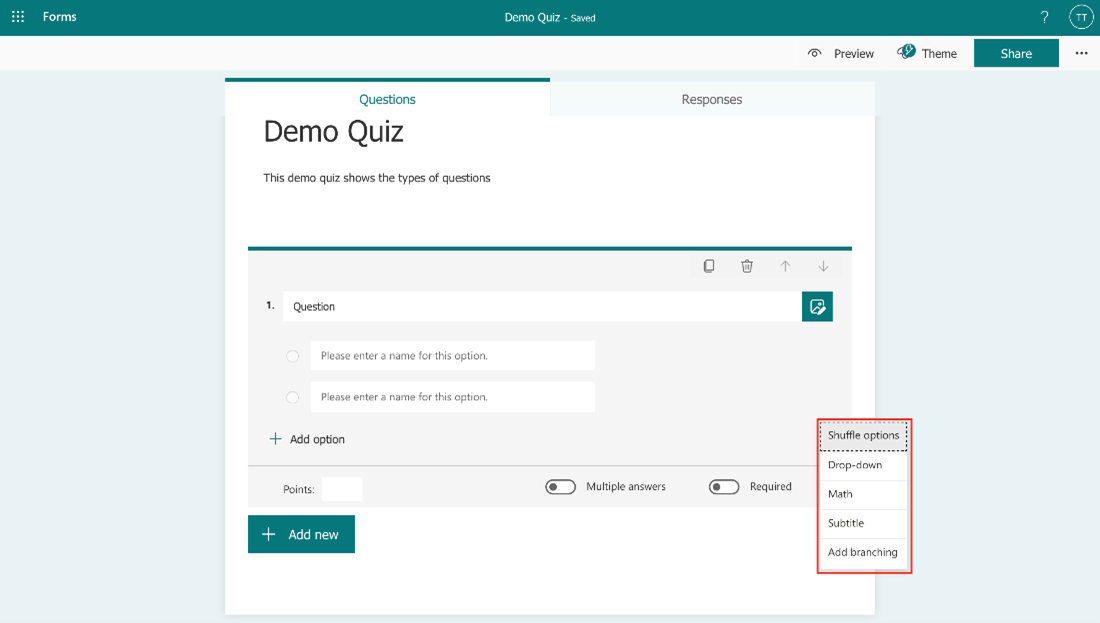
Choice: Use this question type for multiple choice questions. Multiple answers can be used if turned on and the Required button makes the question mandatory in order to proceed with the questions. Other options include Shuffling the answers, displaying answers as a Drop-down list, adding Math related question which might include different formula/equation, Subtitles under the question, as well as Branching option for answers.
-
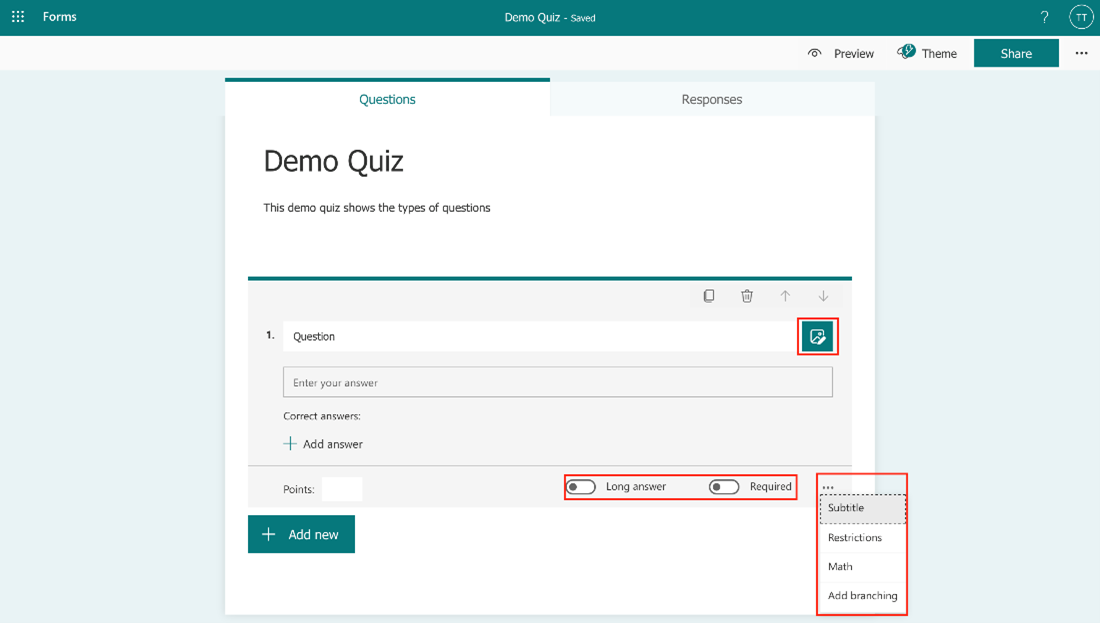
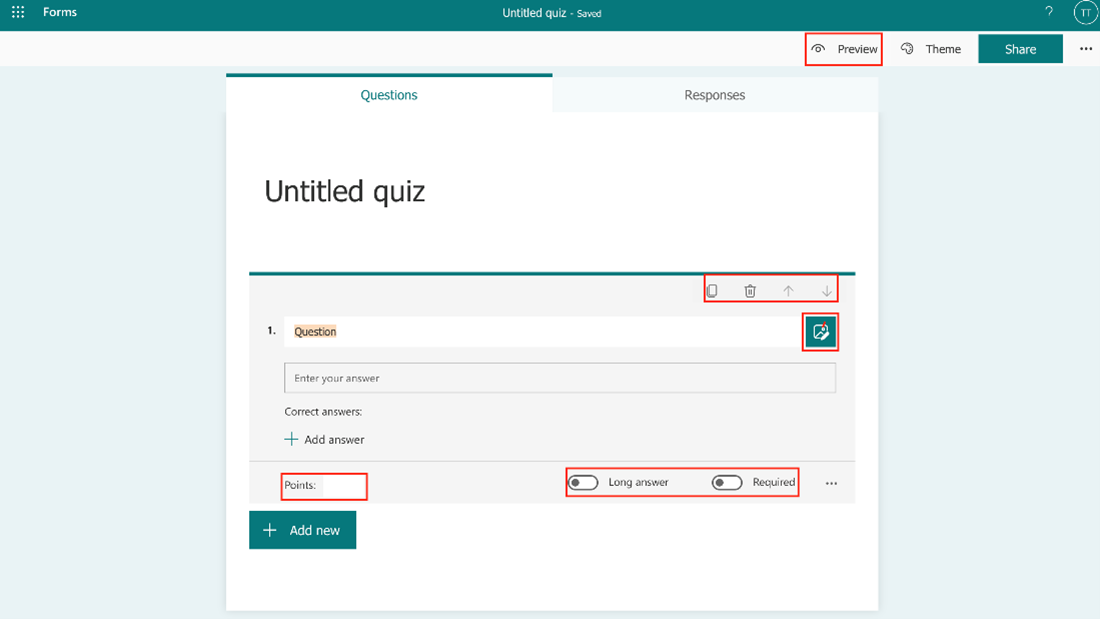
Text: Use this type of question that requires a written answer. Options include allowing Long answers, making the question Required so that the user doing the quiz has to complete the question in order to proceed. Other option includes adding Subtitles under the question, putting certain Restrictions for the answer, adding Math related question and Adding branch to the question.
-
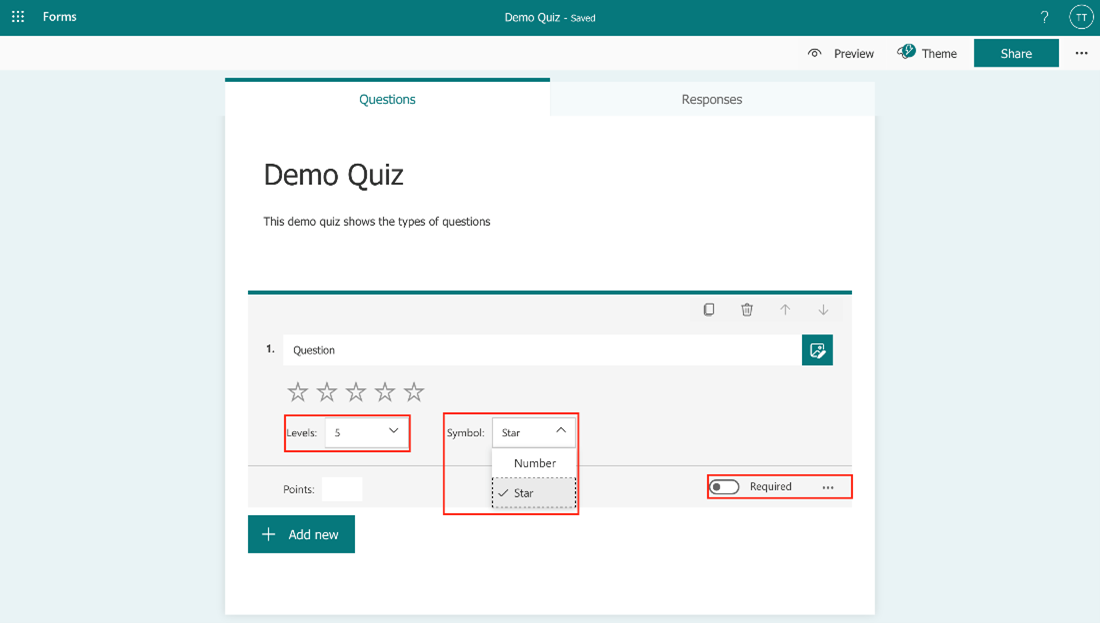
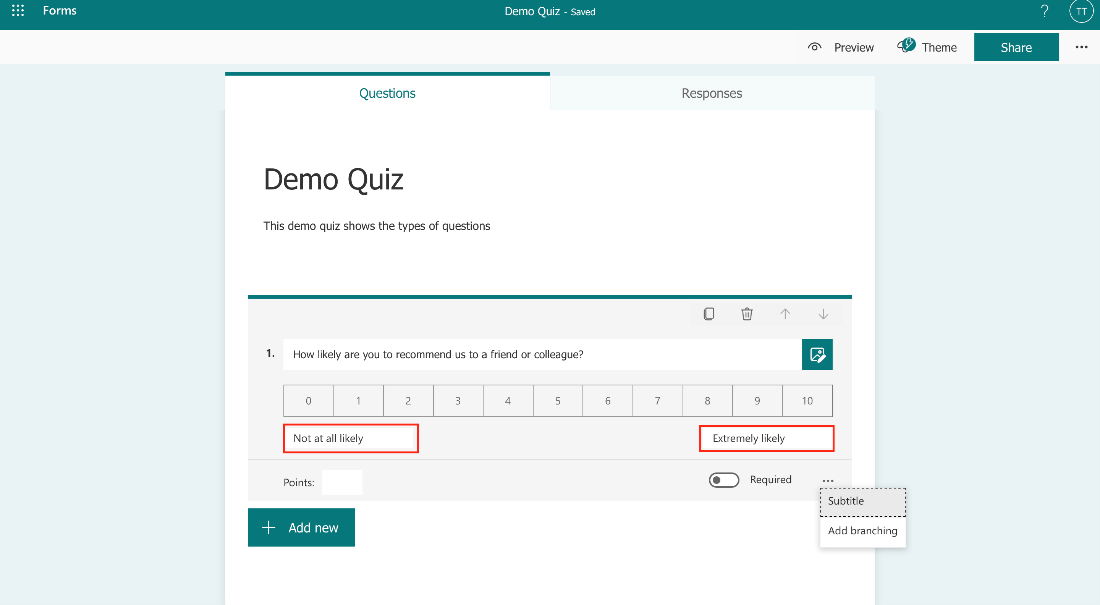
Rating: This type of question asks respondents to provide a rating on a scale. The Scale and Level can include between two and ten levels, and you can choose between a Number scale or Star scale. Other options include adding Subtitles under the question, labelling each levels and Adding branch to the question.
-
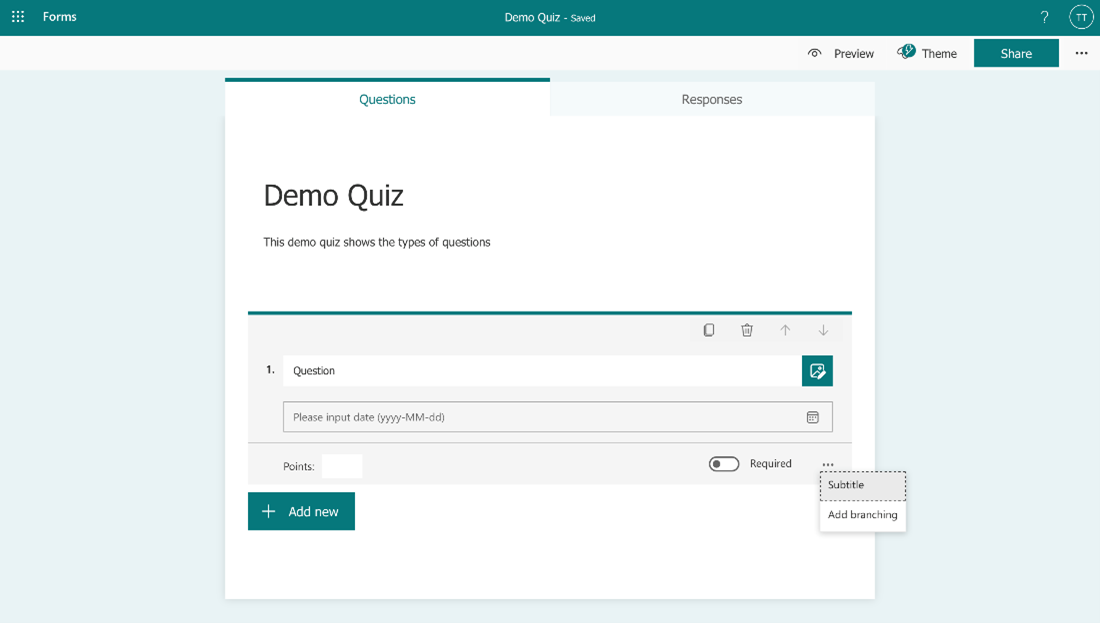
Date: Use this type of question when the answer is a date (i.e. enter your birthdate).
-
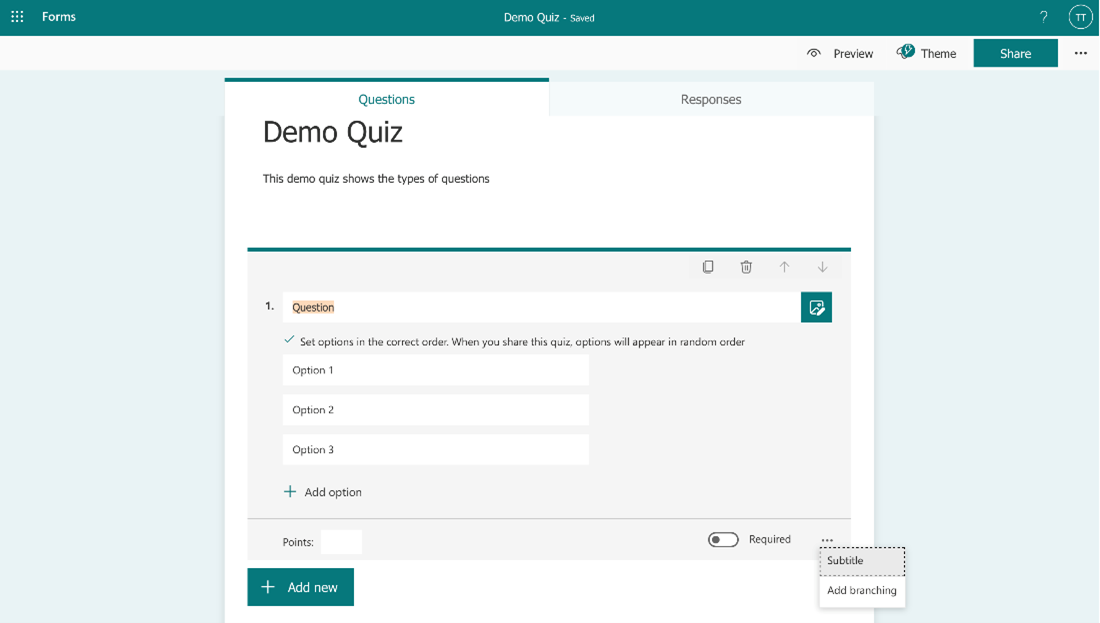
Ranking: The ranking question type allows respondents to rank the options you provide by dragging and dropping. You can also add up to ten options.
-
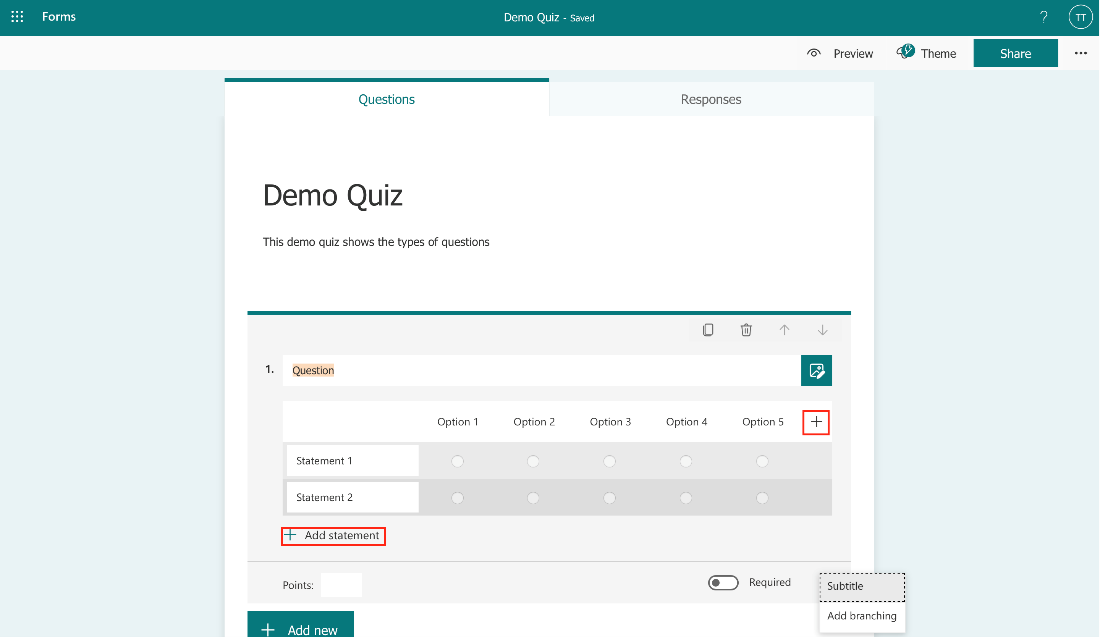
Linkert: This question type asks respondents to indicate how much they agree or disagree with a statement. You can add up to twenty Statements and seven Options.
-
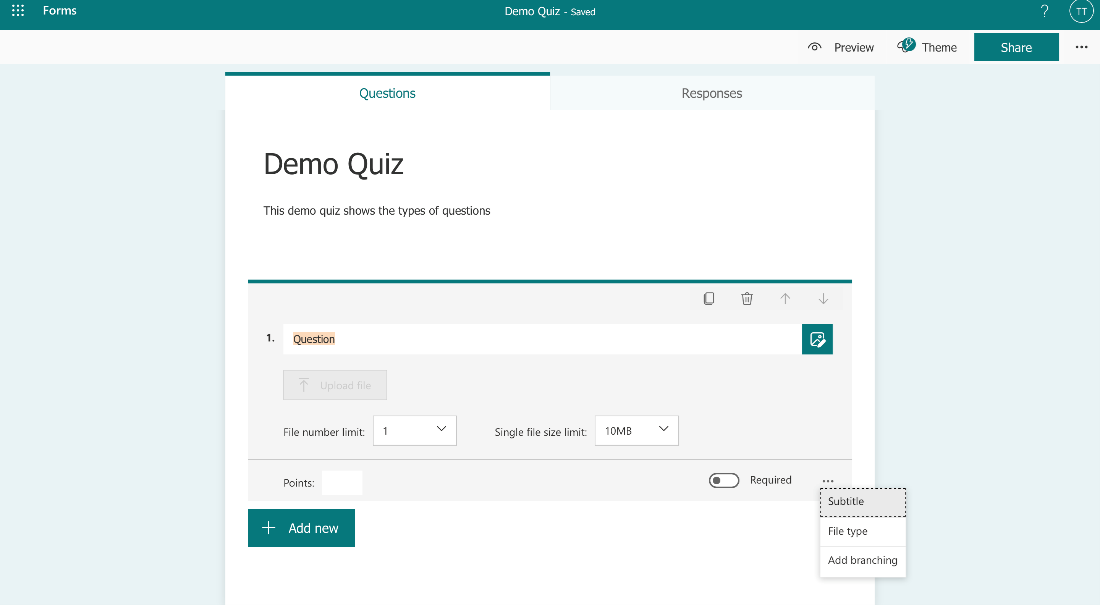
File upload: This question type is only available to users in the organization (they will have to use their @smu.ca email address). Choosing this question type will create a new folder in your OneDrive and respondents will upload their files to that folder.
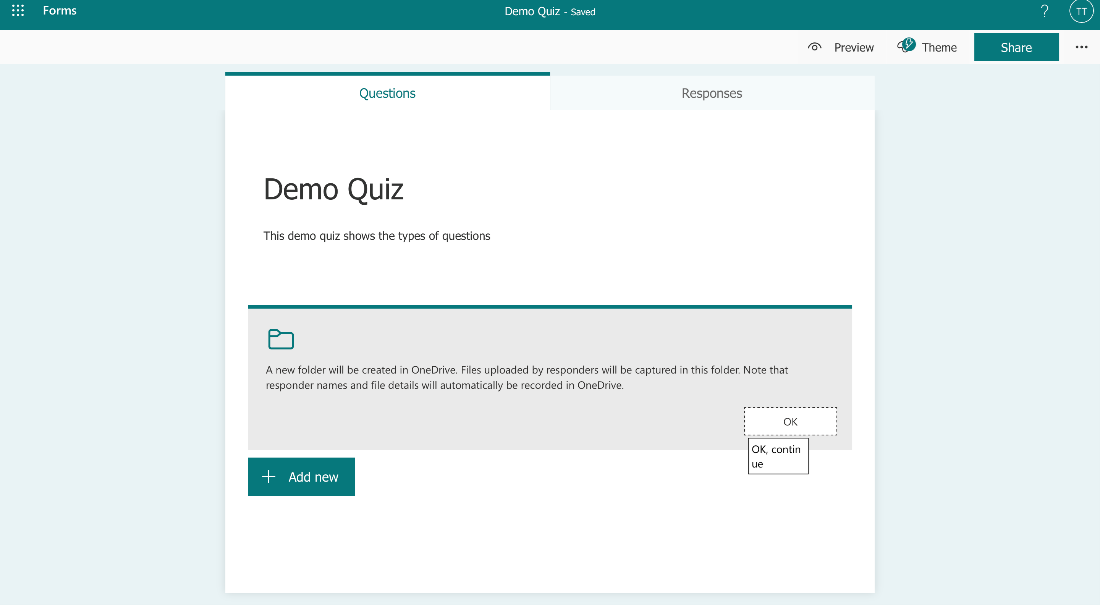 Once you click OK, it will take to another page to continue with the question as shown in the picture below. You can select the File number limit from one to ten and Single file size limit from 10MB, 100MB or 1GB. Other options include you to add Subtitles under the question, specifying the File type(s) such as Word, Excel, PPT, PDF, Image, Video or Audio as well as Adding branching to the question.
-
Net promoter score: This question type is similar to the rating question type. If you use this type of question, you will have access to a summary page showing overall scores and distribution. You also have the option to change the text inside the red box.
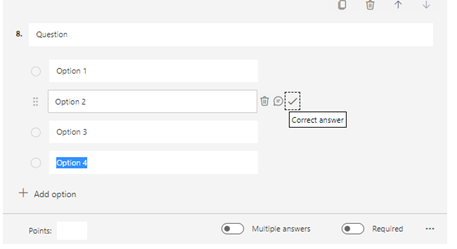
Note: You can copy, delete, move any question which can be selected while making the question at the right-hand side of the question page, above the question as well as add points. You can also add an image or video with the question from your device.
-
Sections: Sections are used to separate parts of the form/quiz from other parts in order to keep the form organized. You can group related questions into their own area or create branching conditions to direct respondents to other sections based on their answers. You can also duplicate, remove, or move a section by clicking the … of the section header.
-
To add a section: Click Add New button, select the drop-down arrow on the right, and choose Section. Give the section a name and description (if applicable).
Note: If you use sections in the form, the shuffle questions setting will be disabled.
-
To add a section: Click
-
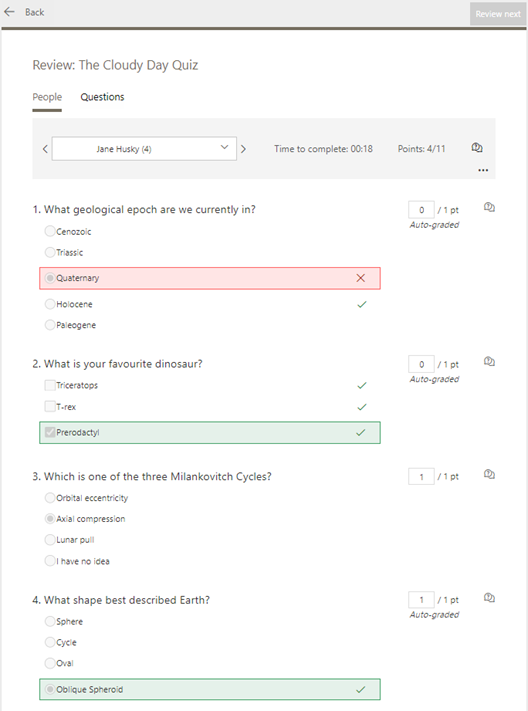
Branching logic - When using Branching, you direct respondents to other questions or sections of the form based on the answer they give to a question. For example: If a form asks if you want to do more questions, if you choose yes – then more questions load, whereas if you choose no – it takes you to the end of the form When using branching is used in the Form, a symbol appears next to the Form title.
 To enable branching on any question or section, click the … and select Add Branching. You can choose how you want each question option to behave:
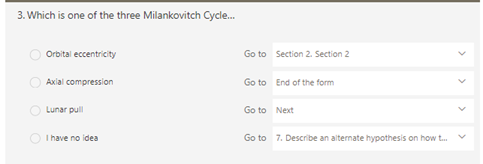 For the above image:
- If Orbital eccentricity is chosen then it will direct them to Section 2.
- If Axial compression is chosen then it will direct them to the end of the form.
- If Lunar pull is chosen it will direct them to the next question.
- If I have no idea is chosen it will direct them to question 7.
-
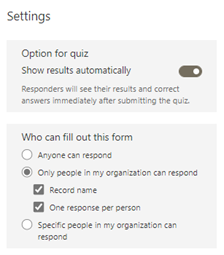
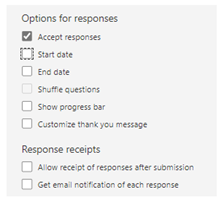
Settings: To view and change the settings of the form, click the … in the top-right of the form.
 You can also set a start and end date for the form, as well as create a Thank You message, shuffle questions, and collect response receipts:
-
Choice: Use this question type for multiple choice questions. Multiple answers can be used if turned on and the Required button makes the question mandatory in order to proceed with the questions. Other options include Shuffling the answers, displaying answers as a Drop-down list, adding Math related question which might include different formula/equation, Subtitles under the question, as well as Branching option for answers.
Creating a Quiz (questions tab)
Very similar to creating a Form, only with quizzes you can provide a correct answer as well as math equations. To insert a math equation, first choose a choice or text question. Then select the … and click Math. Type the question text, click the equation field and a calculator/equation maker will load. Enter the equation manually or you can use Latex to enter the question. This feature works natively without any additional syntax, but can only be used in the question text and answers.

Enter the answer/other answer choices in the option boxes. Forms will calculate the correct answer (make sure to double check) as well as give other choices.
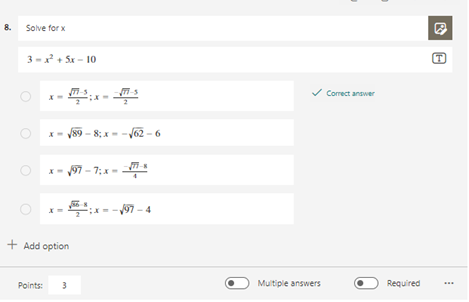
To select the correct answer when making a question, mouse over the correct answer and click the check mark on the right. You can also set the points for this question in the Points field.
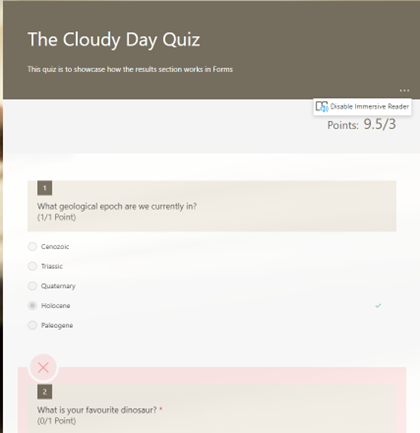
Users can view their results (scores), see what they got wrong and see updated grades when the organizer marks other questions (i.e. written response).
Sharing the Form
To share your Form or Quiz, click the Share button in the top right.

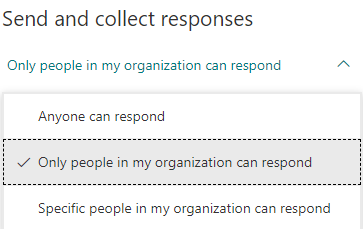
- Anyone can respond means anyone can complete the form.
- Only people in my organization can respond means only people with a @smu.ca email can complete the form.
-
Specific people in my organization can respond means only people that you have specified with a @smu.ca can complete the form.
-
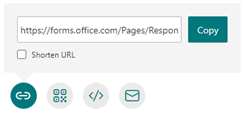
Link
 - You can select the link button, and either copy the URL address or click the shorten URL button then the copy button and share the link in a chat or email.
-
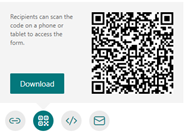
QR code
 - You can select the QR code button and click download. This will download a .PNG image that you can insert into a chat, email, textbox, etc.
-
Embed </>
 - You can select the embed button to copy the code to embed the form in a website, Brightspace module, etc.

-
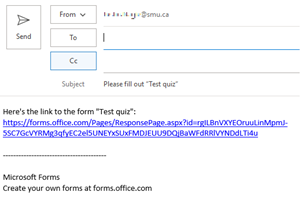
Email
 - You can select the email button to open your email application of choice and send the email to the participants.
-
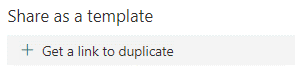
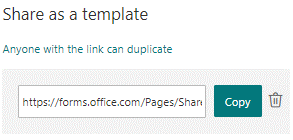
Share as a template - You can also share your form as a template, meaning the user you share the link with will be able to make a copy of your form.
-
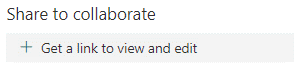
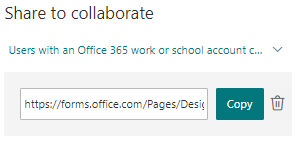
Share to collaborate - You can also share your form to your colleagues to collaborate on the form. You can also set who can access the form.
Viewing Results (responses tab)
As a form organizer, you can view user responses and grade their answers under the Responses tab of the Form/Quiz.
When on the Responses Tab, a summary of how many users chose a specific answer as well as a pie chart of all answers chosen. This is updated in real-time.
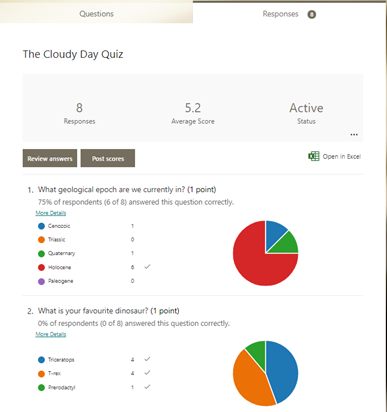
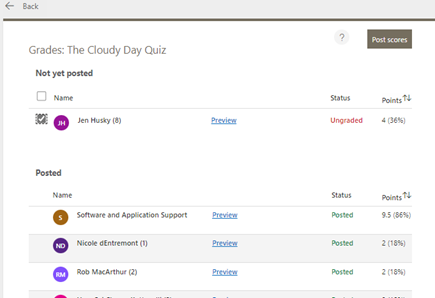
To grade uses responses click the Review answers button. To select different users, click the drop-down arrow and select the different user. To grade a question input the amount points for the user.
To post the scores that users got on the quiz, click the Post scores button. A new window will open. Select the user(s) under the Not yet published header, and click the Post Scores button.
-
Summary Link - You can also obtain a summary link by clicking the … on the Responses tab and selecting Get a summary link. This link would be useful if you wanted to show users the distribution (statistics) of the answers. Individual user responses remain hidden.

-
Export to Excel - If you click the button Open in Excel, an Excel file will download that you can open. Here, the responses to each question is recorded as well as the total score, and user information.

Adding a Form to a Teams chat/group chat
Forms in Teams chat are referred to as Polls. To add a poll to a chat, first make sure that the Forms app is installed in Teams. It should look like this symbol in a chat

If you do not see this symbol, click the Apps button on the left-hand side of Teams and search for Forms. Then click on the Forms app and select Add. You can also specify if you want to add it to a team, chat, or meeting
 button. If you do not see this button, click the … and search for Forms.
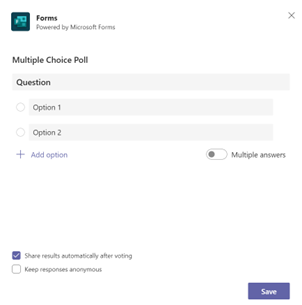
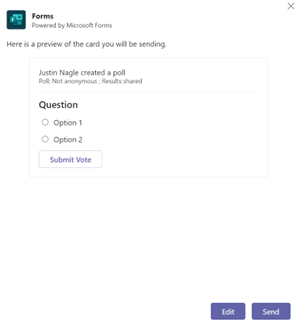
Create your Multiple Choice Poll – similar to choice type question above. You can choose to share results automatically after voting, as well as Keep responses anonymous. Click Save when done making the poll
When you are ready to send the form click Send.
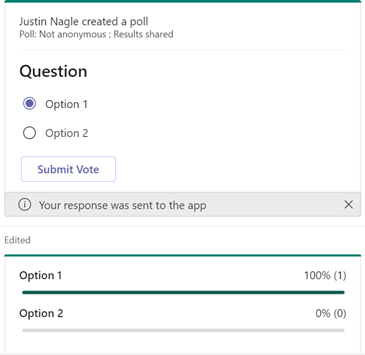
You can see responses to the form in real-time
Forms in Teams Meeting
You can create a poll and launch it before, during, or after your meeting. To begin, find the meeting that you have scheduled in the Calendar Tab in Teams and select it, then select Chat with Participants (this will open a Teams chat with the participants). Then click the + (Add a Tab) button and search for and select Forms. Then click Save.
- Multiple Choice Poll – create your question and provide answer options for your participants to choose
- Multiple Choice Quiz – mark the correct answer for your question (similar to Creating a Quiz section)
- Multiple Choice Quiz – mark the correct answer for your question (similar to Creating a Quiz section) Word Cloud Poll – Ask an open-ended question and see responses reflected in a word cloud
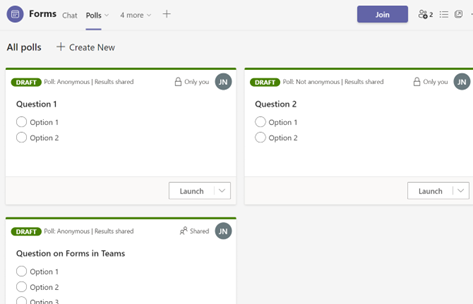
Select Save to save the poll as a draft. You will be able to launch this poll in your meeting when you are ready.
You can change the order of your polls by dragging it to the position you want
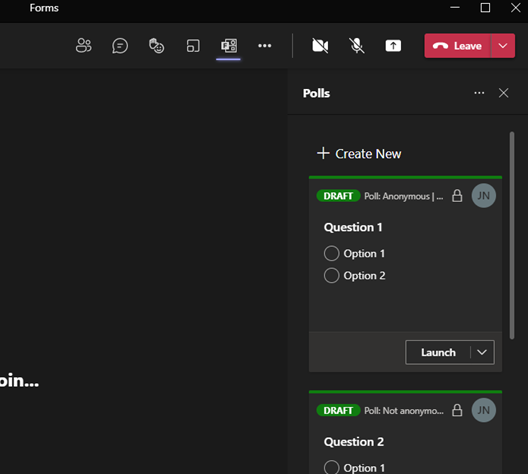
To launch a poll, select Launch. This can be done before, during, and after your meeting.
To launch a poll during a meeting, select the polls pane if you have (draft polls already made) and select Launch next to the poll you want to launch
If you want to launch a poll during a meeting (and you have not set up a poll in advance). Open the chat pane in the meeting, selecting … and select Messaging Extensions, then search for and select Forms. You can then create a poll as shown above, and Save then Send the Poll


