Intro to Microsoft PowerPoint
Getting started with PowerPoint
- Launch the PowerPoint software from your Desktop or using PowerPoint Online.
-
To access PowerPoint Online:
- Navigate to Microsoft Office
- Sign in with your @smu.ca email address and password.
- On the left navigation bar, select the All Apps button at the bottom left corner.
- Scroll down until you see the PowerPoint icon. Click on the icon to launch the application in a new browser tab.
- Select Blank Presentation from the list of options.
Note: These instruction were written using the Desktop application of PowerPoint. If you are using PowerPoint Online, some features may have slight differences than those described. Please contact sas@smu.ca if you have any issues or questions about using PowerPoint Online.
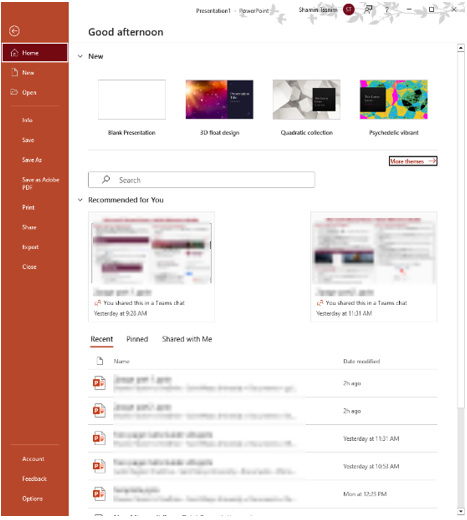
To create a new presentation, you can follow the following steps:
- Open the PowerPoint application.
- Select New from the left pane
-
You will have 3 options to choose from:
- Select Blank Presentation to create a presentation from scratch.
- Select one of the templates to use an already designed templates.
-
Select Take a Tour to see tips for using PowerPoint and then select Create.
Slides, formatting, and text
To manage slides, you can follow the following steps:
Adding in slides
-
Select the slide you want your new slide to follow from the thumbnails on the left pane.
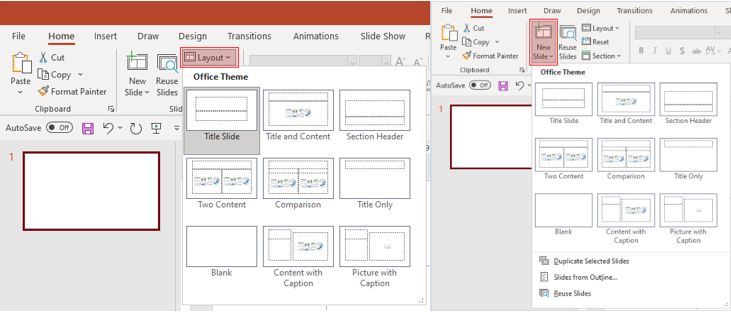
- Select New Slide from the Slide section in the Home tab.
- From the same Slide section, select Layout and then select the layout you want from the menu.
Deleting slides
- To delete a single slide, right-click the slide in the thumbnail pane on the left and select Delete Slide.
- To delete multiple slides, you can select multiple slides by pressing and holding Control button and selecting the slides on the left thumbnail pane and releasing the Control key, Then, right-click the selection and choose Delete Slide.
- To delete a sequence of slides, you can press and hold the Shift key to select the first and the last slide in the sequence from the thumbnail pane and release the Shift key afterwards. Then, right-click the selection and choose a Delete Slide.
Duplicating slides
To duplicate slides, right-click on the side thumbnail that you want to duplicate from the thumbnail pane on the left and select Duplicate Slide. The duplicate slide will be inserted immediately after the original slide.
Rearranging the order of slides
From the thumbnail pane, click the thumbnail of the slide that you want to move. You can then drag the slide to a new location as needed.
- To re-arrange multiple slides, you can press and hold the Control key and click on each slide that you want to move from the thumbnail pane on the left and release the Control key afterwards. You can then drag the selected slides as a group to move them to a new location as needed.
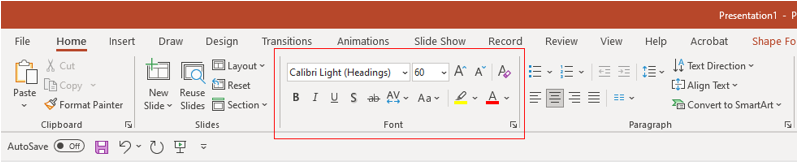
Adding and formatting text
- You can draw a text box by selecting Text Box option from the Insert tab.
- Once a text box is drawn, you can place your cursor inside the text box and type something.
-
You can then select the text and change a few options from the Font section of the Home tab such as Font, Increase Font Size, Decrease Font Size, Bold, Italic, Underline, etc.
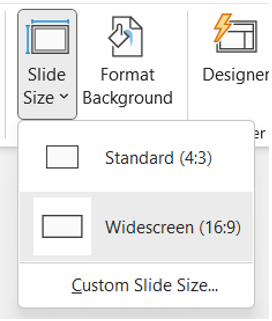
What is slide size and when to use
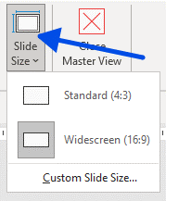
Slide Size in PowerPoint determines the size of all of your slides. For instance, if you are creating a Poster in PowerPoint, it is important to increase the size of the slide. To use Slide Size, you can follow the following steps:
-
Locate the Slide Size from the Customize group on the far right end of the Design tab of the Ribbon

-
Select Slide Size, and then select either Standard (4:3) or Widescreen (16:9).
-
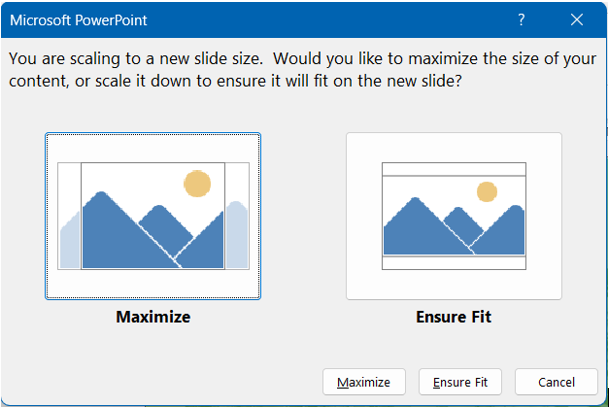
If and when PowerPoint is unable to automatically scale your content, it will prompt you with two options for scaling:
-
Maximize: You can select this option to increase the size of your slides and slides content if you are scaling to a larger slide size.
Note: By choosing this option, it could result in your contents not fitting the slides. -
Ensure Fit: You can select this option to decrease the size of your slides and slide content if you are scaling to a smaller slide size.
-
Maximize: You can select this option to increase the size of your slides and slides content if you are scaling to a larger slide size.
Note: The 16:9 widescreen setting is the default value for new presentations you create.
The 16:9 widescreen setting is the default value for new presentations you create.
Inserting Objects
Adding pictures, shapes and more
To insert pictures or shapes, you can follow the following steps:
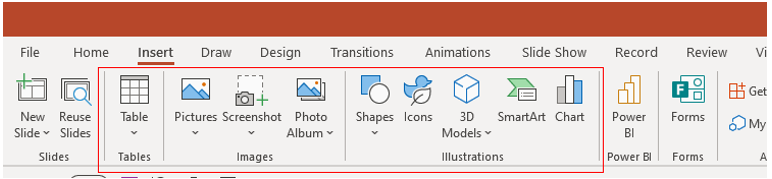
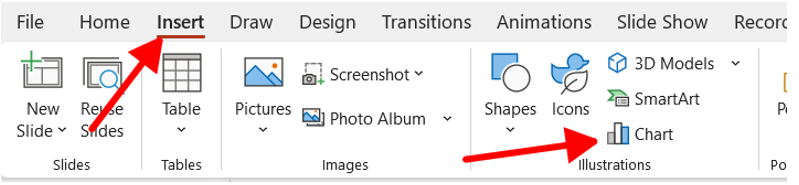
- Head over to the Insert tab.
-
To insert or add a picture –
- Select Pictures from the Images section.
- In the Insert Picture From menu, select the source you want.
- Then select the picture you want and select Insert.
-
To inset or add an illustration:
- From the Illustrations group, select Shapes, Icons, 3D Models, SmartArt, or Chart.
-
A dialogue box will open up when you select one of the illustration types. You can select the item you want and follow the prompts to Insert the illustration.
Adding a clip art from online
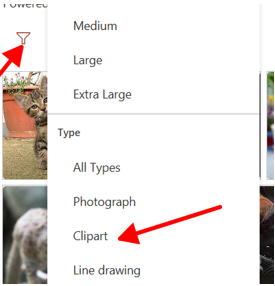
- To add a clipart, you can select Insert > Pictures > Online Pictures.
- Then, type in a word or a phrase to describe what you are looking for and then press Enter.
-
You can also filter the results by Type for Clipart.
-
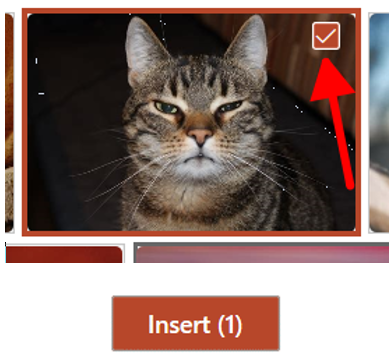
When done, you can select a picture and then select Insert.
Inserting a picture from your computer
-
To insert a picture from your computer, you can do one of the following:
- You can select Insert > Pictures > This Device for a picture that is saved on your computer.
- You can select Insert > Pictures > Stock Images for a high-quality images or backgrounds from the full library of creative content of Microsoft.
- You can select Insert > Pictures > Online Pictures for a picture on the web.
- Select the picture when done, and then select Insert.
Resizing or moving pictures
- To resize a picture, you can select the picture and drag a corner handle. The cursor icon will change into a resize cursor
- To move a picture, you can select the picture and drag any sides. The cursor icon will change into a move cursor
Using charts and graphs
-
To insert a chart, you can click on Insert > Chart.
-
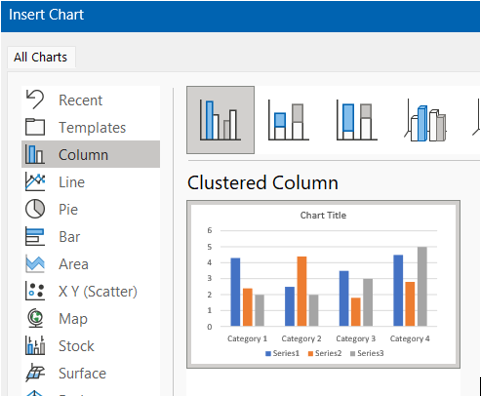
You can then choose a Chart type, and then double-click on the Chart that you want.
-
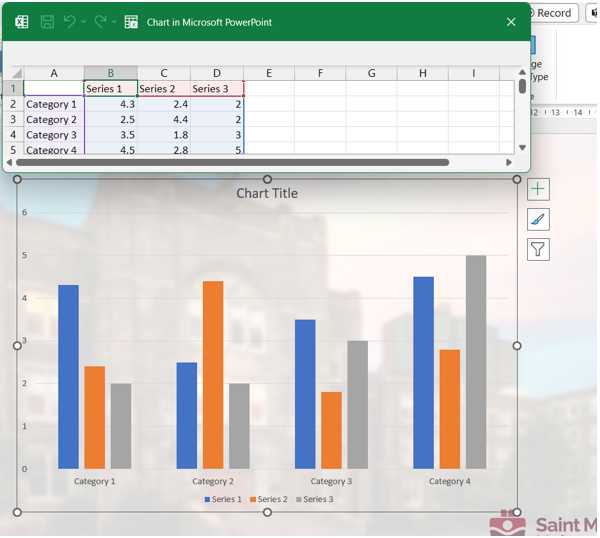
You can replace the placeholder data with your own information on the worksheet that appears.
-
You will see small buttons appearing next to a chart that you insert. You can use the Chart Elements
 button to show, hide, or format the axis titles or data labels. You can also use the Chart Styles
  button to quickly change the color or style of the chart.
- When done, you can close the worksheet.
Slide Design
Using Templates
To apply a template to your presentations, you can follow the following steps:
- Select File and then select New.
- You can choose a template from the following the shows up or type in a key word or a phrase into the Search for online templates and themes field and press Enter.
-
When you find a template, you can select it to see more details and then select Create.
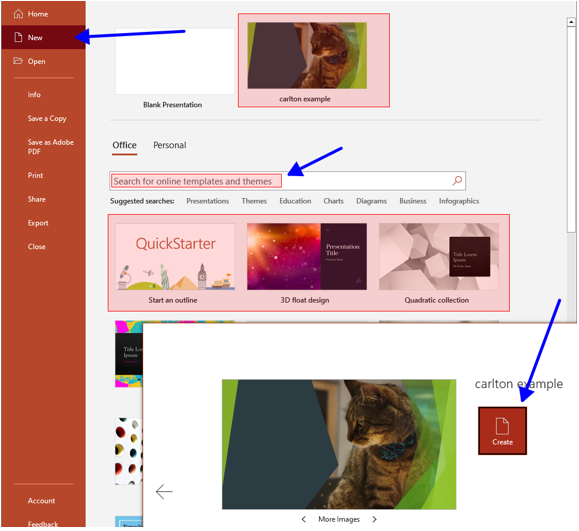
Note: If you have already created some templates, they may be under the Personal tab.
Creating a PowerPoint template
To create a PowerPoint template, you can follow the following steps:
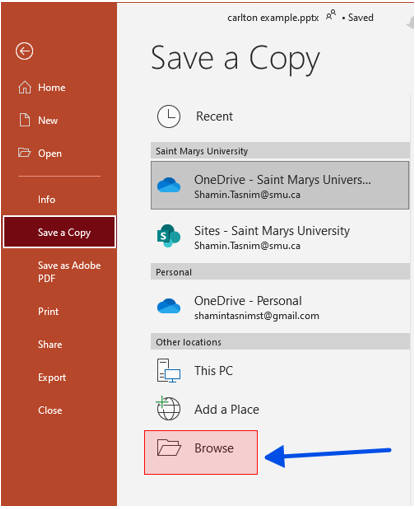
- From the File tab, you can click Save As (or Save a Copy, if you are using Microsoft 365).
-
Then, click on Browse to open the Save As dialogue box.
-
Then, in the Save As dialogue box, in the Save as type list, you can choose PowerPoint Template. When choosing the template type, PowerPoint will automatically switch the storage location to the appropriate folder which is the Custom Office Templates folder.
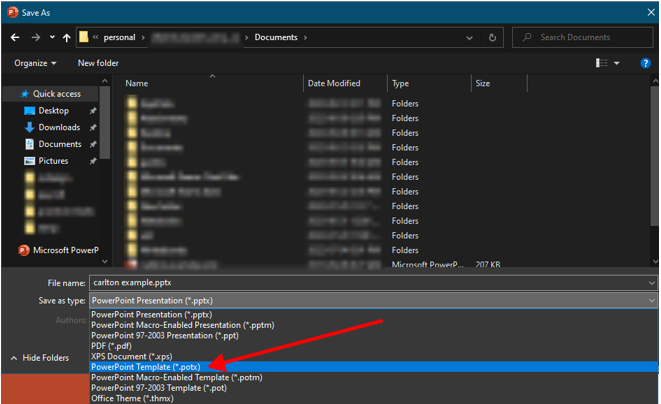
- In the Save As dialogue box, you can type in the File Name for your template and then select Save.
-
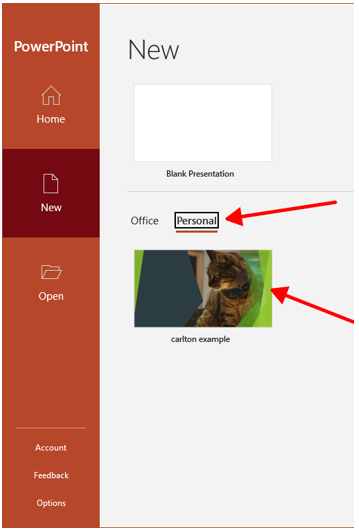
To use your templates in the future, you can click on File > New and then click on Personal and then double-click the template you saved.
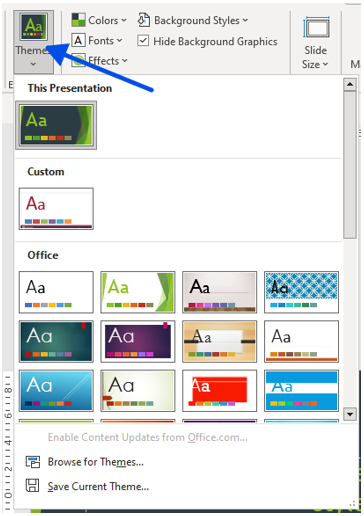
Using Themes
-
To use themes, you can select the Design tab.

- Then, you can select from on the available Themes.
-
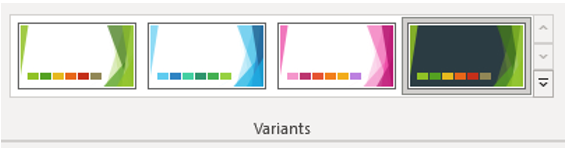
You can also select one of the Variants of the theme, if the theme you chose supports it.
Designer
To use PowerPoint Designer, you can follow the following steps:
- To use the Designer, you need to insert one or more pictures, or list of items, or list of dates, etc.
- Once your slide has some content, the Designer panel will open, and you can select the design you want
-
You can also bring up the Designer tab by selecting a picture and then selecting Design > Design Ideas.
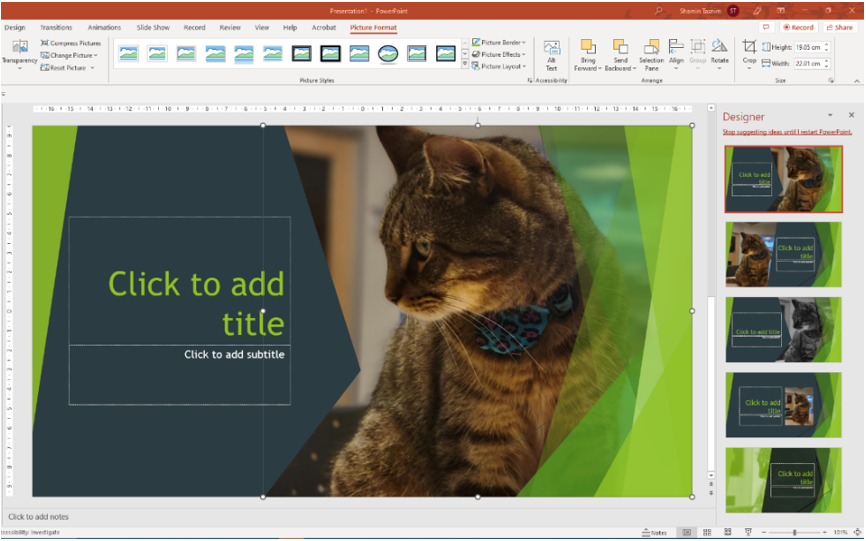
Note: You will need an internet connection and an Office 365 account to use the designer.
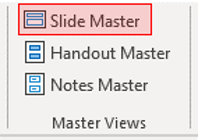
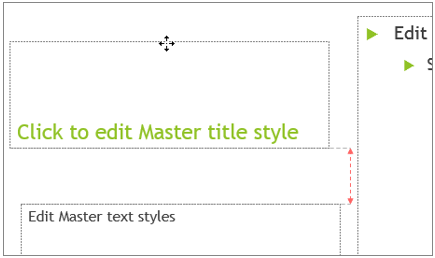
When to use Slide Master
The Slide Master is a very handy tool if you are looking to make all your slides contain the same fonts, images, etc. You can make all those changes in just one place which is the Slide Master, and it will be applied to all the slides. To open Slide Master View, you can click on the View tab and then select Slide Master.
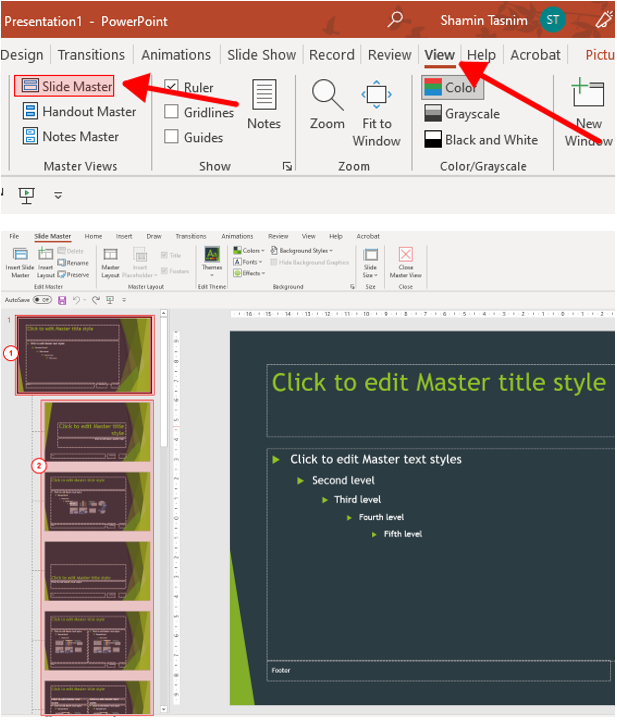
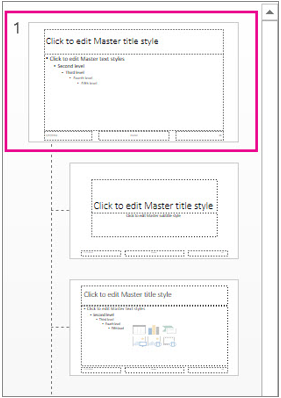
From the image just above, the slide numbered 1 is called the Slide Master and the slides numbered 2 is called the Layout Masters.
Editing the Slide Master will make changes on all the slides that are based on the Master Slide.
If you have other people working on your presentations (in Normal View), they will not be able to delete or edit any changes you make to Layout master’s and the Slide Master in Slide Master View. In the same way, if you are working in Normal View, and cannot edit an element on a slide, it may be because you are trying to change something that is defined on the Slide Master or the Layout Master. To be able to edit that, you must switch to the Slide Master View.
Note: It is a good practice to edit your Slide Master and Layout Master before you start to create your individual slides. This way, all your new slides will contain your custom edits. In case you want to edit your Slide Master or the Layout Master after you create your individual slides, you will need to re-apply all the changes to your existing slides in your presentations in Normal View.
Create a template using Slide Master
To Create and Save a PowerPoint template using Slide Master, you can follow the following steps:
- You need to open a blank presentation. Click on File > New > Blank Presentation.
- Then, from the Design tab, select Slide Size > Custom Slide Size and choose the page orientation and dimensions.
-
Then, choose Slide Master from the View tab, in the Master Views group.
-
To edit the Slide Master or to make any kind of changes, do the following:
-
Click on Themes and choose a theme.
-
To change the background, you can click on Background Styles and choose a background.

-
You can also add a placeholder. To add a placeholder in the thumbnail pane, select the Slide Layout that you want to hold the placeholder and do the following:
-
Click on Insert Placeholder and select the placeholder type.
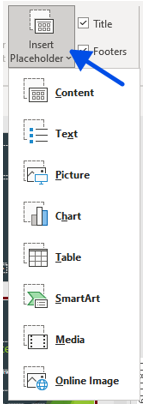
- You can click and drag on the corner to draw the placeholder size on the Slide Master or the Side Layout.
-
To move the placeholder, select the edge on any side and then drag it into a new position.
- To remove any placeholder, select it in the Side thumbnail pane and then select the border of the placeholder and press Delete.
-
Click on Insert Placeholder and select the placeholder type.
-
Click on Themes and choose a theme.
-
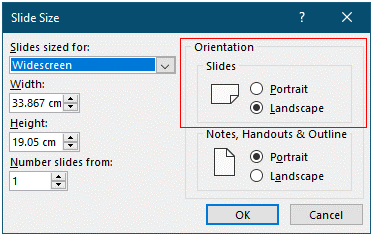
You can set the page orientation for all of slides in your presentation. To change the orientation, you can click on Slide Size > Custom Slide Size.
 Under Orientation, choose Portrait or Landscape.
Animations and Transitions
Transitions can be used create animated effects while moving from one slide to another. To use Transition for slides, you can follow the following steps:
- You can select the slides that you want to add a transition to.
- From the Transition tab, you can choose a transition. To preview a transition, you can select it.
-
You can select the Effect Options, to choose the nature and direction of the transition.
- To change how the transition happens, you can choose various options such as From Right, From Left, etc
- Then, you can select Apply to All to add the transition to the entire presentation.
-
To remove a transition, you can select the Transition and then None.

To use animations or to animate text or objects on your slide, follow the following steps:
- You can select the text or the object you want to animate.
-
From the Animations tab, you can select Add Animation and from the drop-down, you can select the animation.
- You can animate one line of text at a time. To do that, you must select one line of text and select an animation and so on.
-
To start the animation, you can click Start and select When Clicked, then With Previous or After Previous. You can also select the Duration or Delay of the animation.
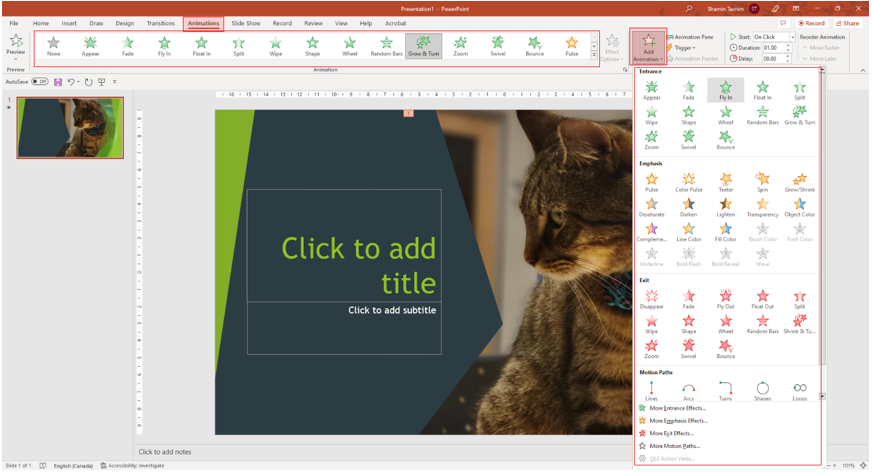
- You also can assign more than one animation to the same object.
Zooming
PowerPoint has few Zoom features that allows you to make your presentation more interactive and engaging. To use the Zoom features, you can follow the following steps:
-
To add a Zoom to your presentations, click on the Insert tab and then click on Zoom.

-
You will have 3 Zoom options to choose from:
- Summary Zoom – To summarize the entire presentation on one slide; This allows you to create a navigation slide that links to different sections of your presentation. PowerPoint will automatically create a summary slide with thumbnails of the other slides in your presentation.
- Slide Zoom – To show selected slides only; This allows you to create a link from a slide to a specific section of your presentation. It will create a zoomed-in version of the slide with thumbnails of the other slides in that section.
- Section Zoom – To show a single section only; This allows you to create a link from a slide to another slide in your presentation. It will open a new window with thumbnails of all the slides in your presentation
Here is link that has more information regarding the Zoom features on PowerPoint: Use Zoom for PowerPoint.
Practicing your presentation
Rehearse timings is a great way to re-check your presentations for any effects, transition, etc. To rehearse and check the timings in your presentations, you can follow the following steps:
-
Click on Rehearse Timings from the Slide Show tab. You will see the Rehearsal toolbar appear and the Slide Time box will begin timing the presentation.

- Next – To move to the next slide.
- Pause – To temporarily stop recording the time. You can restart the recording by clicking on Pause again.
- Slide Time – You can set an exact length of time for a slide to appear by typing in the time in this box.
- Repeat – To restart recording the time for the current slide.
- Total presentation time – The total time of the presentation.
-
When you set the time for the last slide, you will see a message box that displays the total presentation time and prompts you to do one of the following:
- Click on Yes to keep the recorded slide timings.
- Click on No to discard the recorded slide timings.
- In the Publish as PDF or XPS dialog box, choose a location to save the file to. If you want it to have a different name, enter it in the File name box.
-
Optionally, if you want to change what the final PDF file is like, do any of the following:
- Click Publish.
Note: The presentation timer will begin immediately as soon as you click Rehearse Timings. You can also press the Escape key to stop the recording and exit the presentation.
Rehearsing with Coach is a great way to practice your presentation skills before the actual presentation. The Speaker Coach feature in PowerPoint can evaluate your pacing, pitch, your use of filler words, informal speech, euphemisms, and culturally sensitive terms, and it detects when you're being overly wordy or are simply reading the text on a slide. It gives you a summarised report at the end of your presentation showing how you did.
To use Rehearse with Coach, you can follow the following steps:
- Click on the Slide Show tab.
- Then, click on the Rehearse with Coach button.
-
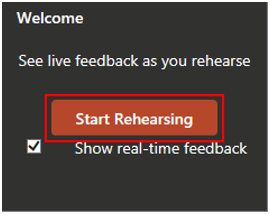
You can start rehearsing by clicking on the Start Rehearse button on the bottom right.
Note: You will see the timer on the bottom right. If needed, you can pause it by clicking on the Mic icon  .
.
Recording
To record your presentation, you can follow the following steps:
-
Click on the Record tab from the top menu bar.
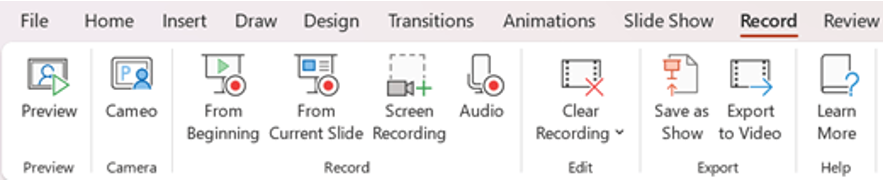
- From the Record group, you will have the option to Record From Beginning or Record from Current Slide.
- Then, you have the option to record your narration. Select the Record narration option to record your narration. You can also choose to record only the timings of your presentation. Select the Slide and animation timings option.
- Then, click on the Start Recording button. You can speak into your microphone to record your narration. Advance to the next slide by clicking on the screen or pressing the right arrow key on your keyboard. Repeat this process for each slide.
- To pause the recording, click anywhere on the screen and click on Pause Recording. To resume the recording, click on the Resume Recording.
- Once the recording is done, click on End Show to stop the recording.
- Then, click on the Export button and choose a location to save your recording file. Give your file a name and click on the Save button to save your recording file.
Note: You can also use the Record Slide Show feature to record only a specific portion of your presentation. To do this, select the Record from Current Slide option, start recording, and then click on the End Show button when you've finished recording the desired portion of your presentation.
Saving, Sharing and Exporting your Presentation
To save your PowerPoint presentation as a PowerPoint Show, you can follow the following steps:
- Click on the File tab from the top-left corner and then click on Save As.
- In the Save As dialogue box, select a location to save your presentation file.
- In the Save As type drop-down menu, select PowerPoint Show (*.ppsx) format.
- Then, give your file a name and click on Save button to save your presentation file.
Note: When you save your presentation as a PowerPoint Show, it will automatically open in PowerPoint Show mode when you double-click on the file. This means that the presentation will be displayed in full-screen mode, without any distractions or PowerPoint interface visible
To save your presentations to your OneDrive account, you can follow the following steps:
- Select File > Save As.
- Then select OneDrive.
To share your presentation, you can follow the following steps:
-
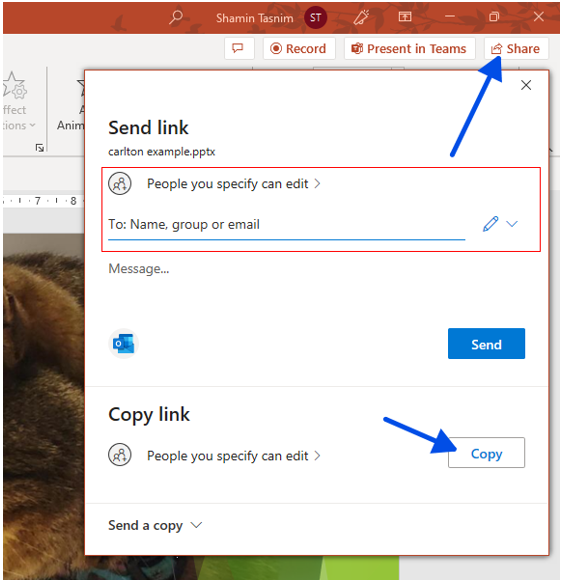
Select Share button from the Ribbon.
- Your presentation needs to be saved in your OneDrive. If it is not saved, you will get a prompt asking you to save your presentation.
-
In the Send Link dialogue box, you can do any of the following:
- Enter the names or email addresses of the people you want to share your presentations with.
- You can also select the drop-down to change permissions if you want. Allow editing option is checked by default and gives the person the ability to edit. To change it to a View only option, you can uncheck the Allow editing box and select Apply.
- You can also include a message if you would like and select Send.
-
Under the Copy Link sections, you can click on the Copy button that copies a link to your presentations in your clipboard for you to share.
To save a PowerPoint presentation as PDF, you can follow the following steps:
- Select the File option and then Export.
-
Click on Create PDF/XPS Document, and then click on Create PDF/XPS.
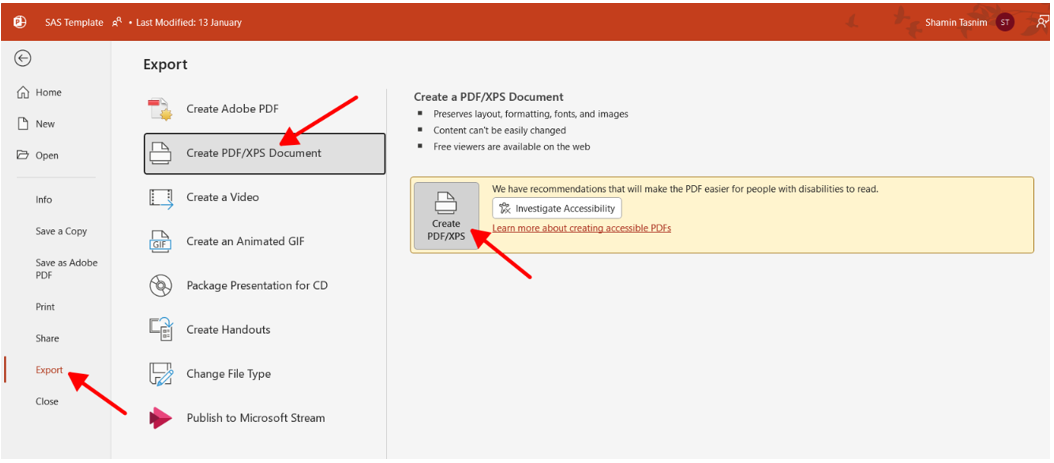
- In the Publish as PDF/XPS dialogue box, you can choose a location to save the file. You also have the option to rename the file in the File Name dialogue box.
- When done, click on Publish.
To save a PowerPoint presentation as a video, you can follow the following steps:
- Click on the File tab from the top-left corner and then Export.
- Choose the Create a Video option.
- You will get options to choose the quality of how you want your video to be. You can choose between Ultra HD (4K), Full HD (1080p), Standard (720p), and Internet Quality.
- If you have recorded timings and narrations in your presentation, select the Use Recorded Timings and Narrations option.
- If you want to include the Slide Timings in the video, select the Use Timings option.
- Then, click on the Create Video button to start exporting your presentation as a video.
- You will be prompted with a dialogue box to save your video file. Choose a location and give your file a name.
- Then, click on the Save button to export your presentation as a video file.
Note: The time it takes to export your presentation as a video depends on the length of your presentation and the video quality you choose. You can monitor the progress of the export process on the status bar at the bottom of the screen.
Once the export process is complete, you can play your video in any media player that supports the video format you selected. By exporting your PowerPoint presentation as a video, you can easily share it with others who do not have PowerPoint or who cannot attend your presentation in person
Accessible PowerPoint Template
- Download the Accessible PowerPoint template from the link below and save it under Documents > Custom Office Templates.
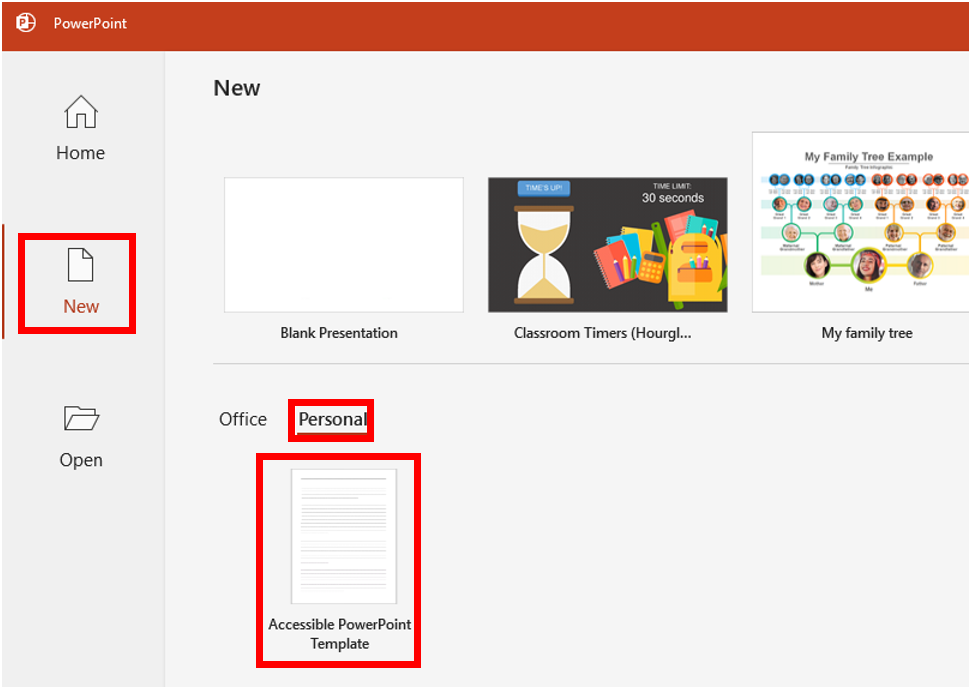
- Open PowerPoint.
- Select New, then select the personal tab.
-
Select the SMU Accessible PowerPoint Template. Then click on Create in the popup window.
- Make sure to save your file and give it a meaningful name.
- Continue working on the document as normal.
- You can repeat steps 3-5 everytime you want to use the SMU Accessible PowerPoint Template for a new document.


