Appointments in Zoom
The appointments tab on Zoom in Brightspace allows instructors to create schedules with dates and time slots that students can book to meet for one-on-one appointments.
The appointments feature in Zoom allows instructors and students to meet online for one-on-one discussions and support.
When a student books an appointment, the instructor will receive a confirmation email with meeting details (meeting ID, time, link) to join the meeting.
How to Create a Bookable Schedule
To schedule your appointments, follow the steps below:
- Log in to Brightspace and go to your course.
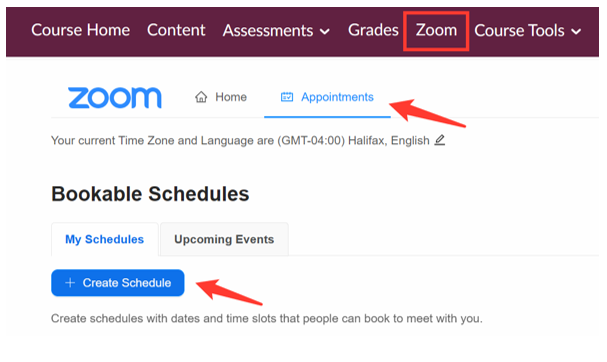
- From the nav bar, click on Zoom.
-
Go to the Appointments tab. Here you will be able to create a new schedule and view all the Upcoming Events.
-
When you click on Create Schedule, a small window will pop up to book a new schedule.
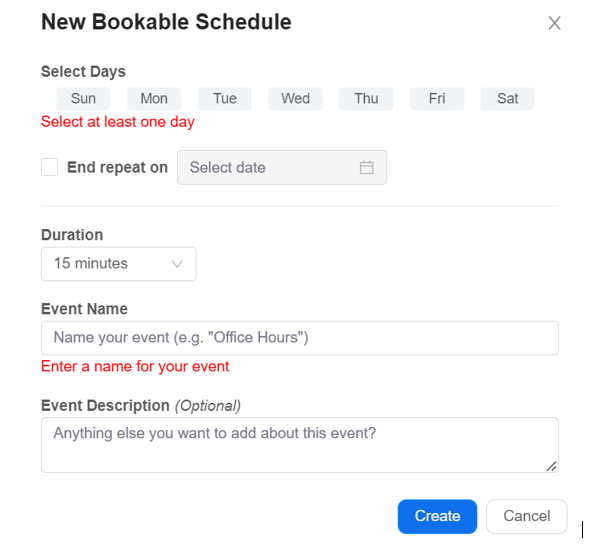
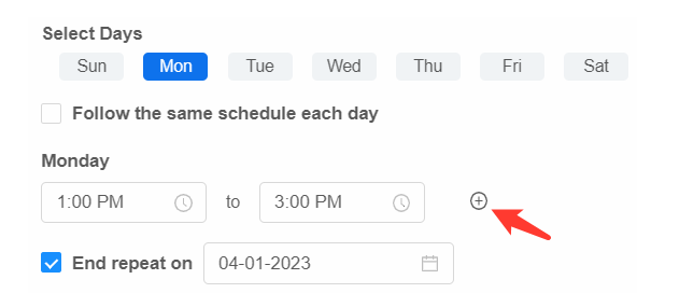
- You must select at least one day. You can also keep it ongoing or put an end date by checking the “End repeat on” box and then selecting the date.
-
Once you select the day(s), you will be able to set a start and end time. You can also have multiple sessions scheduled throughout the day by clicking on the + sign as shown in the picture below.
-
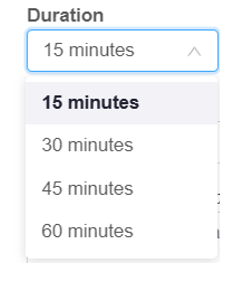
Select the duration of your meetings by clicking on the Duration drop-down menu.
-
Give it an Event Name and Description (optional) click on Create.
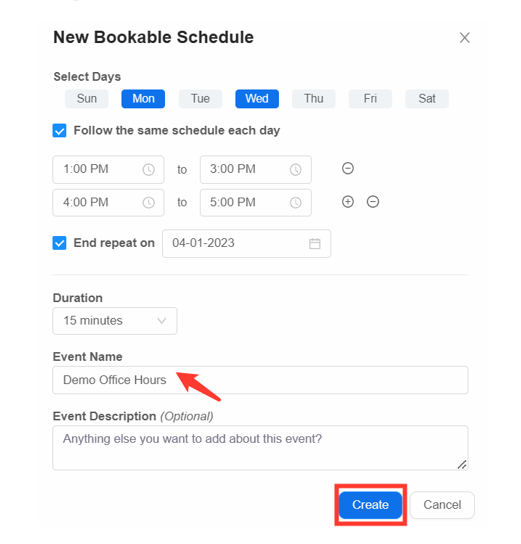
-
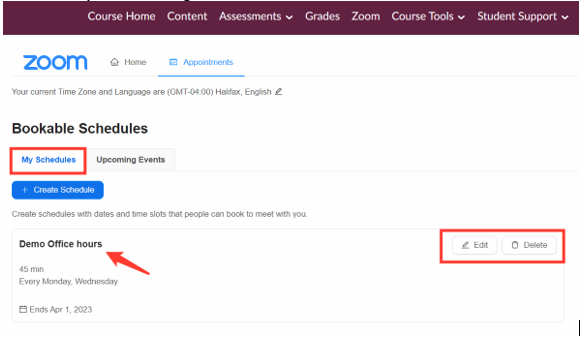
Once created, it will show up under My Schedules. You can also Edit or Delete your booking list from here.
The appointments feature in Zoom allows students to book a time slot(s) with the instructors for one-on-one support.
Note: Only one student can book a time slot and join an appointment at a time.
The student will receive a confirmation email with meeting details (meeting ID, time, link) to join the meeting.
How to Book Office Hours/Appointments:
To schedule your appointments, follow the steps below:
- Log in to Brightspace and go to your course.
- From the nav bar, click on Zoom.
-
Go to the Appointments tab.
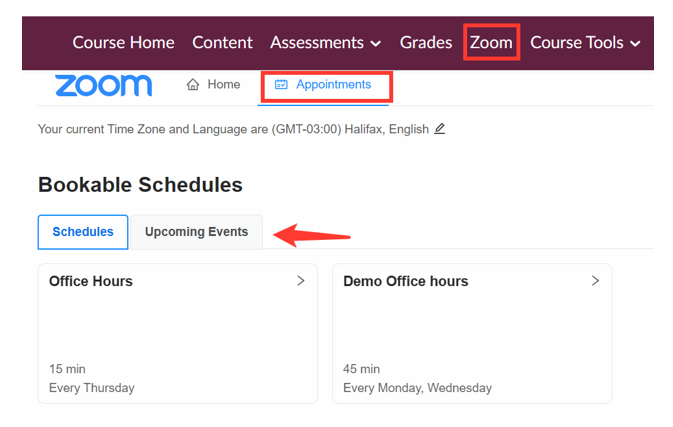
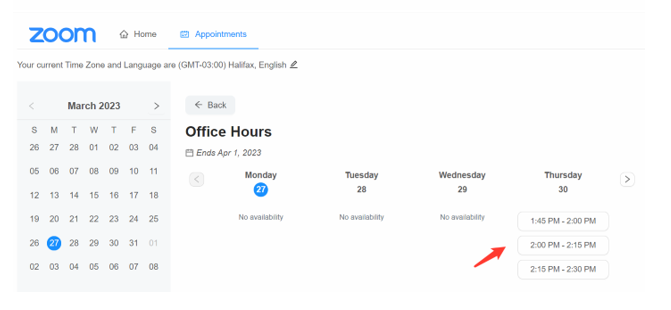
- From here you can pick the type of appointment you would like to book.
-
Every appointment has the day(s) and duration of the meeting listed at the bottom left. Once you click on a specific appointment, you will be able to see a calendar with the schedule.
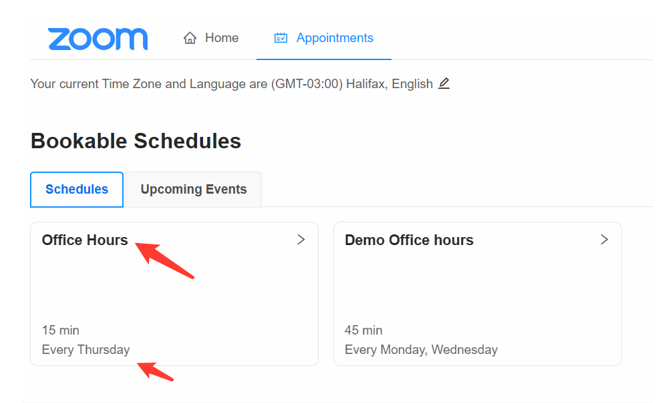
-
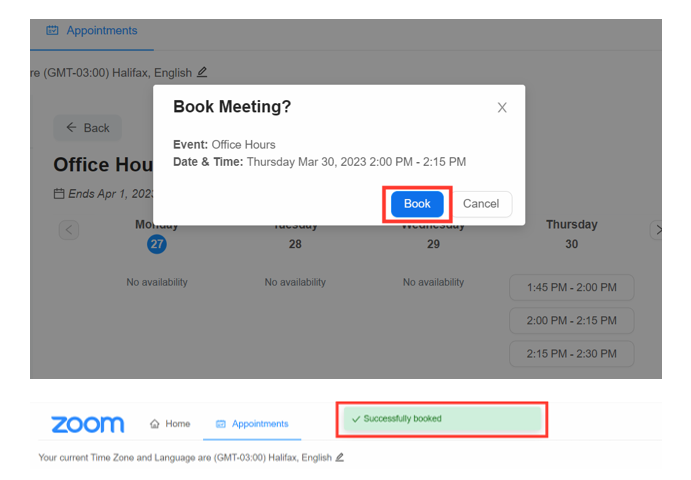
Now you can pick the date and see the available bookable schedule. Once you book an appointment, you will see a confirmation message at the top of the screen.
Please note that the meeting will not appear in the Brightspace calendar or Outlook calendar.
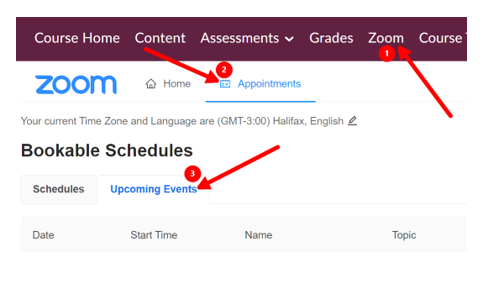
- Login to Brightspace and open the course.
- Click Zoom on the top navbar.
-
Click the Appointments tab and then the Upcoming Events tab.
-
Here Instructors can Start the appointment and Students can Join the appointment.
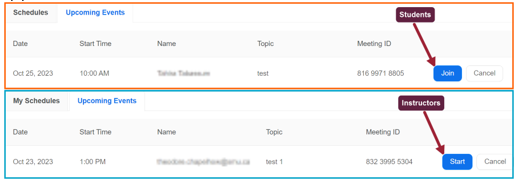
The instructor and students will both receive an email with the appointment details (time, ID, and link). The link or the meeting ID can also be used to join the appointment.


