Microsoft Teams
This training manual is a basic overview of some of the functions and features in Microsoft Teams that you can take advantage of at Saint Mary’s University. If you have any questions about any of this content, or if you would like any further support using Microsoft Teams please contact the Software & Application Support Centre via email at sas@smu.ca.
Navigating Teams
Teams has many different functions and abilities. To use Teams to its fullest potential, it is important to understand how to navigate the software. Below are some tips to help you navigate Microsoft Teams.
Settings
There are several different settings you can customize within Teams. Here are some that you might find useful.
Notifications
You can edit the notifications you receive from chats, channels, and calls in Teams. Here is how:
- Click on your profile icon in the top right corner
- Select Manage account from the drop-down menu. A new window will appear
- Click on the Notifications tab on the left menu. A new screen will display the different types of notification settings you can edit.
- If you want the notification to make a sound, navigate to the Appearance and sound section and toggle the Play sound for incoming calls and notifications button to on (green)
- Navigate to the Chat section and click on the Edit button
- You can then choose how you would like your notifications displayed for @mentions, replies, and likes and reactions. Your options are as follows:
- Banner - A small notification box will pop up in the corner of your screen
- Feed - The chat message will be highlighted in the Chat list pane and you will receive a notification on the Activity tab
- Banner and feed - Both banner and feed notifications will appear
- Navigate to the Meetings and People sections to edit notification settings for meetings and for messages and calls for specific people
Devices
You can choose the audio and video devices that Teams will use for calls. To select your devices:
- Click on your profile icon in the top right corner
- Select Manage account from the drop-down menu. A new window will appear
- Click on the Devices tab on the left menu. A new screen will display the device settings you can edit.
- Under Audio Devices, select the microphone that you would like to use from the drop-down menu. If you do not see your microphone listed here, check the settings on your device.
- Under Cameras, select the camera you would like to use from the drop-down menu. Once you have selected your desired camera, a preview video displays below. If you do not see your camera listed here or if there is no preview display, check the settings on your device.
Chat
The chat feature on Teams can be used as a one-on-one or group instant messaging tool. It is a good way to ask quick questions or check-in with colleagues while working remotely. Here are some tips for making the most of the chat feature.
Hiding a chat
You can use the Hide feature to remove the visibility of chats in your Chat feed. Here is how to use the Hide feature:
- Select the Chat tab on the Navigation Bar
- In the Chat feed, identify the chat you would like to hide and hover your cursor over the chat preview
- Click on the More options button that appears (three dots)
- A drop-down menu will appear. Select Hide from the list
This chat will no longer be visible in your Chat feed. If the same person or group sends you a new chat message, the chat will reappear in the Chat feed.
If you wish to locate the chat again:
- Type a name, email address, or keyword used within the chat in the Search bar at the top of your Teams window
- Select the desired chat from the options that appear in the search results
If you then wish to Unhide this chat and have it be visible on your Chat feed:
- From the search results, select the Chat tab on the Navigation Bar
- The chat will appear in your Chat feed. Hover your cursor over the chat preview
- Click on the More options button that appears (three dots)
- A drop-down menu will appear. Select Unhide from the list
Adding new members to a chat
If you would like to add additional members to a chat:
- Navigate to the desired chat by selecting the Chat tab on the left navigation bar
-
Select the Participants icon in the top right corner of the chat
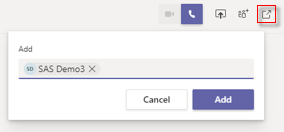
- Type the name of the person you would like to add in the Add text box and click the Add button
-
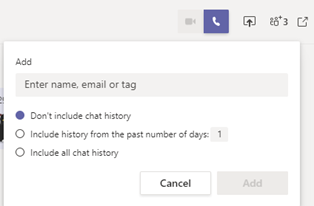
If your chat has three or more participants, you can choose whether you’d like the new member of the chat to see previous chat messages. Select the radio button for the option you would like to choose and repeat step 3.
Using apps in chat
There are many different apps you can use to send specific types of messages within a chat. To access apps in a chat:
-
Navigate to your desired chat and locate the icons underneath the Type a message box. Frequently used app icons will appear under the box.

- Click on the More apps button (three dots) to access more app options. You can browse from a list of apps or search for a specific app in the Find an app search bar.
One fun app to use in chats is Praise. You can send Praise to colleagues from within a chat or the activity feed of a channel. Here is how:
-
Click on the Ribbon
 Icon right below the text box in a chat or in the activity feed of a channel
-
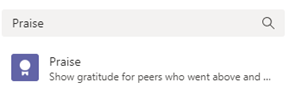
If you don't see the ribbon icon, you can click on the More apps button (three dots) and search for Praise in the find an app search bar.
-
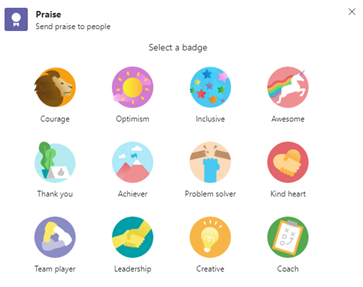
Once you open Praise, select the Badge you would like to send from the options displayed
- Type someone's name in the To box (if you are in a one-on-one chat this box will auto-fill). You must type in a name for the Praise to send
-
Add a message in the Notes field if you would like
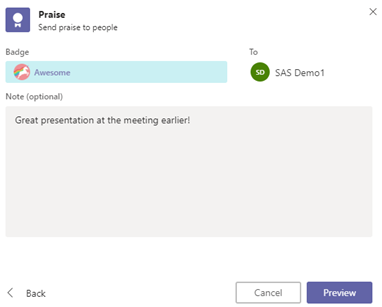
- Click Preview to see what your Praise will look like
- Click Send if you are satisfied with your Praise, or click Back to edit
Another app you can use within the Chat function is Forms. You can send a multiple-choice Form to colleagues from within a chat or the activity feed of a channel. Here is how:
-
Click on the Forms icon right below the text box in a chat or in the activity feed of a channel

- If you do not see the Forms icon, you can click on the More apps button (three dots) and search for Forms in the Find an app search bar
- The Forms pop-up window will appear. Write your question in the Input your question text box and enter your desired responses in the Option text boxes.
- Select the + Add option button to add another response option. You can add up to six response options.
- If you would like the responses to your Form to remain anonymous, select the Keep responses anonymous check box. If you would like to share the results of the Form within the chat, select the Share results automatically after voting check box.
-
Click Save. A preview of your Form will appear. If you are satisfied with the Form, click Send. If you would like to edit your Form, select
Edit and repeat steps 3-5 as desired. - Your Form will be sent in the chat. To vote, select the radio button of your desired response and select Submit Vote. You can see the percentage of responses for each option below the Form.
Managing Channels, Teams
Accessing a Team
A Team is a group of individuals who are working together. Each Team consists of at least one Channel, where members of the Team can have conversations, share files and links, and connect to other Microsoft apps. Each Team has at least one Owner who can control access to the Team and set various permission levels for Members. Here is how to access a Team:
-
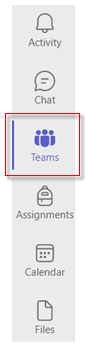
Click on the Teams icon from the left navigation bar
-
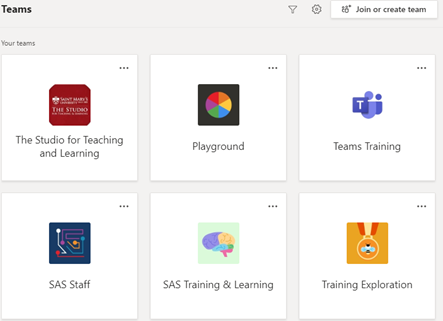
Select your desired Team from the list of icons that appears
Managing a Team’s settings and members
Team owners and Team members have different levels of permission to access Team settings, but both members and owners can view members of the Team.
To view a Team’s members:
- Select the More options button next to the Team name in the Channel navigation panel
-
From the drop-down menu, select Manage team

- Navigate to the Members tab. Team owners will be listed under the Owners section, and members under Members section. If your team has guests from outside organizations, they will be listed under the Guests section
- By default, Team owners can edit the permission levels of both Team owners and members. To do so, select the arrow next an individual’s permission level in the Role column.
-
The Role drop-down menu will appear. Select the desired permission level for that individual and their permissions will immediately change.

-
Team owners are also able to edit a variety of settings for the Team. To explore these options, select the Settings tab.

Creating a channel
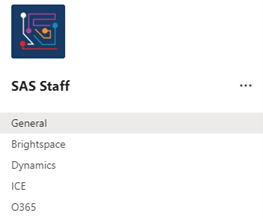
Channels are where the activity in a Team takes place. You can navigate between your channels using the Channel navigation panel. When you navigate to a specific channel, it will be highlighted (see below). By default, all Teams have a General channel.
To add a new channel:
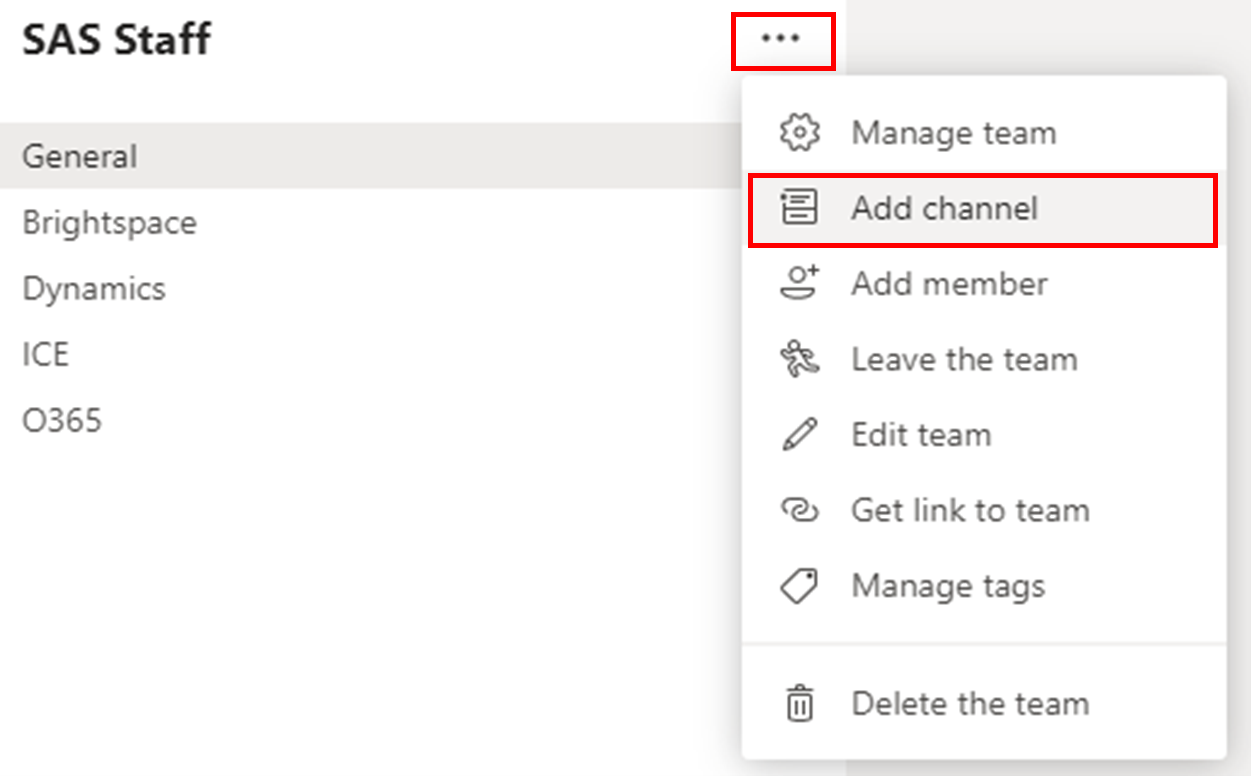
- Select the More options button next to the Team name in the Channel navigation panel
-
From the drop-down menu, select Add channel
-
The Create a channel pop-up window will appear. Type a name for your channel in the Channel name text box, and a short description of the channel in the Description text box. If you would like the channel to be accessible to everyone on the Team, select Standard from the Privacy drop-down menu.
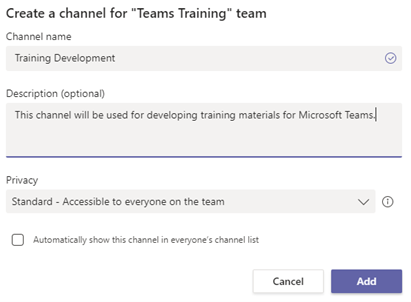
- Click the Add button.
Creating a private channel
A private channel lets you create a focused space for collaboration among specific members of your Team. Only members of the private channel can access the channel, though Team owners are able to see the name of the private channel. Follow these steps to create a private channel:
- Select the Teams tab from the left navigation bar
- Select the appropriate Team from your list of Teams
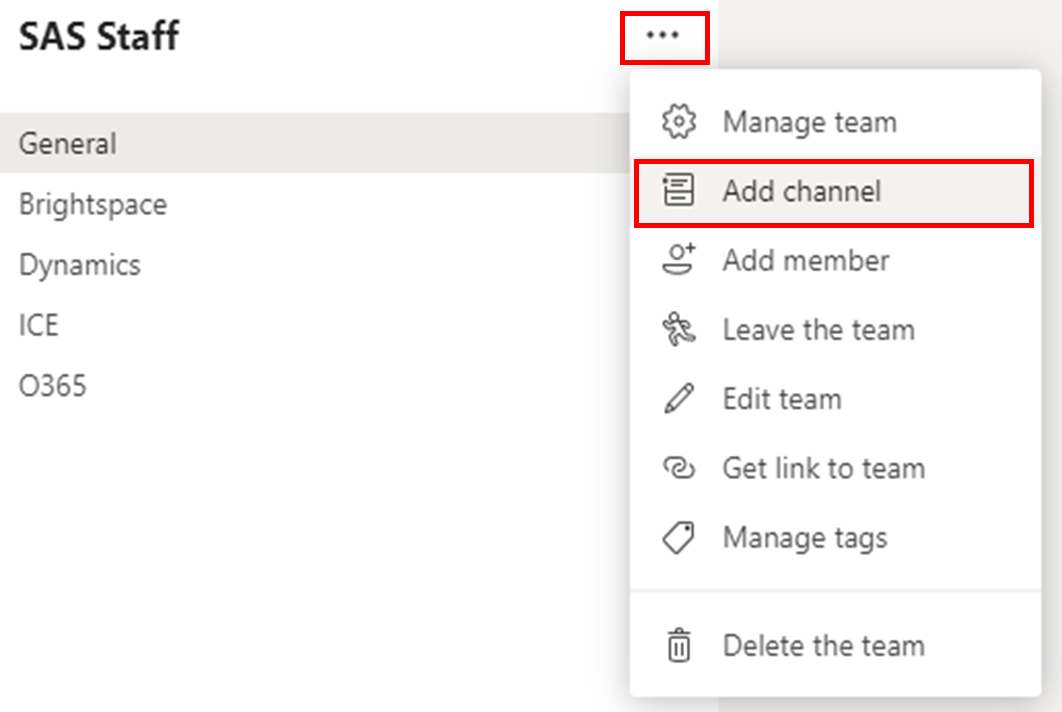
- Select the More options button next to the Team name in the Channel navigation panel
-
From the drop-down menu, select Add channel
- The Create a channel pop-up window will appear. Type a name for your channel in the Channel name text box, and a short description of the channel in the Description text box.
-
In the Privacy drop-down menu, select Private – Specific teammates have access
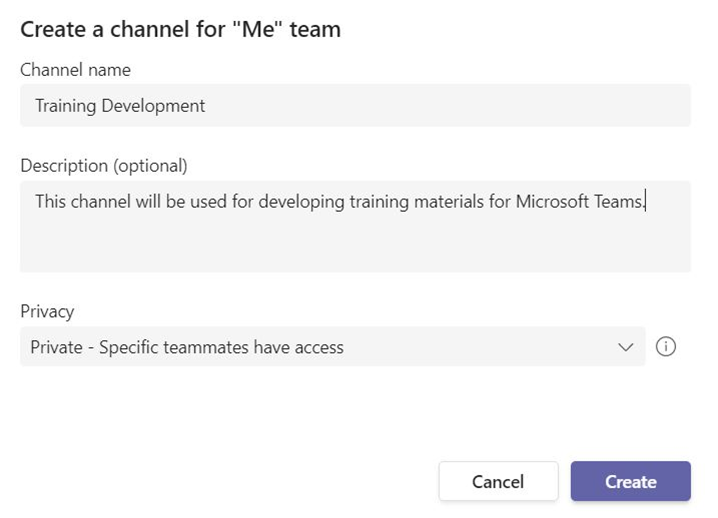
- Click the Create button.
-
Type the name of the Team member(s) whom you would like to add to the channel and click Add
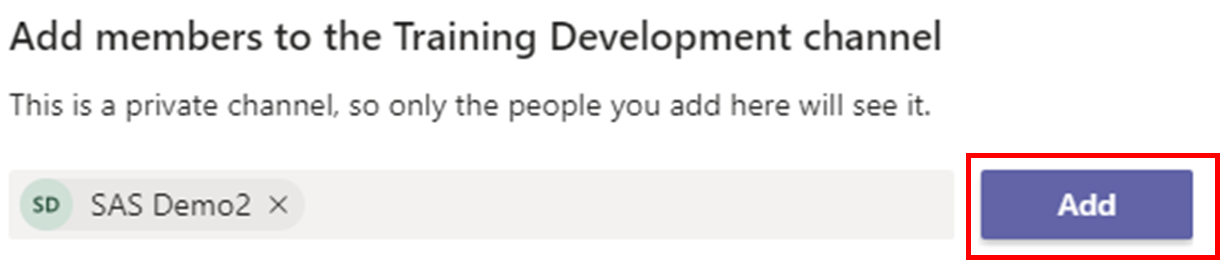
-
From the Membership drop-down menu, select if you would like the Team member(s) to be a Member or an Owner of the new private channel
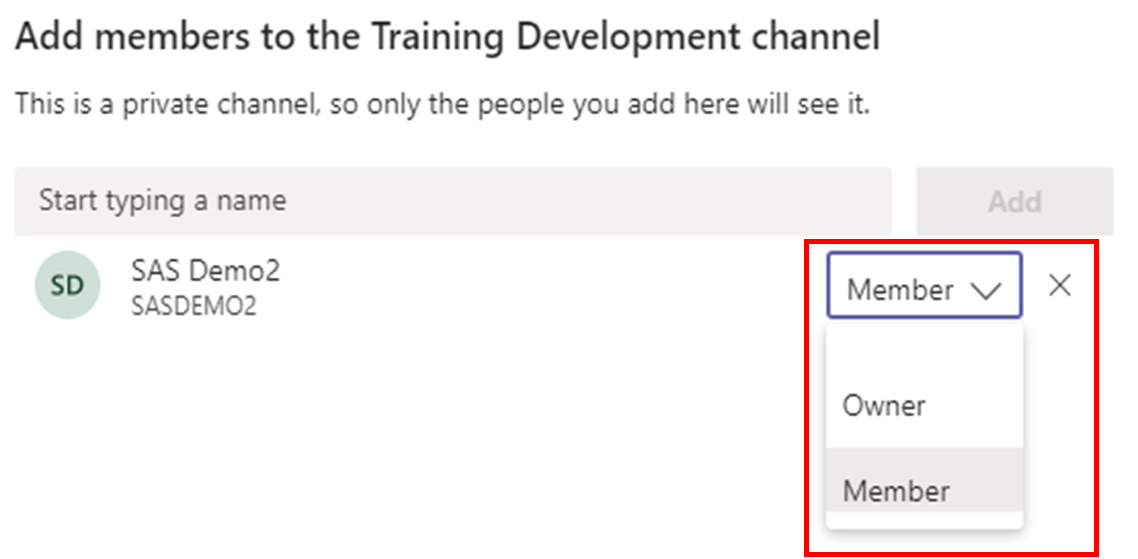
- Click the Done button.
Channel feed
The Channel feed (also called the Posts tab) is the main activity feed of a Channel in Teams. The Channel feed is where all activity that takes place within the Channel is recorded.
To start a chat in the Channel feed:
-
Click the New conversation button at the bottom of the Channel feed
-
Type your message into the Text box and click the Send button

To reply to a post made in the Channel feed:
-
Click on the Reply button underneath the relevant message

-
Type your message into the Text box and click the Send button

Managing Meetings
In-Meeting Features
Meeting options
Meeting options allows you to change settings so that your meeting is more secure and easier to facilitate, especially if the meeting is a large one. After a meeting has been scheduled in your calendar, follow these steps to change your Meeting options:
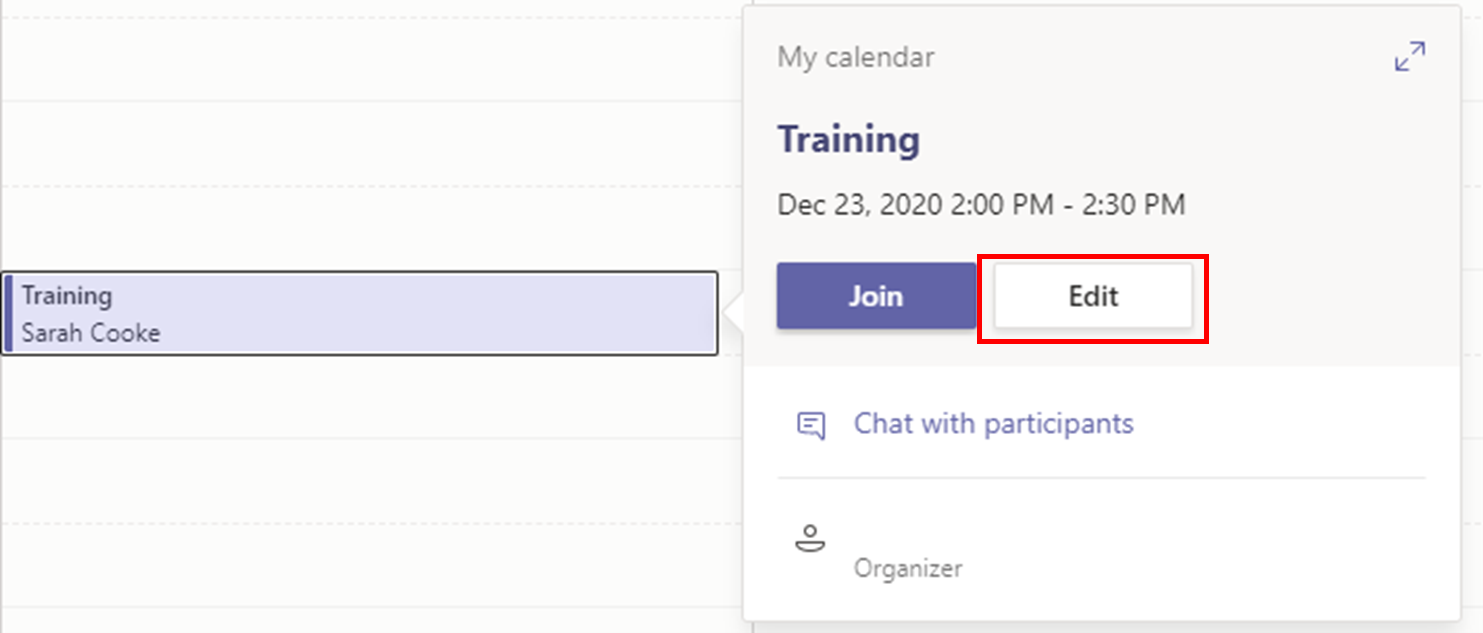
- Navigate to the Calendar tab on the left navigation bar
- Select the meeting that you would like to edit
-
Click Edit
-
Select Meeting options from the top menu bar

-
A new tab will open in your internet browser that outlines the various options you can set for your meeting
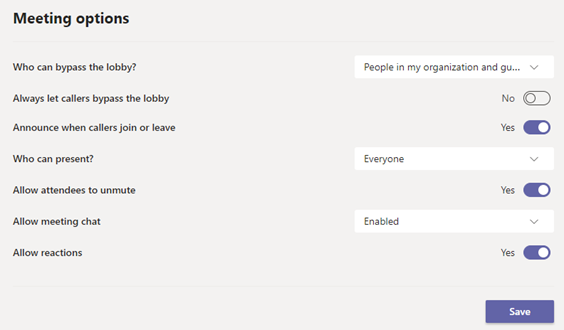
Lobby permissions
The Who can bypass the lobby? drop-down menu allows you to create a lobby for your Teams meeting and select which participants will need to wait in the lobby and which participants can join the meeting directly. Below is a list of the options:
Everyone – Select this option if you want all meeting participants to be able to join the meeting directly
People in my organization, trusted organizations, and guests – Select this option if you want anyone with an @smu.ca email address and any Guests invited to your meeting to be able to join the meeting directly
People in my organization and guests – Select this option if you want anyone with an @smu.ca email address and any Guests invited to your meeting to be able to join the meeting directly
Only me – Select this option if you want all meeting participants to wait in the lobby
Note: Due to SMU’s Office 365 administrative settings, the People in my organization, trusted organizations, and guests and People in my organization and guests options function the same.
Presenting permissions
- The Who can present? drop-down menu allows you to control which participants are able to share their screen in your meeting.
- Everyone – All meeting participants are able to share their screen
- People in my organization – Only people with an @smu.ca email addresses can share their screen
- Specific people – The meeting organizer can choose which participants can share their screen. Participants must already be invited to the meeting to be selected.
- Only me – Only the meeting organizer can share their screen. Participants can still request control of the meeting organizer’s screen, but are unable to share their own screen. Attendee options
- The Allow mic for attendees switch allows you to control whether or not attendees can unmute themselves if they’ve been muted by the meeting organizer.
- The Allow meeting chat drop-down menu allows you to select whether or not there is a meeting chat, and if so, if participants are able to post in the chat preceding and proceeding the meeting.
- The Allow reactions switch allows you to control whether or not participants can share reactions in the meeting.
Muting participants
To mute participants on a call, follow these steps:
- Click on the Participants button located on the Meeting control bar
- Click on the three dots next to the name of the participant you would like to mute
- Select Mute Participant
Note: You need at least three participants on a call to mute a participant. You can also select the Mute All option on top of the list of participants to mute everyone on the call.
Removing participants from meeting
To Remove Participants on a call, follow these steps:
- Click on the Participants button located on the Meeting control bar
- Click on the three dots next to the name of the participant you would like to remove from the meeting
- Select Remove from Meeting
Note: You cannot remove the organizer of the meeting.
Using live captions
Live captions on Teams have speaker attribution and are only visible to the user that turns them on. To turn on live captions:
- Click the More options button (three dots) from the Meeting control bar
- Select Live captions from the drop-down menu
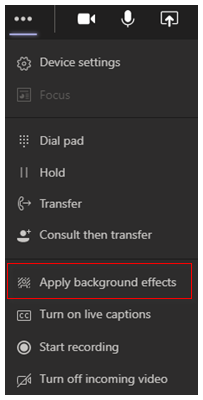
Background effects
- Click on the More Options (three dots) button from the Meeting control bar
-
Select the Apply Background Effects option
-
Select the background effect you would like to use. Click the Preview button to get a preview of your background effect before clicking Apply to update your background for other meeting participants.
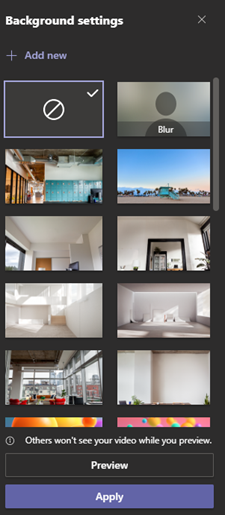
Note: Background effects are only available on the Desktop app and the iOS (Apple) app.
Raise hand
To raise your hand, click on the Raise hand button located on the Meeting control bar. This allows you to alert the presenters that you have something to contribute without interrupting the ongoing conversation. Other participants will be able to see an icon next to your name that indicates you have your hand raised. This icon shows up in both the video window and the Participants panel.
Spotlight
Spotlight lets you highlight a participant's video for all the participants present on the call. To do so please follow these steps:
- Click on the Participants button located on the Meeting control bar
- Click on the three dots next to the name of the participant you would like to Spotlight
- Select Spotlight from the drop-down menu
Pin
Pin lets you highlight a participant’s video just for you. To do so please follow these steps:
- Click on the Participants button located on the Teams Meeting control bar
- Click on the three dots next to the name of the participant you would like to Pin
- Select Pin from the drop-down menu
Screen sharing
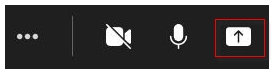
-
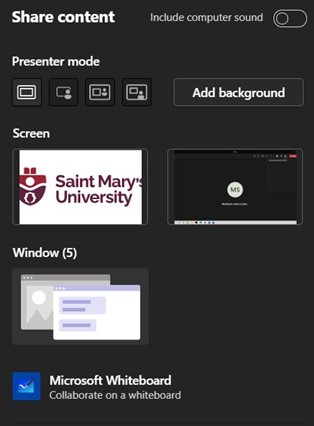
Select the Share content option from the Meeting Control Bar
- Select the window you would like to share
-
Toggle the include computer sound switch to on to share all audio from your computer
-
Using the Sharing control bar, select a participant from the Give control drop-down menu to allow them to navigate your shared window. If you wish to take control of somebody else’s shared window, select Request control.

-
To end your screen share, select the Share tray icon from the Meeting control bar

Giving a PowerPoint presentation
-
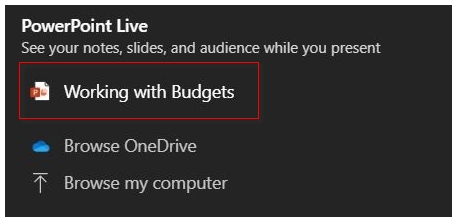
Click on the Share tray on the Meeting control bar

-
Select the PowerPoint deck you would like to present from the options listed under PowerPoint
- Click on the eye to enable/disable Private viewing so attendees can move through the presentation on their own
- Click on the slide to move forward/trigger an animation
-
Click Stop presenting to end the presentation

-
If you are viewing a PowerPoint presentation, select Take control to take over the PowerPoint from the presenter

Recording a meeting
To record a meeting:
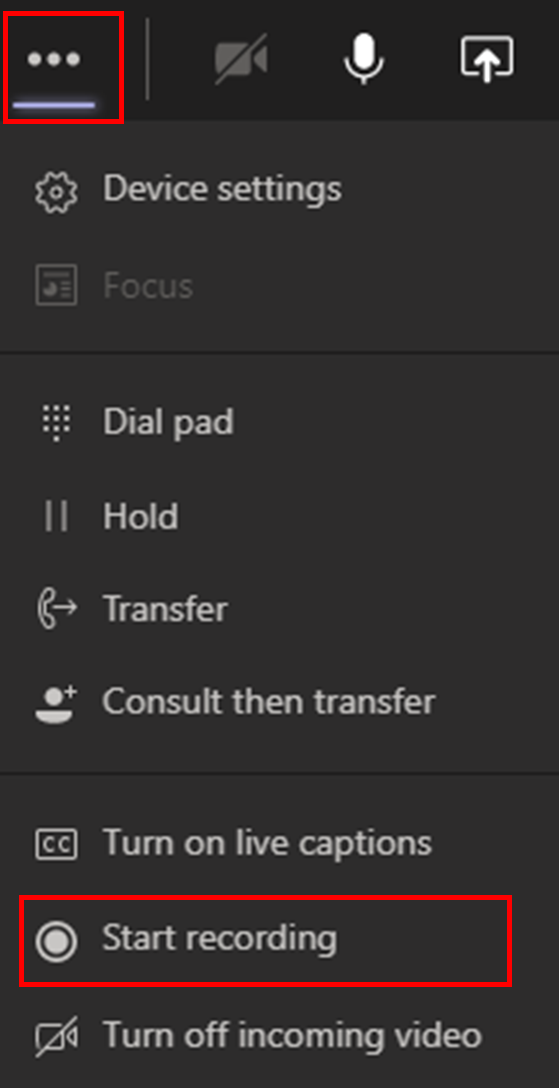
- Click the More actions button (three dots) from the Meeting control bar
-
Select Start Recording from the drop-down menu
When you wish to end the recording:
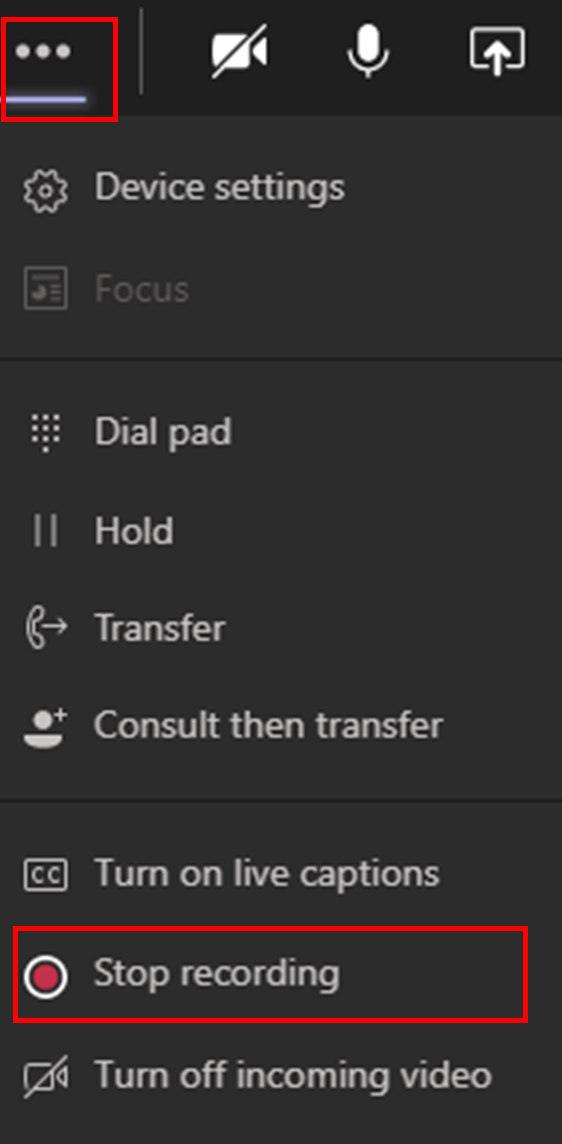
- Click the More actions button (three dots) from the Meeting control bar
-
Select Stop Recording from the drop-down menu
The recording will be saved in the Recordings folder in the OneDrive of whoever initiated the meeting recording. Depending on who recorded the meeting, different people could have access to the recording.
Please read the permissions or role-based access chart from Microsoft to determine who will have permission to access your meeting recording.
What is a Whiteboard?
A whiteboard is a collaborative space for meeting participants in a virtual or hybrid environment to brainstorm, plan, and share ideas in real time. It can be accessed through Microsoft Teams desktop application, web browser, and mobile phone applications. Whiteboards can also be re-used across reoccurring meetings.
Getting Started
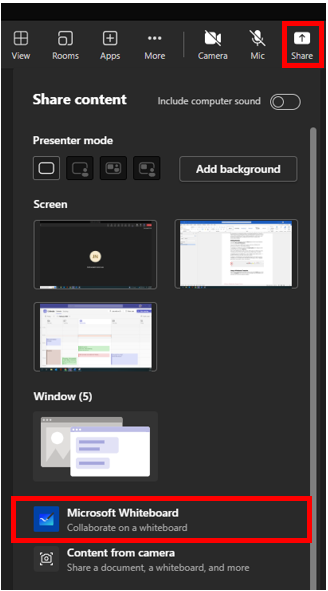
To create a new Whiteboard, click the Share button in the Teams Meeting and select Microsoft Whiteboard.
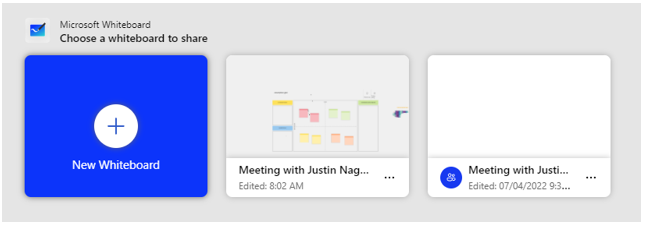
You can create a new whiteboard or select a previous whiteboard (if previously created in a reoccurring meeting).
To add text to a Whiteboard, select the Create button in the toolbar on the left-hand side, then select Add Text.
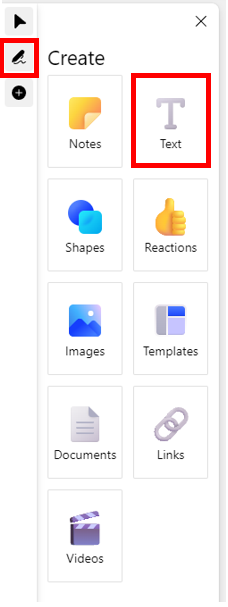
Click on the Whiteboard to add a text box, then type out or format your text. To change the size of the text, drag the text box either larger or smaller.
The same steps can be repeated to add Notes, Shapes, Reactions, Images, documents (such as PDFs or PowerPoint slides), etc.
To Zoom in/out of the Whiteboard, use the middle mouse wheel or the + / - buttons in the lower left-hand corner of the screen.
To draw on the Whiteboard, select the Inking tool, this will open a tool bar and allow you to freehand draw with different writing tips, colour, highlight, point with a laser pointer, erase, and measure.
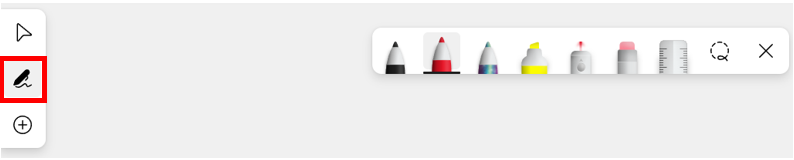
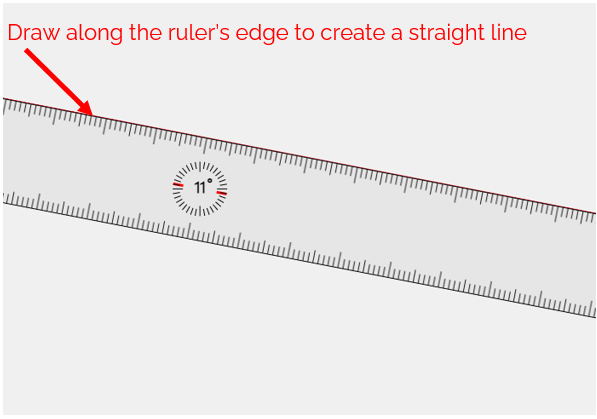
To draw straight lines, you can use the Ruler tool from the Inking tool bar. Position the ruler where ever you would like the straight line. To change the angle of the ruler, use the middle scroll wheel on your mouse. Once the ruler is in the correct position, using the Inking tools, draw along the ruler to create your straight line
Using a Whiteboard Template
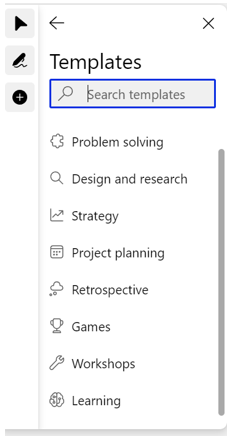
Once your new Whiteboard has been created, select the Create button, then click on Templates. Then choose the type of template you would like to use and select one from the template category.
Settings
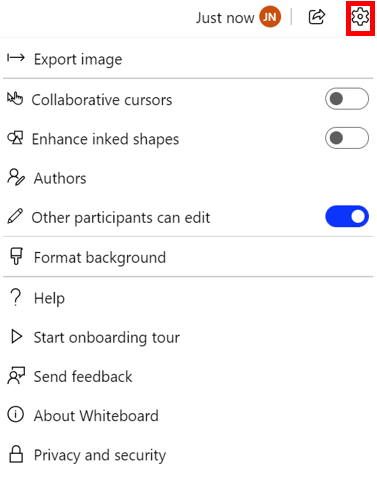
To change the settings of your Whiteboard, click the gear in the top-right corner. Here, you can export an image of the Whiteboard, turn on/off Collaborative Cursors (can see where other participant’s cursor is), enhance inked shapes (create precise shapes), or other participants can edit.
After the Meeting
After a Teams meeting, the whiteboard will be available to all participants in the meeting. The Whiteboard can be found on a new tab in the Meeting Chat labelled Whiteboard. This allows participants to continuing working on the Whiteboard, or re-use in future meetings.

Integrating other apps with Teams
Tabs & Integrated Apps
You can add specific files or apps as Tabs within a channel. Tabs are different sections of a channel where Team Members can access specific files, websites, or integrated apps directly within Teams. Tabs can be accessed along the Tabs bar across the top of every channel. Tabs are unique to each channel, and can be added, removed, and edited. Here is how:
-
To add a tab, click on the + button on the Tabs bar

-
The Add a tab pop-up window will appear. Select what integrated app you would like your Tab to provide access to. If you don’t see your desired app on the list, type its name in the Search bar

-
If you select the Post to the channel about this tab check box, a post will be made in the Channel feed about the new tab. If you de-select the check box, a post will not be made

- Select the necessary options for your Tab and click Save (see below for detailed instructions on how to add Office files, OneNote notebooks, Forms, and Websites as tabs to your channel).
Files Tab
Every channel will automatically have a Files tab. The Files tab contains all files associated with a channel. Any files shared in the Channel feed will be automatically saved to the Files tab. To upload a new file to the Files tab:
- From the Channel navigation panel within the appropriate Team, select the channel that contains your file
- Select the Files tab of the channel
- Click the Upload button along the top menu bar
- Select Files from the drop-down menu < img src="/s/File_Tab_1.png" alt="click upload drop down then click files" class="center">
- Select the desired file(s) from your device and click Open or Upload
Office Files
You can edit Office files within Teams and collaborate on the files in real time with members of your Team. Word Documents, PowerPoint Decks, and Excel Workbooks can be simultaneously edited by multiple users within Teams. To access files within a particular Teams channel, please follow these steps:
- From the Channel navigation panel within the appropriate Team, select the channel that contains your file
- Select the Files tab of the channel
- To create a new File, select New. You can then create a Folder, Word document, Excel workbook, PowerPoint presentation, or OneNote notebook
- To upload a file or folder from your computer to the channel, select Upload.
- To download a file, select the File and click Download.
- To make a file a Tab within the channel, select the file and click Make this a tab.
Note: If you download a file, a new version of the file will be downloaded to your device and any changes you make to this version will NOT sync to
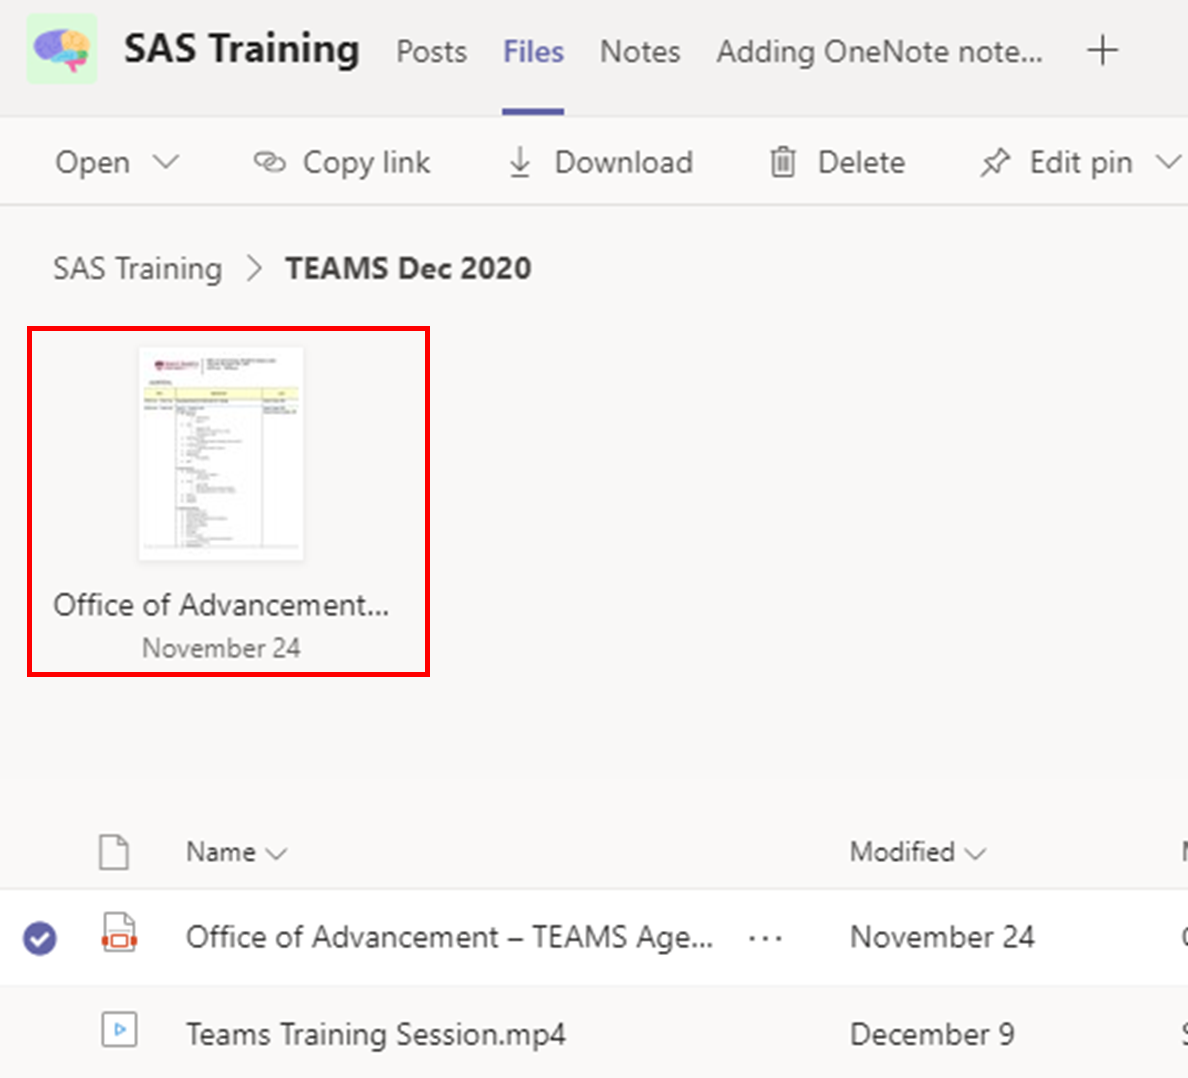
Pinning files
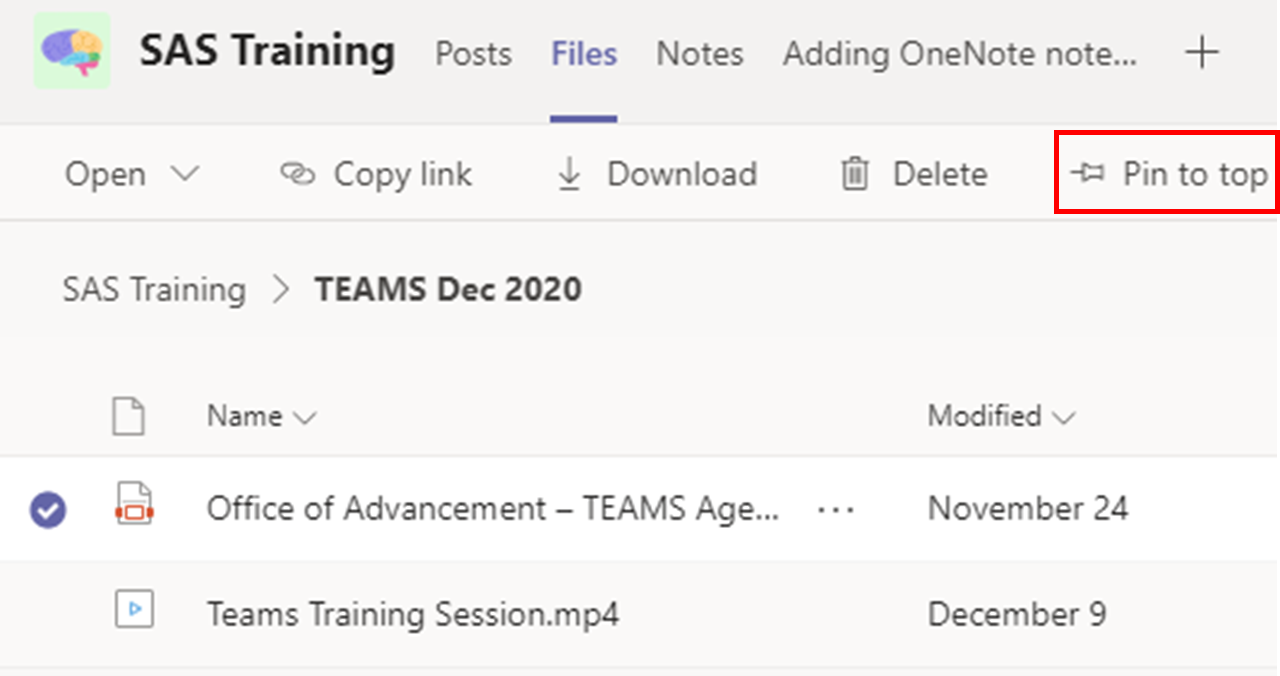
Pinning a file lets you add a specific file to the top of the Files tab so it can be easily accessed by everyone who is a part of the channel. To pin a file, please follow these steps:
- From the Channel navigation panel within the appropriate Team, select the channel that contains your file
- Select the Files tab of the channel
- Select your desired File
-
Select the Pin to top option from the menu bar
-
The file will now be pinned to the top of the Files tab for all members of the Channel
Conversation feature
To facilitate asynchronous document collaboration, Teams supports a Conversation feature that allows Team members to have a conversation associated with any file within a channel. Here is how to use the Conversation feature:
- Select the Channel your File is present in.
- Select the Files tab of the Channel.
- Select your desired File.
- On the top right of the file, you will find a Conversation button, click that to start a Conversation.
Note: Once a conversation associated with a File has been closed, the conversation is still accessible in the Channel feed (Posts tab).
Planner
You can add an existing Plan associated with a Team or create a new Plan from Planner and add it as a tab to your channel.
- Navigate to the appropriate channel
- Click the + icon along the top toolbar
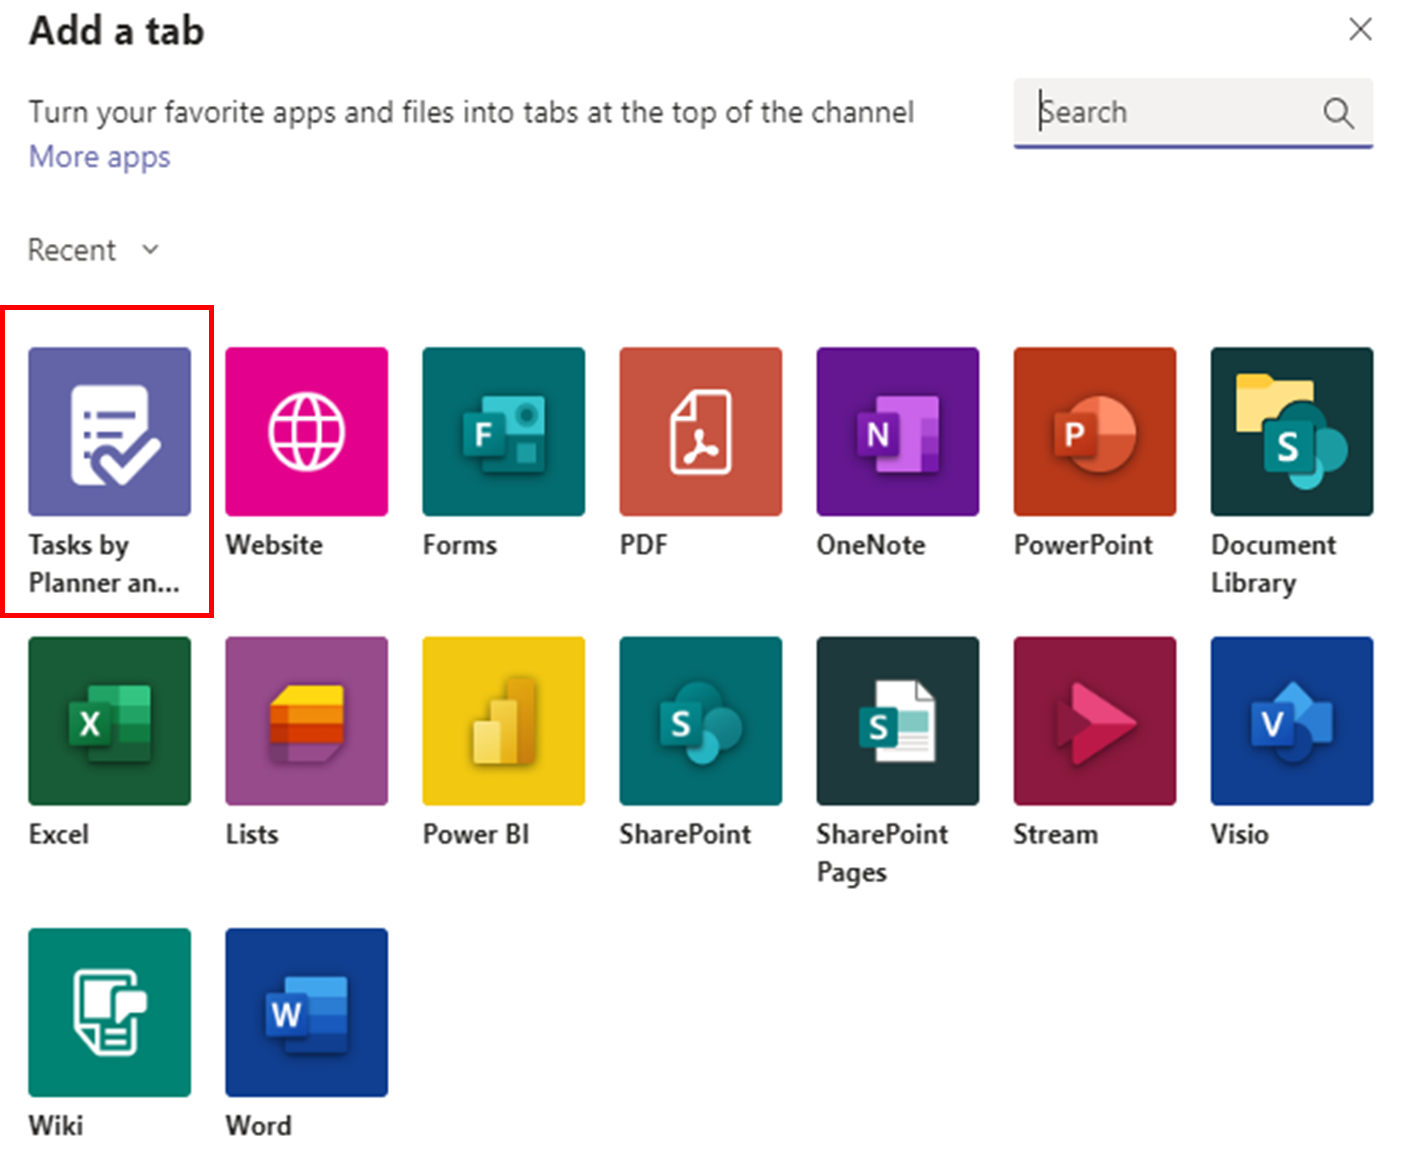
-
The Add a tab window will appear. Select Tasks by Planner and To Do from the list of applications
-
To create a new plan:
- Select the Create a new plan radio button
-
Type the name of your new plan into the Tab name text box

- Click Save
-
To use an existing plan from the Team:
- Select the Use an existing plan from this team radio button
-
Select your desired plan from the drop-down menu
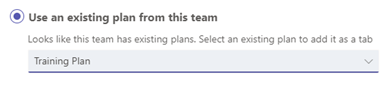
- Click Save
OneNote
You can add an existing OneNote Notebook or Section as a tab to your channel or create a new Notebook or Section as a tab to your channel. To do so:
- Navigate to the appropriate channel
- Click the + icon along the top toolbar
- The Add a tab window will appear. Select OneNote from the list of applications
- A list of Notebooks that you have permission to access will appear. Hover your mouse over each Notebook to see where the Notebook is saved.
Note: If the file path starts with sites/ it is a Notebook within the Team; if it starts with personal/ it is within your individual OneDrive
Adding an existing Notebook or Section
- To add an entire Notebook as a tab to the channel, select the Notebook then click Save
- To add a specific Section from within the Notebook as a tab to the channel, click on the arrow next to the Notebook and select the Section, then click Save
Creating a new Notebook or section
- To create a new Notebook to add it as a tab to the channel, select Create New Notebook from the top of the list of Notebooks, type in a name for your notebook, then click Save
- To create a new Section within an existing Notebook to add as a tab to the channel, click on the arrow next to the Notebook and select Create New Section, type in a name for your section, then click Save
The Notebook or Section will now be added to the channel toolbar as a tab. If you don’t see the title of your Notebook or Section, click on the arrow next to the more button to display your full list of channel tabs.
Websites
You can add a website as a tab to your channel. To do so, please follow these steps:
- Navigate to the appropriate channel
- Click the + icon along the top toolbar
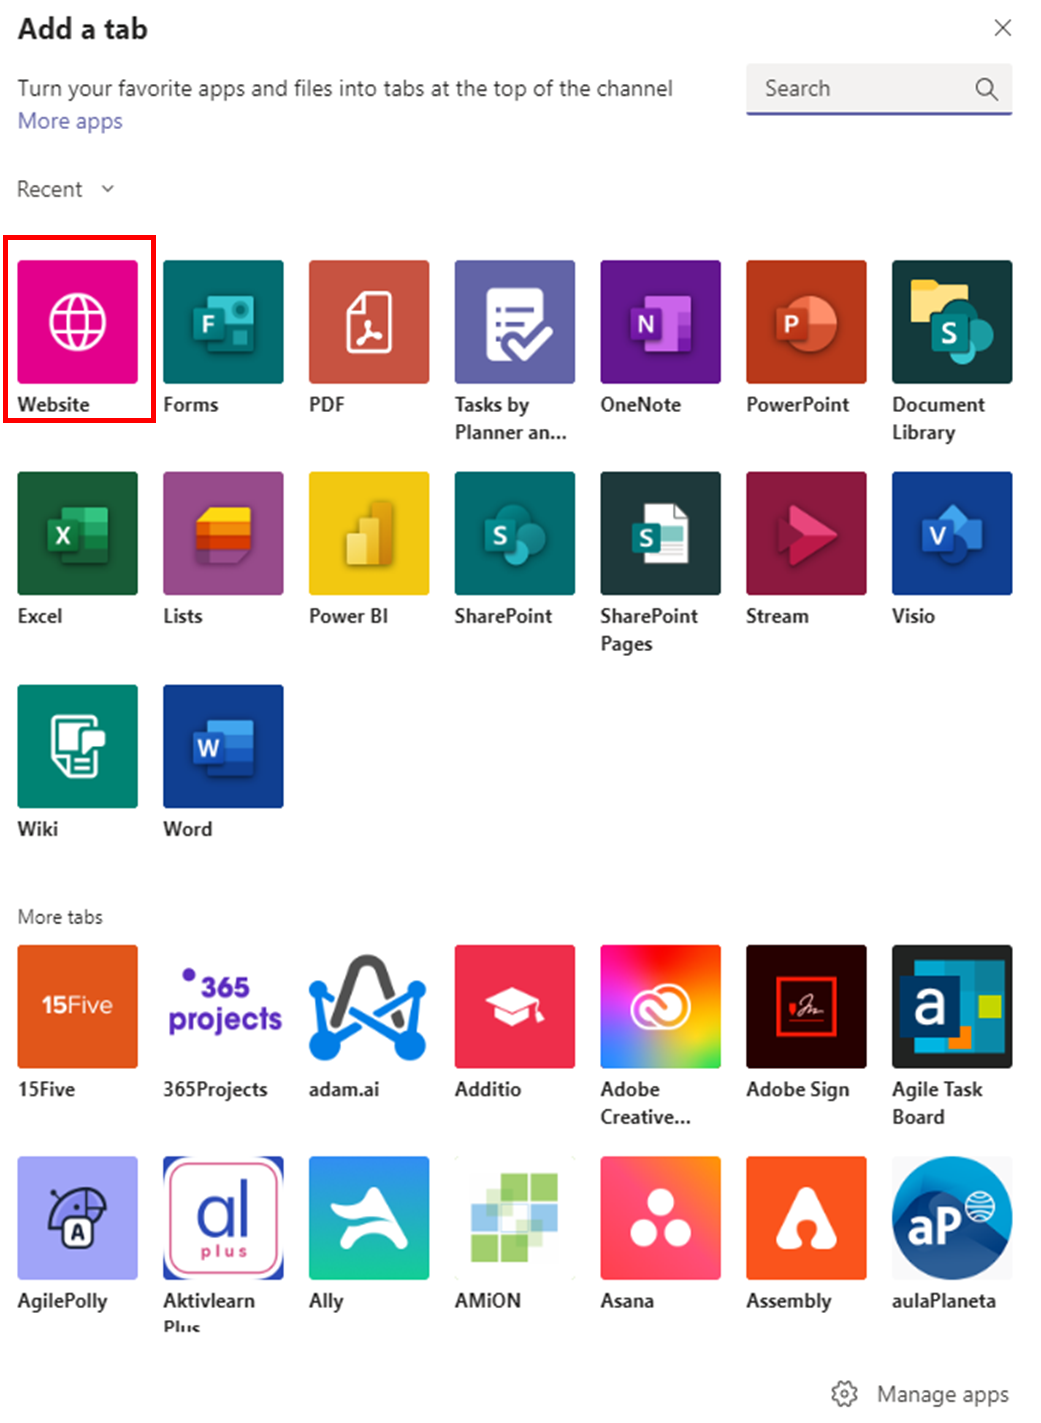
-
The Add a tab window will appear. Select Website from the list of applications
- Enter the name you would like for your Tab in the Tab name text box
- Paste the URL of your desired website in the URL text box
- Click Save.
Forms
You can add a new Form as a tab to your channel, or add an existing Form as a tab to either share its results or collect responses. To do so:
- Navigate to the appropriate channel.
- Click the + icon along the top toolbar.
- The Add a tab window will appear. Select Forms from the list of applications.
-
You can now either create a new form, or add an existing form as a tab. To create a new Form:
-
Select the Create a shared form that your team can edit and see results option
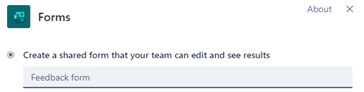
- Enter a name for your new Form
- Click Save
-
Select the Create a shared form that your team can edit and see results option
-
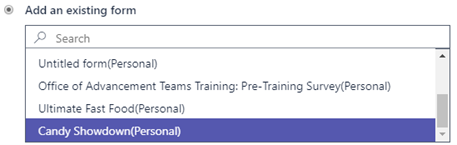
To add an exiting form, select the Add an existing form option
-
Search the for the Form you would like to use in the search bar or choose it from the drop-down menu. If the Form was created using your individual Office 365 account, the name of the Form will end with (Personal)
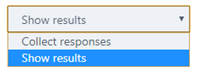
-
If you would like to use the Form to collect responses from the other members of the channel, select the Collect responses option from the drop-down menu. If you would like to share the results of your Form with the members of the channel, select Show results.
- Click Save
-
Search the for the Form you would like to use in the search bar or choose it from the drop-down menu. If the Form was created using your individual Office 365 account, the name of the Form will end with (Personal)


