Qualtrics
Getting set-up with a Qualtrics account
To get a SMU licensed Qualtrics account, please contact the Software and Application Support Centre. You can email us at sas@smu.ca or drop by at our office (AT107).
Getting started with Qualtrics
A typical project consists of a survey, a distribution record, responses, and reports.
-
From the homepage, click the Create new project button on the bottom left corner.

-
To start with from a template, scroll through the sections or filter or search to find the type of project you’d like to create.
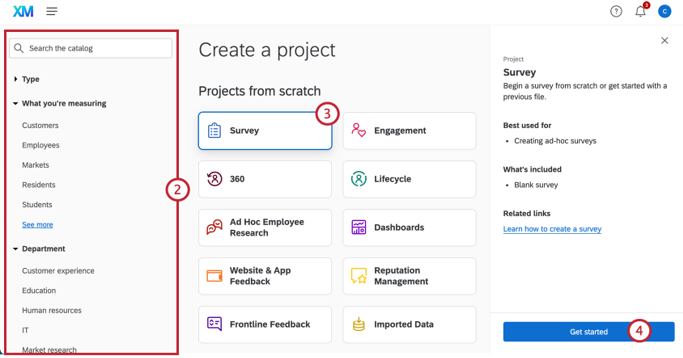
- To start from scratch, select Survey.
- Click Get Started.
- Enter a Name for your survey.
- Choose Create a blank survey project.
- Click Create project.
After clicking “Create project,” you’ll be taken to the Survey tab where you can begin adding questions to your survey.
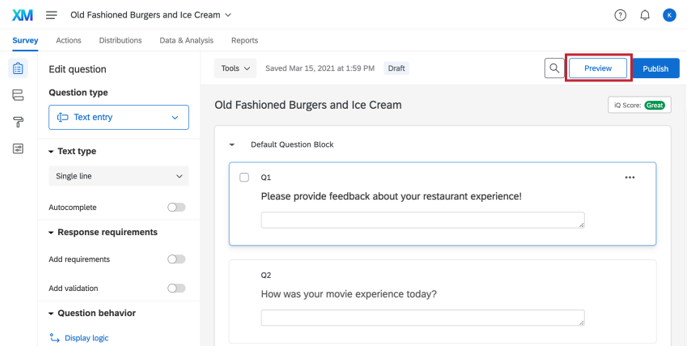
Survey
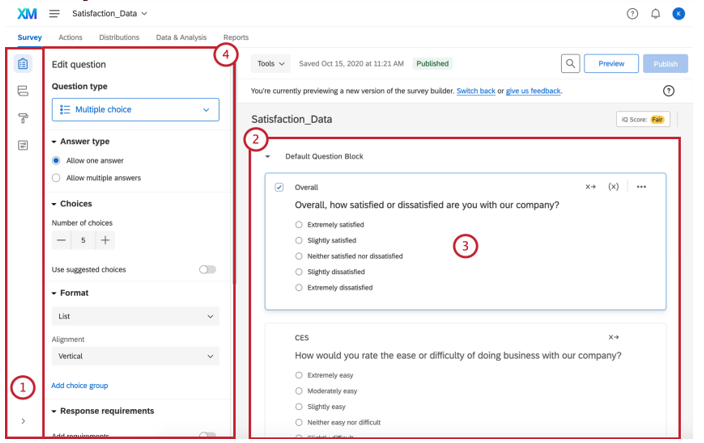
- Survey toolbar.
- Question block
- Question editing area.
- Question editing pane.
Block Basics
All survey questions are created, edited, and stored inside blocks. Every survey includes at least one block initially called the Default Question Block.
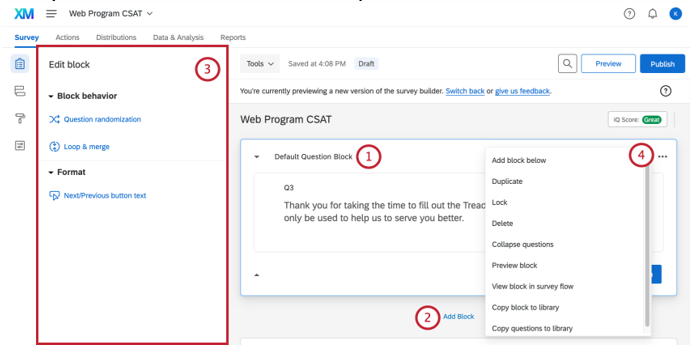
- Block name: Change at any time by clicking directly on the name and typing a new one.
- Add Block: Lets you create new blocks.
- Block editing pane: Appears when you click the block (e.g., white space next to the name) without clicking a question. Make changes to block behavior and formatting. Includes question randomization, loop & merge, and the ability to edit Next / Previous button text.
- Block options menu: Displays an array of one-click block editing choices.
For simple surveys, placing all of your questions in a single block is just fine. But as surveys become more intricate, organizing questions into multiple blocks allows the application of a sophisticated survey flow, including branches, randomization, authentication, and embedded data. Visit the Displaying Blocks page to learn how to take full advantage of blocks in building sophisticated survey flows.
Initially, a default multiple-choice question will be inserted into your “Default Question Block.” This ensures that your block has at least one question to start with.
-
To add additional questions to a block, click Add new Question.

- To add more questions, hover over any existing question and click the plus (+) buttons (either above or below the existing question).
- Click the minus (–) sign to delete a question.
-
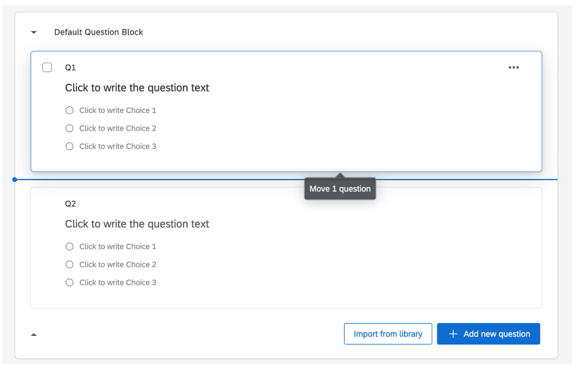
Move questions around the survey by clicking and dragging them. The question you move will be highlighted in blue, and where it lands is represented by a blue line in the editor.
Editing Question Text
You’ll write questions, edit question text, and apply text formatting in the question editing area.
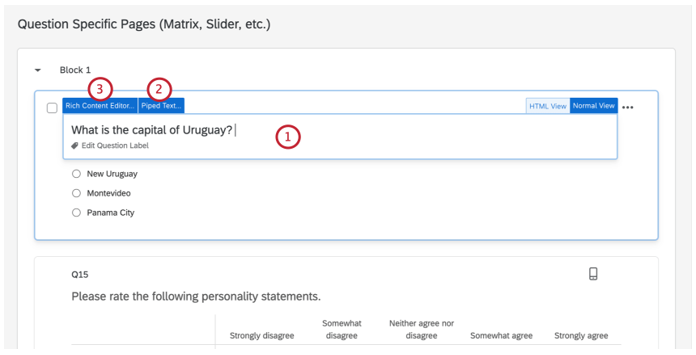
- Click in the question text (or answer choice) text boxes to enter or edit your text.
- Click the Piped Text button to grab information from previous questions and blocks (e.g., pulling in someone’s name from a Demographics Block to personalize a question).
- Click the Rich Content Editor button to format your text by changing fonts, font sizes, applying bolds, bullets, italics, and more.
Warning: Questions are numbered in the order you create them. If you change the order of your questions by moving a question up or down, the question numbers DO NOT change.
Participants will see your questions in the order they appear the survey builder, regardless of numerical order in which you created the questions. Read the Auto-Number Questions page if you wish to re-number your questions, but that’s not typically necessary.
Change Question Types
When you first click Create Project, a multiple choice question is inserted into your first question block by default. However, you might want to change it to another type or style of question. Use the question editing pane to choose among more than a dozen question types (e.g., Multiple Choice, Rank Order, Heat Map, NPS, Graphic Slider, among many others).
-
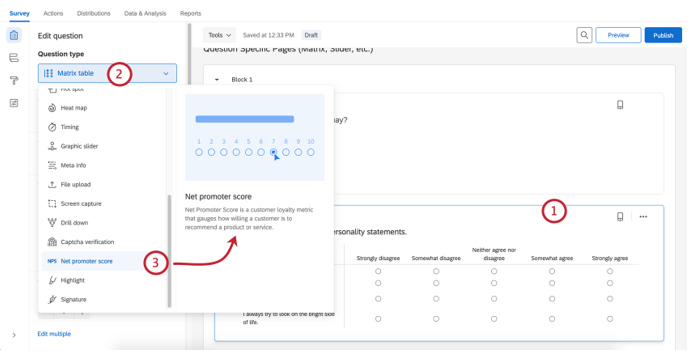
To change Question Types:
- Open the editing pane by clicking on a question.
- Click the dropdown menu under Question type.
- Hover over an option to get an explanation.
- Click the option to select the question’s type.
Editing Pane Options
You can also use the editing pane to apply the specific options available for each unique question type (e.g., suggested choices, vertical or horizontal positioning, force response, etc.).
Let’s demonstrate how these commands work with the matrix table question type:
-
Matrix Type: In this case, choose whether the matrix is formatted as a series of Likert scales, as a bipolar table, or more.
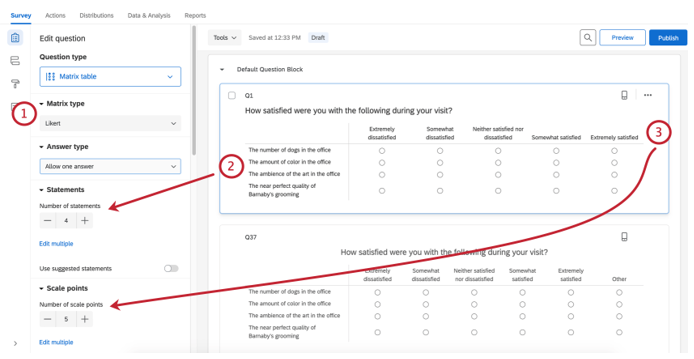
- Statements: Use the + or – buttons to increase or decrease the number of possible statements.
- Scale Points: Use the + or – buttons to increase or decrease the number of possible scale points.
-
Response requirements: Click Force response if you want to require a respondent to answer this question before continuing, or add other types of validation.
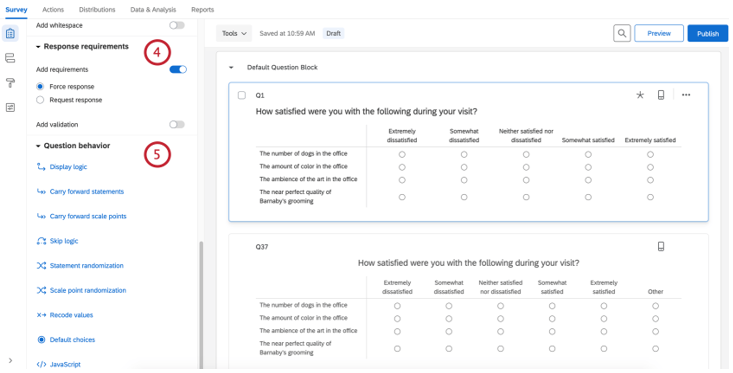
- Question behavior: Add display or skip logic to the question, and more.
-
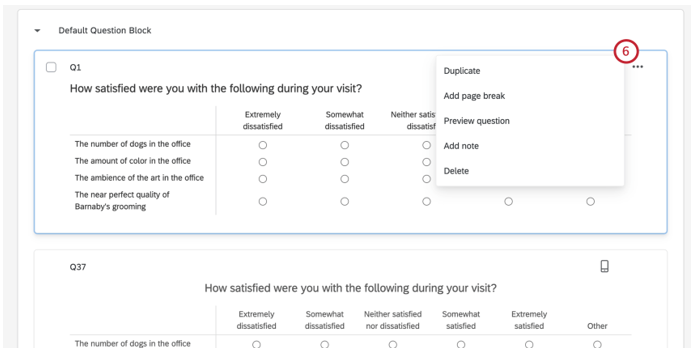
Actions: Lets you duplicate a question, add a page break after it (to separate pages so the respondent won’t see too many questions on a single screen), add a note, and preview questions.
Since there are more than a dozen different question types with a multiplicity of editing pane options for each, you’ll want to explore each of these more in the Creating Questions and Question Types support pages.
To Copy a question from a current survey
- Select the question.
-
Click the dots in the upper-right of the question.
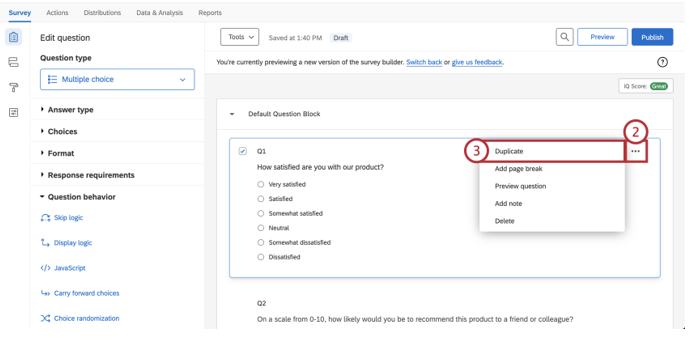
- Select Duplicate.
To Copy a question from a previous survey
-
Click Import from library.
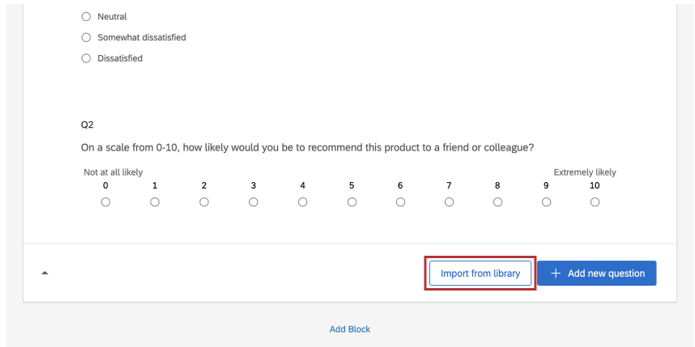
-
Select Copy from existing project.
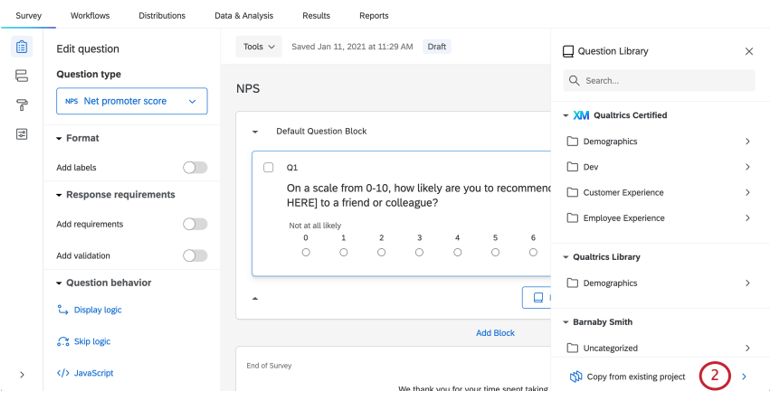
Note: You can also add questions from your library, use prebuilt Qualtrics content such as certified questions, or use the search bar to find what you need.
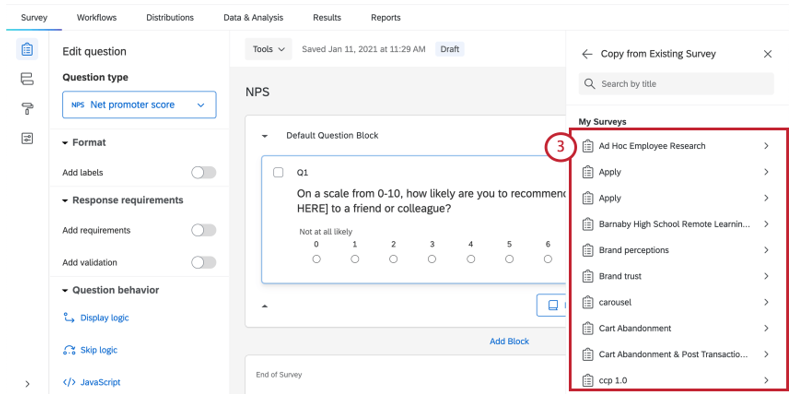
-
Select the survey you want to copy the question(s) from.
-
Use the checkboxes to select the question(s) you would like to copy.
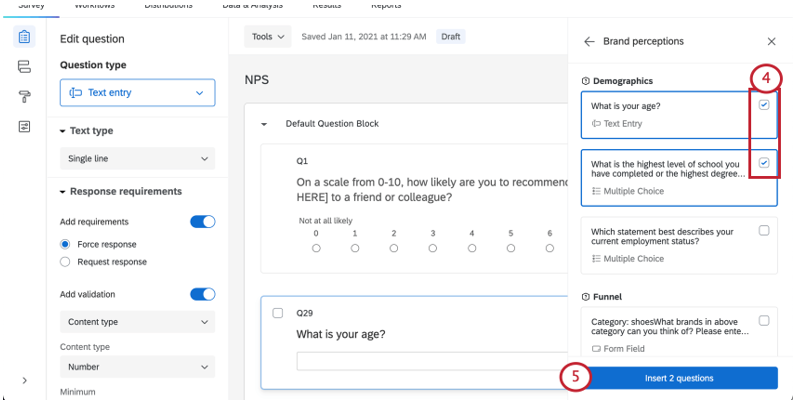
- Click Insert question(s).
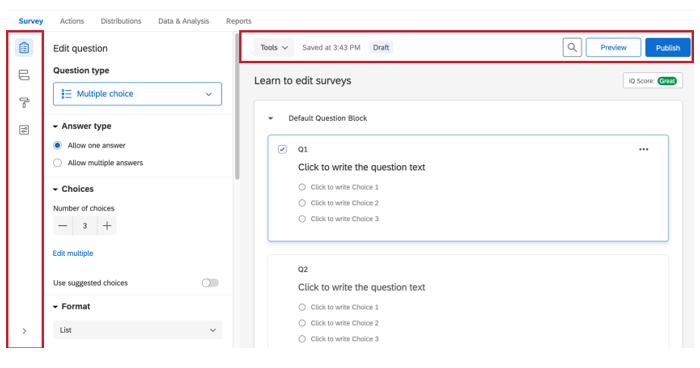
Survey Toolbar and Navigation Basics
The toolbar along the left manages your survey’s design options, security settings, and logic structures (i.e., Survey Flow). The toolbar along the top also lets you preview, publish, and search your survey.
Survey Flow
The Survey Flow section gives a block-level view of your survey and details the order in which blocks are displayed to your respondents. From here you can customize where respondents go in your survey, what they see, and what they don’t see.
You can perform simple tasks like rearranging blocks, or you can add elements like branch logic that directs and personalizes your respondents’ survey experience.
By selecting Add Below or Add a New Element Here in the Survey Flow, you can continue to customize your respondent’s path through your survey by adding randomization, authenticators, web services, or new branch logic.

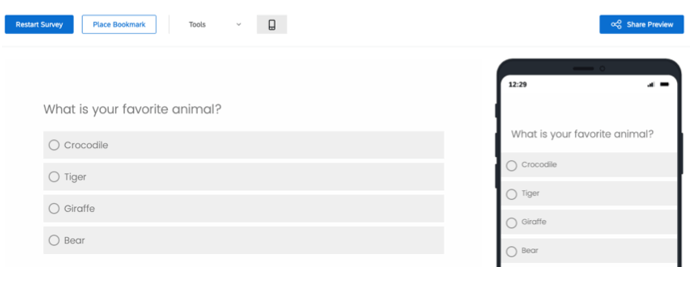
Preview Surveys
Once you have finished building your survey, you can preview it to ensure that everything is working the way you want by clicking Preview in the top-right of the Survey tab.
In the preview survey mode, you can answer questions and move through the survey the same way your respondents would with a real link. The survey will look the same as in the real link, except you’ll have some additional options available at the top to help you test your survey; these options won’t appear in the real link.
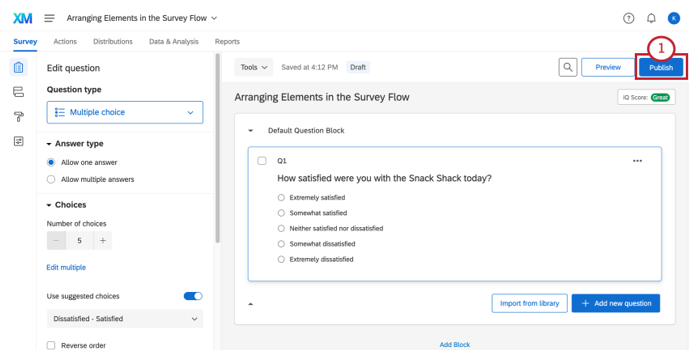
Publishing and Distributing a New Survey
When you publish a survey, it’ll be a little different if your survey is active and open to responses than if it is new. If your survey is new, the first time you publish will also activate a survey.
-
When you are ready to save your changes and present them to your respondents, click Publish.
-
Read the description and note that your survey is about to be activated. This means you will have to press publish after making changes, or else the active survey will look like the last published version.
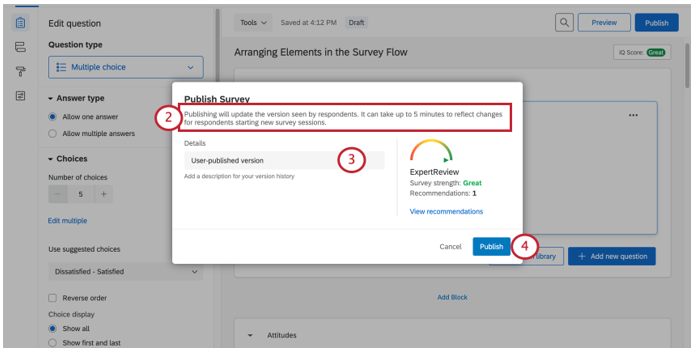
- In addition to publishing your survey, you are saving a new version of it. Add a description of the changes you’ve made. This can be whatever you like. Dates will automatically be stored with the version, so don’t worry about adding date labels.
- Click Publish.
-
Your survey has now been activated! On this window is the anonymous link. You can copy this by clicking Copy link.
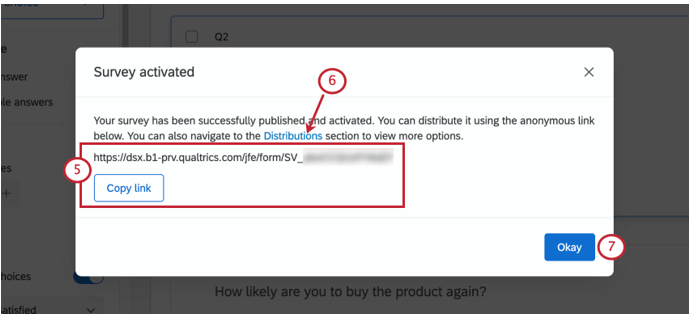
- If you plan on recording participant data with responses, emailing the survey through Qualtrics, sending through SMS, or something else, you can see all your distribution options by clicking Go To Distributions. This will bring you to the Distributions tab.
- If you aren’t ready to distribute yet, click Okay to resume editing your survey.
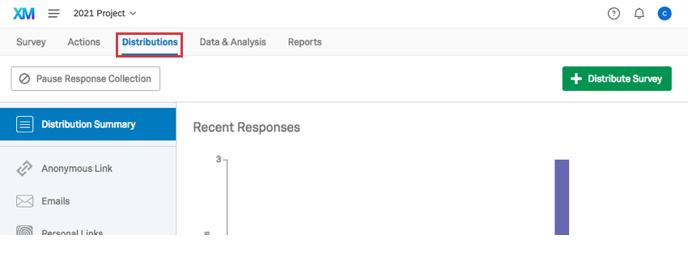
Distribution Tab
Select the Distribution Tab to:
- Activate a new survey
- Start collecting responses.
-
Monitor your response collection metrics.
Channels and Methods
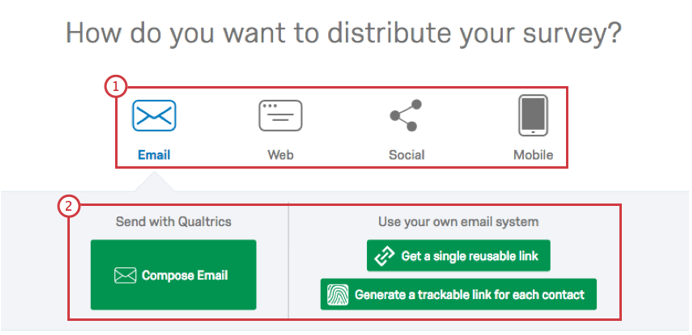
As the Distributions tab first opens, you’ll need to pick a distribution channel and a method within that channel to start collecting survey responses.
- Channels: Choose from Email, Web, Social, or Mobile.
- Methods: Pick from the available invitation options (e.g., email invites can be sent via the Qualtrics mailer or through your own email system). The options available here will change depending on the channel you have selected.