Quizzes
The quiz tool enables you to create quizzes using a variety of question types. Quiz questions can be shuffled and randomized. Use the quiz preview option to test the accuracy of content and grading before you release a quiz. In a preview, you can answer the questions, view allowed hints, submit the quiz, auto-grade answers, read feedback, and view report results.
Once you receive completed quizzes from learners, you can view quiz statistics such as grade distribution, grade average, question statistics, and user statistics on the Statistics page.
Use our Quiz Questions Converter tool to help you convert your Quiz questions to a format you can upload into Brightspace.
Creating a Quiz
To create a new quiz:
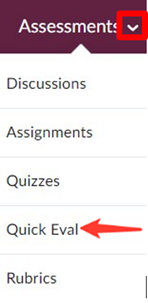
- On the navbar, click Assessments and select Quizzes from the dropdown menu.
- On the Manage Quizzes tab, click New Quiz.
- A new page will open with the basic set up of a quiz.


To learn more about Quizzes, expand the accordions below.
General Quiz Details

- Name (mandatory) – Give a name to the quiz.
- Description (optional) – Add a quiz description. Students will see this description before quiz availability.
- Due Date – The due date will appear in the course calendar as well as in the student’s Work To-Do widget.
-
Connect to Gradebook – Click on Not in Grade Book. Select Edit or Link to Existing.
- If your gradebook is set up, click on Link to an existing grade item, then select the appropriate item and click ok.
- If you’re gradebook is not completely set up, select Create and link to a new grade item, then click ok.
- Grade out of – The total grade point will adjust automatically as you add in questions.
Availability Date & Conditions

- Start/End Date and Time – Start and end date determine the time frame in which students can start the quiz. It is important to note that students will have the full amount of time to write the quiz once they’ve clicked start, regardless of the end date/time.
- Release Conditions – Release conditions can be set so students can’t access the quiz until another condition has been met (ex. completed a reading assignment or achieved a certain grade on another quiz).
- Special Access – Special Access allows quizzes to be available to only a select group of users or individualized due dates and/or time limits for certain users (i.e. Accommodations for extra time).
Timing & Display

-
Timing – To set a time limit for students to complete the quiz, select Set time limit. Then, enter an amount of time, in minutes, in the box under Time Limit. The timing can be customized further by clicking Timer Settings.
-
In the Timer Settings window, you will find two different Quiz Start options:
- Asynchronous: Timer starts when the learner launches the quiz
- Synchronous: Timer starts on the start date
-
And, three different options for When The Time Limit Expires:
- Automatically submit the quiz attempt: this will submit the Quiz as soon as the timer finishes.
- Flag as “exceeded time limit” and allow the learner to continue working: the quiz will not be submitted automatically when the timer finishes; however, it will be flagged as exceeding the time limit.
- Do nothing: the time limit is not enforced: This will not submit the quiz, nor will submissions be flagged if students exceed the time limit.
-
In the Timer Settings window, you will find two different Quiz Start options:

-
Paging – Select how you want the questions to be displayed in the quiz. You can also choose to select Prevent going back to previous pages, depending on the option you have selected. There are five options available:
- All questions displayed together (i.e. on same page)
- 1 question per page
- 5 questions per page
- 10 questions per page
- Add page break after each section
- Shuffle Quiz - This option will shuffle the entire quiz, including sections. If you wish to keep your sections in the same order but shuffle the questions within a section, select that option when creating/editing the section.
- Display – Here you have the option to Display hints and Disable Email, Instant Messages, and Alerts within Brightspace.
- Manage Header and Footer – Here you can set a Header and/or Footer for you quiz.
Attempts & Completion

- Number of Attempts – Manage the number of attempts students have to complete the quiz.
Evaluation & Feedback

- Auto-publish attempt results immediately upon completion – With this feature turned on, the auto-evaluate attempt results will be published and appear to learners. Note: If questions cannot be evaluated in the system (e.g. written response questions), those questions will be automatically scored with a zero until manual evaluation.
- Synchronize to Gradebook – With this feature turned on, the learner’s grade will be automatically published to the gradebook once it has been evaluated. This requires the quiz to be connected to the grade book
- Customize Quiz Results Display – Quiz results display determines how learners can view their published quiz attempt results, both immediately following submission, or later when reviewing their attempt. The primary view is shown to learners as the default, and Additional Views will override the Primary View based on the set parameters.
Notes on Availability and Timing
Asynchronous Quizzing
With asynchronous quizzing, the end date/time is the last possible time a student can start a quiz. Students will still have the full amount of time to write the quiz, as long as they begin the quiz in the availability window. For example, if a quiz set to start at 11am and close at 11:30am and the timing is set to 60 minutes, students can start the quiz anytime between 11 and 11:30 and will have the full 60 minutes to write the quiz.
Best practice is to set the End time for 15-20 minutes after the Start time and to let the students know that they can only start the quiz within that time frame.
Student who experiences internet issue after the End time will need to be readmitted to the quiz by the instructor through Special Access
Synchronous Quizzing
With synchronous quizzing, the start time is the actual start time for all students. If a quiz is set to start at 11 and lasts 60 minutes, it will open to everyone at that time and the clock will start counting down for all students. If a student starts the exam 5 mins late, they will have lost that 5 minutes and will only have 55 minutes to complete the quiz. This means that once the time is over, it's over for all students (i.e. pencils down).
In this case there is no need for an end date and time.
Time accommodations set up through Special Access will continue to work as normal for synchronous quizzing, but it's important to keep in mind that the start date and time will still be enforced, as described above. Students that are writing this type of exam (synchronous) through the Fred Smithers Centre should be made aware of this, by the instructor, prior to writing the exam as it's a new feature.
Add or Edit Questions
On the main page of the Quiz Editing view, you can add and edit your quiz questions.
There are several options to get questions into the quiz:
- Manual input of New Questions - Click Create New > New Question > select question type to set up the questions manually.
-
Question Pools – To use the question pool option, your questions must first be in the Questions Library of the course.
- Click Create New > Questions pool.
- Select Browse Questions Library to select the pool of questions.
- Then add a title, the number of questions and how many points per Question.
- Upload a CSV file – Use the Question Converter Tool or manually copy/paste your questions into a CSV file (Clicking on the link will download a sample CSV - Comma Separated Value file) and upload to Quiz by clicking on Add Existing > Upload a File.
- From Question Library – Use this option if you have already uploaded your questions to the Question Library. Click Add Existing > Browse Question Library


Once you have added you questions into the Quiz, click Save or Save and Close.
Question Types available in Brightspace
Brightspace offers the following types of quiz questions:
- Multiple Choice: Students select one answer out of multiple choices. Brightspace offers 4 answer slots by default, but choices can be easily added or deleted.
- True or False: Students select if a statement is True or False.
- Fill in the Blanks: Students write out a word or short phrase to complete a statement. By default, Brightspace offers 2 text boxes with 1 blank option in the middle, but text boxes and blanks can be easily added and deleted. Multiple answers can also be added for each blank.
- Multi-Select: Students select multiple answers out of multiple choices. Brightspace offers 4 answer slots by default, but choices can be easily added or deleted.
- Matching: Students choose answers to match a list of provided statements or key terms. It is possible to have multiple matches for each option on the list. Brightspace offers two paired matches by default, but question fields can be easily added or deleted.
- Ordering: Students order a list of options. The direction of ordering (first to last, lowest to highest, etc.) should be stated in the question.
- Written Response: Students write out a multi-sentence response to a question. Adding attachments, inserting images, and providing an HTML editor can all be enabled. These questions must be graded manually, and answer keys can be added to help evaluators.
- Short Answer: Students write out a word or short phrase in response to a question similar to fill in the blanks format, but the text box for the answer exists outside of the question or statement.
- Arithmetic: Students input a number value to answer an arithmetic question. Questions can be short calculations or word problems. Brightspace can generate random numbers for variables, then use formulae to calculate the correct answer. These variables can be given minimum and maximum values, decimal places, and step values. Units can be enabled, and their use graded. Adding images and attachments can be enabled.
- Significant Figures: Students input a number value to answer an arithmetic question but may lose points if they do not provide correct significant figures. Functions very similarly to Arithmetic questions.
- Multi-Short Answer: Students write out multiple short answers in response to a single question similar to short answer format, but with more text boxes in the answer field.
Most question types will have a few advanced options available. These can be accessed by clicking the Options drop down menu while creating a question. If there is no Options drop down menu, such as in short answer or ordering, then any applicable advanced options can be found at the bottom of the question creation screen:
- Add Feedback: This option enables a feedback response for students, for each answer. If a student selects a certain answer, they will receive the associated feedback.
- Add Hint: Hints are displayed if they are enabled in the quiz settings
- Add Short Description: This could be used as an introduction for a question, or to provide context/further information.
- Add Custom Weights: This option is only available for certain questions, such as multiple choice, and allows instructors to give points for different question answers. For example: if the best answer were "A", but "B" could be an acceptable answer in some scenarios, it would be possible for an instructor to assign partial points to "B".
- Enumeration: The enumeration allows questions to be listed by different numbering or lettering options (e.g., A, B, C or 1, 2, 3).
Creating Question Sections
Quiz sections can be created to organize question groups in your quiz, or to shuffle a specific set of questions. This can be particularly useful for longer quizzes with different types of questions. You can choose to shuffle the questions within a section, allowing for randomization of some sections while others appear in your specified order.
- On the Quizzes page, click on the name of the quiz you want to edit
-
In the Questions section, click on Create New, then select Section.

-
Enter a Section Title and a description (optional). Customize the following settings:
- Hide Section Title from learners: Select this box to hide the section title from students as they take the quiz.
- Hide Section Text from learners: Select this box to hide the text entered in the “Section Text” text box.
-
Shuffle questions in this section: Select this box to shuffle the order of the questions within the section. This will not shuffle sub-sections.

- Click Save. If you are creating multiple sections, select Save and New or Save and Copy.
-
Click the checkbox next to the questions you want to add to a section.

-
Click Move To and select Section, then choose the destination section. You can also drag and drop a question into the section using the move icon
 that appears when you hover over the question.
-
Questions in a section will appear below the section name in an indented list.

- When editing is complete, click Save and Close.
Adding Page Breaks
- On the Quizzes page, click on the name of the quiz you want to edit.
-
Click on the Timing & Display tab to expand it. Under Paging, you have 3 options:
- All questions displayed together (i.e. on same page)
- 1 question per page
- 5 questions per page
- 10 questions per page
- Add page break after each section
- Select an option.
- Click Save and Close.

Question Pool
Question pools allow you to create quizzes with randomized questions while using the new Question Creation Experience. Question pools are an effective way to prevent cheating on quizzes as they ensure each learner receives a unique set of questions. Once you have entered a title, the number of questions to select, and the points per question for your question pool, you can browse the Question Library or existing quizzes, surveys, and self-assessments, to select the desired questions. It is recommended that you organize your Question Library to include a section for each quiz. This makes it easier to locate the correct questions during the question pool creation process. A dynamic preview is automatically generated when questions are imported into a question pool. The preview allows instructors to quickly get an idea of how the question pool appear to learners when taking the quiz.
If you are using the new quiz creation experience:
- On the Quizzes page, click on the name of the quiz you wish to edit.
- Click Add/Edit Questions.
-
From the Add button, click Question Pool.

-
Enter a Question Pool Title, the Number of Questions to Select, and the Points per Question.

- Click Browse Question Library.
- Select from the existing questions in the Question Library and click Import.
- Click Save and Close when finished.
Shuffling Questions in a Quiz
There are several different options to shuffle questions in a quiz:
-
Shuffle all questions – On the Timing & Display tab, select Shuffle questions and sections within the quiz.

-
Shuffle questions within a section (but keep sections in order) – When creating a new section (Create New > Section), select Shuffle questions in this section.

- Create a question pool – Question pools are an effective way to prevent cheating on quizzes as they ensure each learner receives a unique set of questions. To use this option, you must first have your questions in the Question Library. To use this option in your quiz, click Create New > Question Pool.
Previewing allows you to see what a student would see while taking the quiz:
- On the Quizzes page, click on the arrow next to the quiz you want to preview.
-
In the drop-down menu, select Preview.

- Choose whether you want to bypass restrictions. If the Bypass Restrictions checkbox is selected, any availability restrictions for the quiz will be bypassed to allow you to preview the quiz.
- Click Start Quiz! to begin previewing your quiz.
- At any time, you will be able to click the Exit Preview button and return to the Quizzes page.
Making your Quiz Visible to Students
First, determine if a quiz is visible to students. On the Quizzes page, quizzes that are hidden will have an icon of a crossed-out eye next to them  . To make hidden quizzes visible.
- On the Quizzes page, click on the arrow next to the quiz you want to edit.
-
From the dropdown menu, select Make Visible to Users.

To hide a quiz:
- On the Quizzes page, click on the arrow next to the quiz you want to edit.
-
From the dropdown menu, select Hide from Users.

This is useful when a student has attempted a quiz but has not, for whatever reason, clicked the Submit button. You can submit their attempt for them so that it can be graded:
- On the Quizzes page, click on the arrow next to the quiz you want to edit.
- Select Grade from the dropdown menu.
-
Under the Users tab, click Show Search Options.

-
Under the Restrict to drop-down menu, select Users with attempts in progress.

-
Click the magnifying glass icon next to the search bar. This will pull up a list of students who have attempts in progress.

-
Click the icon of two people next to an attempt to enter the quiz as the user.

- When asked if you want to enter the quiz as the user, click Confirm.
- Once in the quiz, click Submit.
- When the quiz submission confirmation page pops up, click Submit Quiz.
Managing a Quiz
By default, after students submit their quiz, they are shown the date, their score, and a message that confirms that their quiz has been successfully submitted. You can customize this view to allow them to see the quiz questions, quiz answers, class average, and the distribution of scores.
- On the Quizzes page, click on the arrow next to the quiz you want to edit.
-
Select Edit from the dropdown menu.

-
Expand the Evaluation & Feedback Tab. Under When published, display to learners: Attempt Grade will be selected automatically. You then have 2 options:
-
To enable the settings immediately after the student submits - Click on the drop-down menu and select from the following options:
- Incorrect questions only, with correct answers.
- Incorrect questions only, without correct answers.
- All questions, with correct answers.
-
All questions, without correct answers.

- To set up a timed release of Questions/answer – Click on Customize Quiz Results Displays. Click on Additional View. Add a Display date and time. Select the Grade checkbox, so that the students can see their grade.
-
In the Questions drop-down menu, select the option you wish to use, then select how you want to display the answers.
-
All questions
- Show the correct answers to the displayed questions.
- Show the learner’s responses to the displayed questions.
- Show the learner’s grade for the displayed questions.
-
Incorrect questions only with learner’s responses
- Show the correct answers to the displayed questions.
- Show the learner’s grade for the displayed questions.
-
Correct Questions only with learner’s responses
- Show the correct answers to the displayed questions.
- Show the learner’s grade for the displayed questions.
-
All questions
-
To enable the settings immediately after the student submits - Click on the drop-down menu and select from the following options:
- Click Create when you're finished.
- Click Save and Close when done editing.
The Attempt Logs track detailed quiz attempt events per user. From the Overview tab you can view quiz attempts based on Quiz Entry time, Quiz Completion time, Quiz Attempt Deleted, and Quiz Attempt Restored.
From the Detailed tab you can view the following quiz attempt events: Quiz Entry and re-entry times, Response Save time, Page Movement time, Quiz confirmation screen / completion time, and IP Address when each event occurs.
To view Attempt Logs for quizzes
- On the Quizzes page, click the arrow next to the quiz of interest, and select Attempt Logs.
- From the Overview tab or the Detailed tab to view all Attempt events for the quiz.
- Select Restore for the quiz attempt you want to restore.
-
To filter the Overview tab, click on Quiz Entry, Quiz Completion, Quiz Attempt Deleted, or Quiz Attempt Restored. Please note: clicking on these filters toggles the selection to ‘on’. If multiple filters are on at once, the results will include attempts that satisfy ANY of the selected conditions. To toddle the filter to ‘off’, click on the text again.

- In the Detailed tab, you can see all events related to every attempt made on the quiz.
View Detailed Quizzes Event Log for Individual Students
To view a detailed log of an individual students quiz events, go to:
- On the Quizzes page, click the arrow next to the quiz you want to grade.
-
Select Grade from the dropdown menu. This will open a new page.

- Select the attempt that you wish to look at, by clicking on attempt #.
- Near the top of the page, click on Quizzes Event Log.
- A pop-up window will open showing details about the student, when the quiz was written, details on the time each question was saved, how many characters were typed (for written response), if they had internet connectivity issues, and when they quiz was submitted.


Restore deleted quiz attempts in the Attempt Logs
You can restore deleted quiz attempts for learners in the quiz's Attempt Logs Overview tab.
Note:A deleted quiz attempt can only be restored if the learner does not have another quiz attempt in progress.
The Restore button only appears for the latest deleted quiz attempt.
To restore a deleted quiz attempt:
- On the Quizzes page, click the arrow next to the quiz of interest, and select Attempt Logs.
-
From the Overview tab, click the Quiz Attempt Deleted filter.

- Select Restore for the quiz attempt you want to restore.
Question Library
Accessing the Question Library
-
On the navbar, click Assessments and select Quizzes from the dropdown menu.

-
Select the Question Library tab.

-
The Question Library window has many features:
- New: add a new question or section to the library
- Import: upload a file or browse existing quiz questions not already housed in the library.
- Move, Delete, Order, Edit Values: Select questions or sections to move them, delete them, change their order, or edit their point values.
- Select: Use the checkboxes to select individual questions, whole sections, or all items in the Question Library.
- File Explorer View: Shows the nesting of sections within the Question Library. Click on the names to navigate easily between folders.
-
Done Editing Questions: Click this when you are finished with the Question Library and it will return you to the Manage Quizzes tab of the Quizzes page.

Questions can be organized into sections and subsections in the Question Library. Organizing your questions in sections helps make your questions easily findable when you are creating a quiz.
Add a section to your Question Library to organize your questions in a folder
-
On the Quizzes page, click on the Question Library tab.
- Click New. This will open a dropdown menu.
-
Select Section. This will take you to the section creation page.

-
Enter a Section Title (Required). Choose something that will help you identify this section when you are importing the questions to a quiz. From this screen you can also choose to add Section Text for a description, to Hide Section Title from learners, to Hide Section Text from learners, and to Shuffle questions in this section (all Optional).

- Click Save. If you are creating multiple sections at the same time, click on the arrow and select Save and New or Save and Copy.
-
On the Quizzes page, click on the Question Library tab.
- Click New. This will open a dropdown menu.
- Select the question type. This will take you to the question creation page. (For an overview of question types, see the Question Types Available in Brightspace section).
- Enter the question information.
-
When finished with the question, click Save to return to the Edit Quiz menu. If you are adding multiple questions, click the arrow next to Save and choose Save and New.

-
On the Quizzes page, click on the Question Library tab.
- Click on the section folder where you want to add a question.
- Click Import. This will open a dropdown menu.
-
Select Browse Existing Questions.

-
Click the Source dropdown menu and select an existing quiz. You can also use the Filter dropdown menu to search by question type or use the Sort dropdown menu to order the results by Question Type, Points, or alphabetically by Title or Text. You can also use the Search option to search for keywords of in questions.

- Click the checkboxes next to the questions you want to import.
- Click Import.
Additional Resources
Enable Special Access for Specific Students
- On the Quizzes page, click on the arrow next to the quiz you want to edit.
-
Select Edit from the dropdown menu.

- Expand the Availability Dates & Conditions tab.
-
Under the Special Access section, select Manage Special Access.

-
Select from the two options, then click Add Users to Special Access. Options:
- Allow selected users special access to this quiz – The selected user will have extended time or alternate availability, as required.
-
Allow only users with special access to see this quiz – only users with special access will be able to access the quiz. The option is great if a learner is writing a make up exam/quiz and you have created a new exam/quiz. Only that learner will see it.

- Scroll to the bottom of the page and select the user you want to have special access. If you do not see the user in the class list, move to the next page of users, or change how many users appear on each page. Please Note: If you move to the next page of users, it will remove any information you have already entered. It is best to select all the applicable users before entering any other information.
-
Input the special restrictions for at learner. You can edit the availability dates, due date, timing, and/or the number of attempts.

- Click Save.
- Click Save and Close when editing is complete.
Setting Course Level Accommodations for the Classlist
From your course home, Click Course Tools from the top navbar and select Classlist from the drop-down list.
Click the drop-down arrow next to the name of the student you want to allow special access to and click Edit Accommodations.


From the Pop-Up window you can allow right click and modify timing for the student by clicking the checkboxes. Click the blue Save button when done.

Note: The changes made here will apply to all quizzes in the course for the student
Setup Quiz Reports
- On the Quizzes page, click the arrow next to the quiz name.
-
Select Setup Reports from the drop-down menu.

-
Click the Add Report button.

-
On the Add Report page, enter the following:
- Enter a Report Name.
- Select a Report Type. Once a report type has been selected, you will be able to customize the report content using the checkboxes. NOTE: There are 5 types of reports (Question Statistics; Question details; Users Statistics; Attempts details; User Attempts), you can only select One type at a time. If you need more than one type of the reports, go back to the reports setup page and click on Add report again.
- Set a Release Date (optional). The default is for the report to be released immediately.
- Under Release Report to, select the roles that you want to release the report to.
- Click Save.
- Add another report or click Save and Close.
View Quiz Reports
- On the Quizzes page, click the arrow next to the quiz name.
-
Select View Reports from the drop-down menu. This will open a new page.

-
In the Reports List page, click on the name of the report you want to view.
There are three options to view the report:
- HTML file: Viewing the HTML file is recommended to get an overview of the report, as this system generates charts for better visualization.
- .CSV file: will be downloaded directly when clicking generate CSV.
- Excel file: will be downloaded directly when clicking generate Excel.
What type of Report do I need?
| Case | Report type |
|---|---|
| I need to identify problematic as well as effective questions in a quiz. | Questions Statistics report |
| I need to identify how many learners choose each possible answer | Questions Details report |
| I need to analyze all answers in a quiz | Questions Details report |
| I need to evaluate how learners are performing in a quiz | Questions Details report |
| I need to evaluate how learners are performing in a quiz | Users Statistics report |
| I need to see the completion time for each attempt | Attempt details report |
| I need to see which learners took a quiz | User Attempt report |
Report Type Options
There are five report types, and each includes a different set of information. You can set release dates for each report.
Question Statistics:
Shows the average score on questions by points and percentage. Unlike a report created using the Questions Stats tab on the Quiz Stats page, you can choose to exclude the class average, score distribution, bonus questions, or the Out Of value.
Question Details:
Contains all of the answers provided for each quiz attempt, how many students chose each possible answer, the total number of responses, and the average score on each question. Unlike a report created using the Question Details tab on the Quiz Stats page, you can choose to exclude the level of difficulty, text responses, or bonus questions. You can also choose to include private comments added to the report.
Users Statistics:
Shows the class average, score distribution, and the grade of each user. Unlike a report created using the User Stats tab on the Quiz Stats page, you can choose to exclude the class average, score distribution, or Org Defined ID (A-number).
Attempt Details:
Includes the Org Defined ID (A-number), username (s-number), first name, and last name of each user. Detailed information about each question. The students’ responses for each question organized by attempt, including how long each attempt took. You can set a start or end date for which attempts to include.
User Attempts:
Includes the Org Defined ID (A-number), username (s-number), first name, and last name of each user. The students’ score for each question in points and percentage organized by attempt, including how long each attempt took. You can set a start or end date for which attempts to include.
Grading Quizzes
Before setting up grading, verify that the quiz is linked to a grade item. A quiz with a linked grade item will have a ribbon icon next to its name on the Manage Quizzes tab of the Quizzes page. To see the grade item linked to the quiz, hover your cursor over the ribbon icon

Manually Grading Quizzes
Grading Quizzes by student Attempt
- On the Quizzes page, click the arrow next to the quiz you want to grade.
-
Select Grade from the dropdown menu. This will open a new page.
-
Under the Users tab you will see a list of student quiz attempts. You can also access attempts under the Attempts tab.

-
Click the attempt for the student you want to grade. A new page will open where you can grade the attempt and enter feedback. You will see questions that are automatically graded indicated next to the question Score. A red X indicates the student did not answer the question correctly. A blue arrow indicates the correct answer.


-
Enter a score in the Score field for each question. Any question that is not automatically graded will be required to have a score entered. By default, a 0 is awarded to the student for any non-auto-graded questions.

- The Final Score will automatically update. You have the option to override the final calculation by entering a score in this field.
- If you want to add feedback, click Expand Question Feedback. A feedback box will appear where you can enter feedback specific to the question. This feedback will be visible to students in the grade book.
- Click Publish to make the updated grade(s) visible to students. Click Save Draft if you want to publish the grade at a later date. Continue to the next student by toggling to a new attempt using the navigation arrows on the top-right side of the page.
Grading Quizzes by Question
- On the Quizzes page, click the arrow next to the quiz you want to grade.
-
Select Grade from the dropdown menu. This will open a new page.
- Select the Questions tab.
-
You can grade questions in two ways:
- Grade Individual Responses: grades one quiz question at a time.
-
Update all attempts: grade all quiz questions at the same time.

To grade an individual response:
-
Click Grade Individual Responses. You have two additional options for grading an individual response.
- Blind Marking: Grade responses display in a shuffled order.
- View Graded Responses: Previously graded responses appear as part of the response queue.
- Click on a question name.
- Read through the student’s response and enter a Score.
- If you want to add feedback, click Expand Question Feedback. A feedback box will appear where you can enter feedback specific to the question. This feedback will be visible to students in the grade book.
- Click Save.
- At the top there will be a numbers and arrows to toggle to the next student. Continue grading until complete.
To update all attempts:
- Click Update all Attempts.
- Click on a question name.
-
You will be taken to the Update All Attempts page. Under Grading Type, choose one of the following options:
- Give points to all participants – If you would like to give points to all participants for a specific question, select this option.
- Give points to attempts with specific answer – If you would like to give points to all participants that chose a specific answer, select this option. (Note: Depending on the question type, you may need to select the answer from a drop-down menu or enter the answer in a text box.)
- Enter the number of points in the text box.
- Enter comments in the HTML editor (optional)
- Click Save.
- Click Yes to apply the points. You will see a new entry in the Modifications Log.
Grading Quizzes with Quick Eval
Quick Eval is an easy way to see an overview of ungraded items that have been submitted. It includes submissions of Discussion posts, Assignments, and Quizzes.
- Click on the Assessment tab on the navbar.
-
Select Quick Eval from the dropdown menu.
- You will now see the Quick Eval Dashboard. From your dashboard, you can view Assignment, Discussion, and Quiz submissions.
-
You can view the Quick Eval list by Submissions or Activities. Click on each of these options to toggle between the view.
- Submission: view a list of ungraded student submissions. The list can be sorted by clicking on the First Name, Last Name, Activity Name, and Submission Date headings.
-
Activities: view a list of activities with ungraded submissions. The list displays the number of New Submissions, and the percentage of Completed, Evaluated, and Published submissions.

-
Navigate to the submission(s) you want to grade in the Quick Eval list.
- If you are viewing the Submissions list, click on the name of the student you want to assess.
- If you are viewing the Activities list, click on the number over New Submissions to view only the ungraded submissions, or click Evaluate All or Submissions List to view all graded and ungraded submissions.
- Click on the attempt you wish to grade.
- A new page will open where you can grade the attempt and enter feedback.
- When you are finished grading, click Update.
View a Quiz Attempt in Progress and Submit on a Student’s behalf
Viewing an attempt in progress:
- On the Quizzes page, click the arrow next to the quiz you want to grade.
-
Select Grade from the dropdown menu. This will open a new page.
-
Under the Users tab, click Show search options.

-
In the Restrict to drop-down menu, select Users with Attempts in Progress.

-
Click the magnifying glass icon in the search bar.
- Click on the student’s attempt to view the attempt in progress.
Submitting an attempt in progress:
- Follow steps 1-5 of Viewing attempts in progress.
- Click the icon of two people next to the attempt in progress.
- You will be prompted to confirm that you want to enter the quiz as a user in the pop-up window. Click Yes.
- You will now see the first page of the student’s quiz attempt. Click Next page to navigate to the other pages.
- When you are ready to submit on the student’s behalf, click Submit Quiz.
-
You will see a Quiz Submission Confirmation page. Click Submit Quiz.

Regrading a Quiz
If you need to adjust a quiz question after the quiz end date, you will need to re-grade the quiz. For example, you will need to re-grade if you notice the wrong answer was set up as the correct answer for an auto-graded question (i.e. multiple choice, true or false), or if you want to award all students a certain grade for a quiz question.
If you have a question that needs fixing after your students have completed the quiz (i.e. a question has “A” as the correct answer when it should be “B”), you have the following options:
- Give points to all participants – Give the same point value to all participants for a specific question, regardless of how they answered the question.
- Give points to all participants with a specific answer – Give maximum points to all participants that selected a specific answer.
To Regrade a quiz question, follow these instructions:
- On the Quizzes page, click the arrow next to the relevant quiz.
-
Select Grade from the dropdown menu.
- Click the Questions tab.
-
Select Update all attempts.

- Click on the quiz question you want to edit.
-
A new Update all Attempts page will open. Next, select the Grading type you want to use:
- If you would like to give points to all participants for a specific question, regardless of how they answered the question, continue to the Give points to all participants section below.
- If you would like to give points to all participants that answered a question with a specific answer continue to the Give points to all participants with a specific answer section below.
- Fill out the number of points to award (and, in the case of points awarded for a particular answer, indicate the relevant answer).
- If you want to leave a comment, enter it in the comment box.
- Click Save.
- You will be prompted to confirm that you want to change the grade values for these attempts. Click Yes.
- You will see a new entry in the modifications log. If you need to adjust more questions, click Go Back to Questions.
Brightspace Quiz Question Generator
Generating Quiz Questions with the Brightspace Quiz Question Converter
Importing Quiz Questions into Brightspace
-
On the Quizzes page, select the Manage Quizzes tab.
- Click on the name of the quiz you want to edit or click New Quiz. This will open the Edit Quiz page.
-
Select the Properties tab.

- Under the Quiz Questions section, click Add/Edit Questions.
- Click Import. This will generate a dropdown menu
-
Click Upload a File. A new window will appear.

-
Drag and drop the .csv file you want to add or click Browse Files to find the file on your computer.

-
When the file is done processing, a green checkmark will appear with the words Upload Complete below. There will also be a message showing how many questions were found in the .csv file

-
Ensure you see the expected number of questions, and click Review to see which questions were found. You can preview a question by clicking on the magnifying glass icon.

-
Select the questions you want to import by clicking the checkboxes next to each question, or select all by clicking the top-most checkbox.

-
Click the Import button.

The questions will now be added to the quiz.


