Course Tools
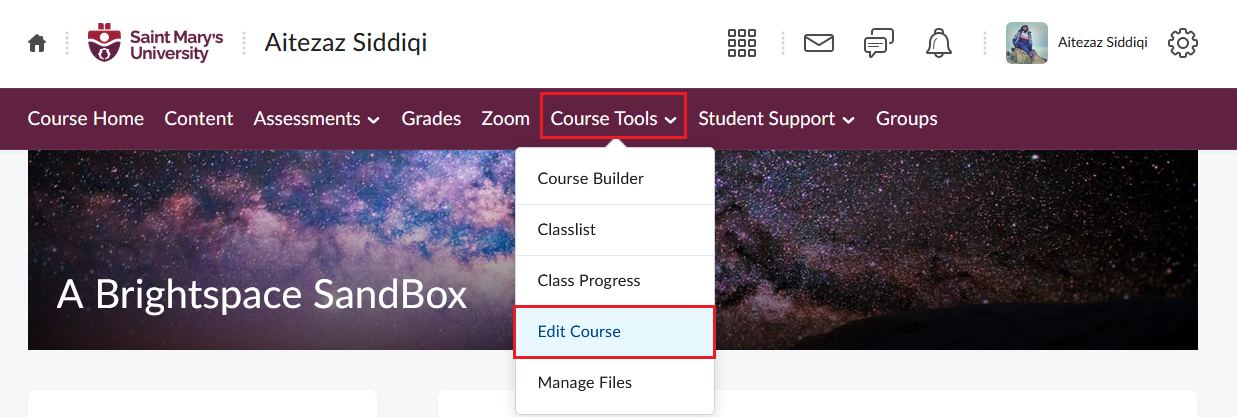
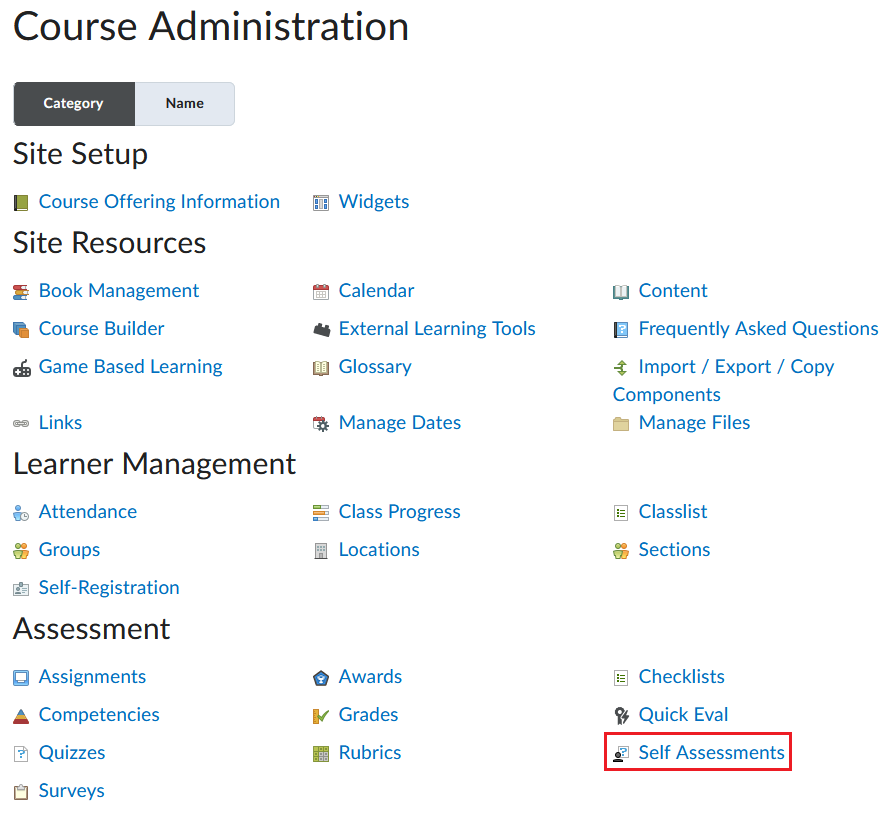
The Course Administration page gives an overview of all things related to courses. You can get to the Course Administration page through the Edit Course button found in the Course Tools drop-down.
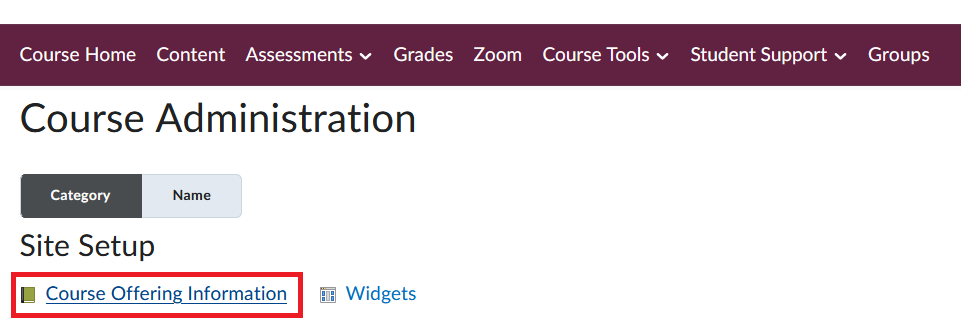
Course Offering Information
The Course Offering Information page has the primary options of setting up a course. Here you can change your course start and end dates and add a banner image to your course homepage.
To find the Course Offering Information page, click on Course Tools from the Navbar of your course, select Edit Course, then select Course Offering Information (near the top of the page).
How to change course Open/Close Date
The start (open) and end (close) date of a course can be changed through the Course Offering Information button in the Course Administration page. You can then scroll to the bottom to see the options for changing the dates.
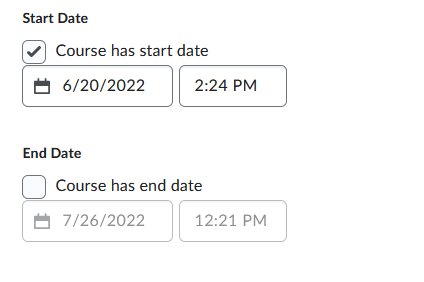
Note: Leaving the Course has a start date checkbox blank means immediate access to course, and leaving the Course has an end date checkbox blank will leave the course open forever. Leaving both the checkboxes blank will make the course be immediately accessible and remain open until end of time.
How to make a course visible in Discover (for self-enrollment)
Under Course Offering Information there is a checkbox option Make this course available in Discover so Learners can self-enroll.

Enabling this checkbox will make the course appear in the Discover button in the Brightspace homepage.
Overview
The Class Progress tool can help instructors keep track of student progress in a course by measuring the completion of different progress indicators.
Progress reports are available for the following progress indicators: Summary, Grades, Objectives, Content, Discussions, Assignments, Quizzes, Checklist, Surveys, and Login History.
To view the Class Progress tool:
- Go to your course.
- From the navbar, click Course Tools, and select Class Progress.
- The Summary tab displays.
Import/Export/Copy Components
The Import/Export/Copy Components page enables users to import, export, or copy all or specific components from one course to another in the same Brightspace system or to a completely different Brightspace system.
To go to the Import/Export/Copy Components page, click on Course Tools > Edit Course, then select Import/Export/Copy Components from the Site Resources sub menu.

How to Copy Components from a previous SMU Course
To copy components from a previous SMU course:
-
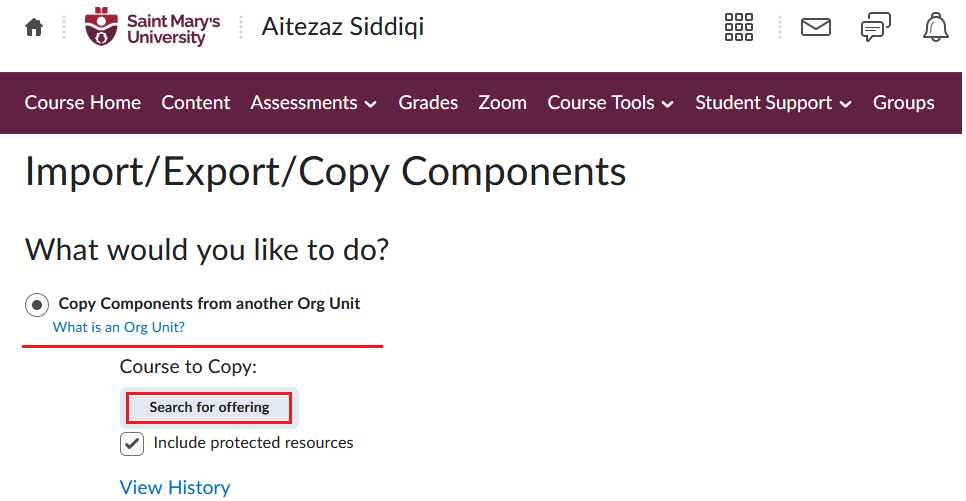
Click on the Import/Export/Copy Components button and choose the first option – Copy Components from another Org Unit.
-
Click on the Search for offering button to look up a previous course offering. You will get a new pop-up window where you can search for a course by name (offering name), department, semester, or CRN. If you click on the Show Search Options, you will get more options to filter your search criteria’s.
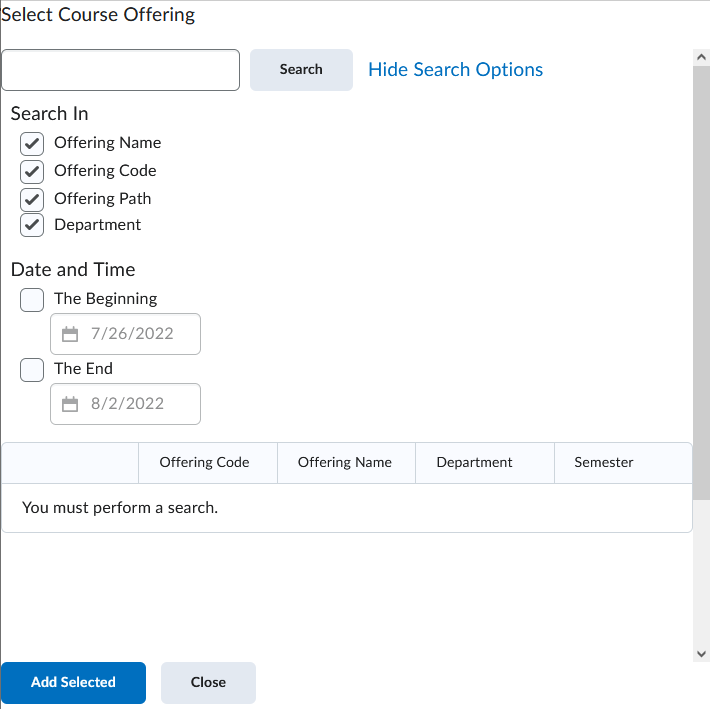
- Once the specific course is found, click on the Add Selected button in the bottom left corner to add the course to the copying process.
-
Now, you can choose to either Copy All Components or Select Components.
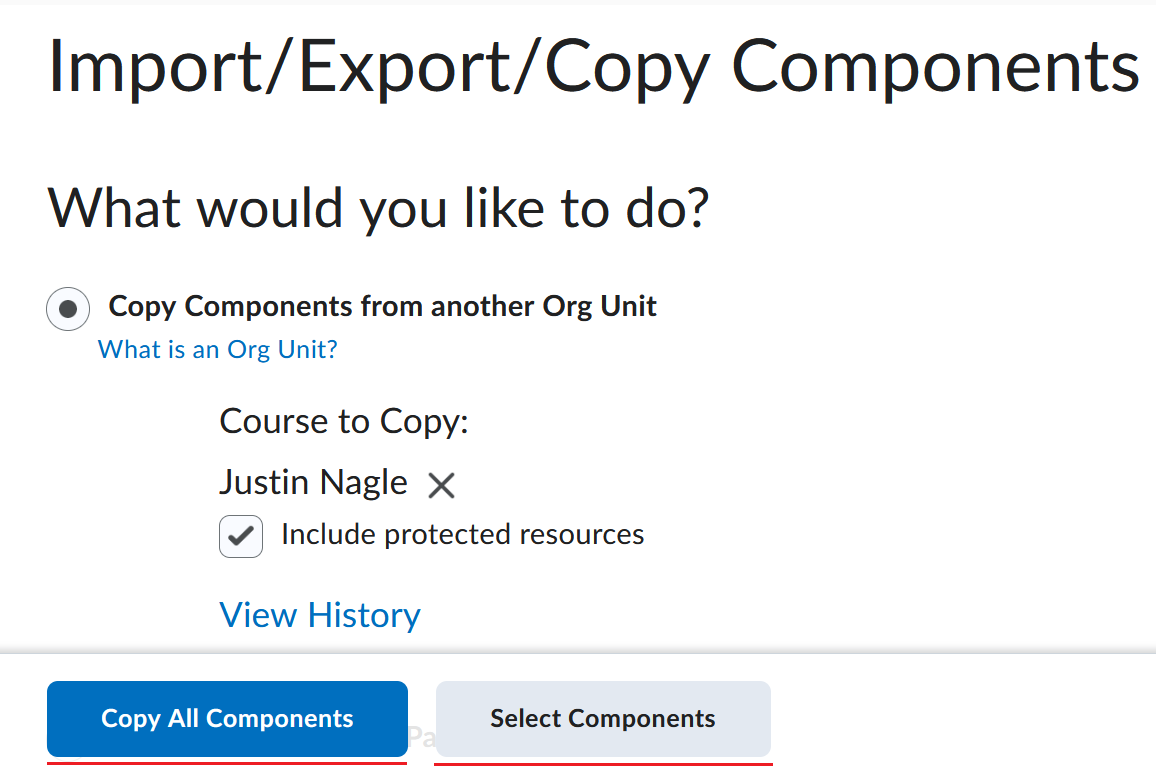
- To copy the entire course, select Copy All Components. This will automatically start copying all the components immediately.
-
To copy on some parts of the course, choose to copy Select Components.
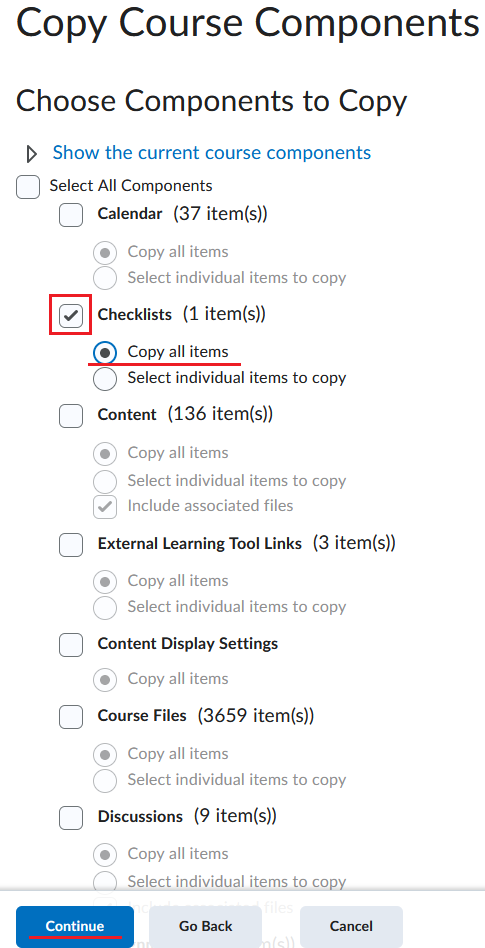
- On the next page select the specific components you want to copy by clicking on the check box of the component. You can also Select individual items to copy under specific components to only copy some part from that component. (ex. You can choose to only copy some items from Content, or only specific quizzes). Click continue when you are done.
- Select the individual components on the next page, if needed. Once the components are selected, click Continue.
-
You will then be given the option to Offset Dates to change the dates of the components.
Note: Changing the dates in this option is not recommended.
- Click Finish.
How to Import a course from another Brightspace Instance (ex. Dal or NSCC, etc.)
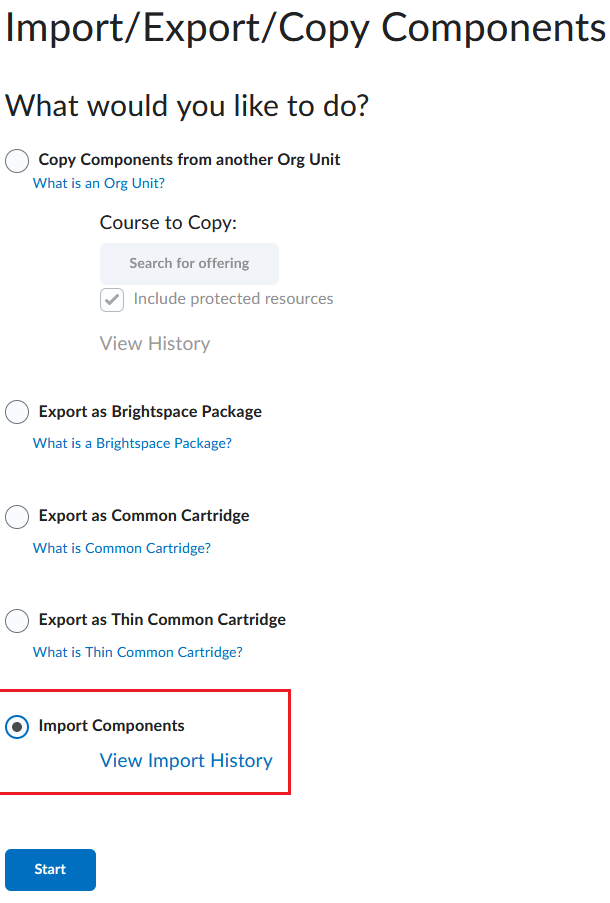
To import components from another Brightspace instance, click on the Import/Export/Copy Components button and choose the Import Components option and then Start.
If you have a course package, select that file after clicking Upload. Then, you will have the option to Import All Components or Advanced Options….
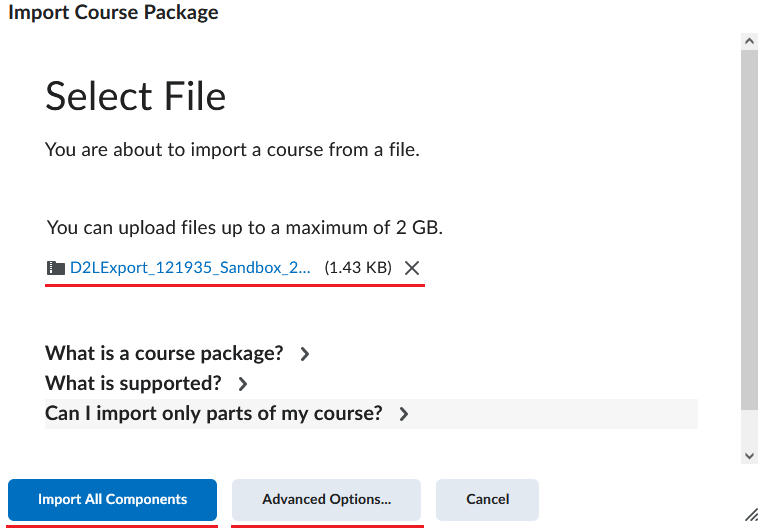
The Import All Components will import all the components. Once you click this button, it will start importing immediately without asking for any confirmation.
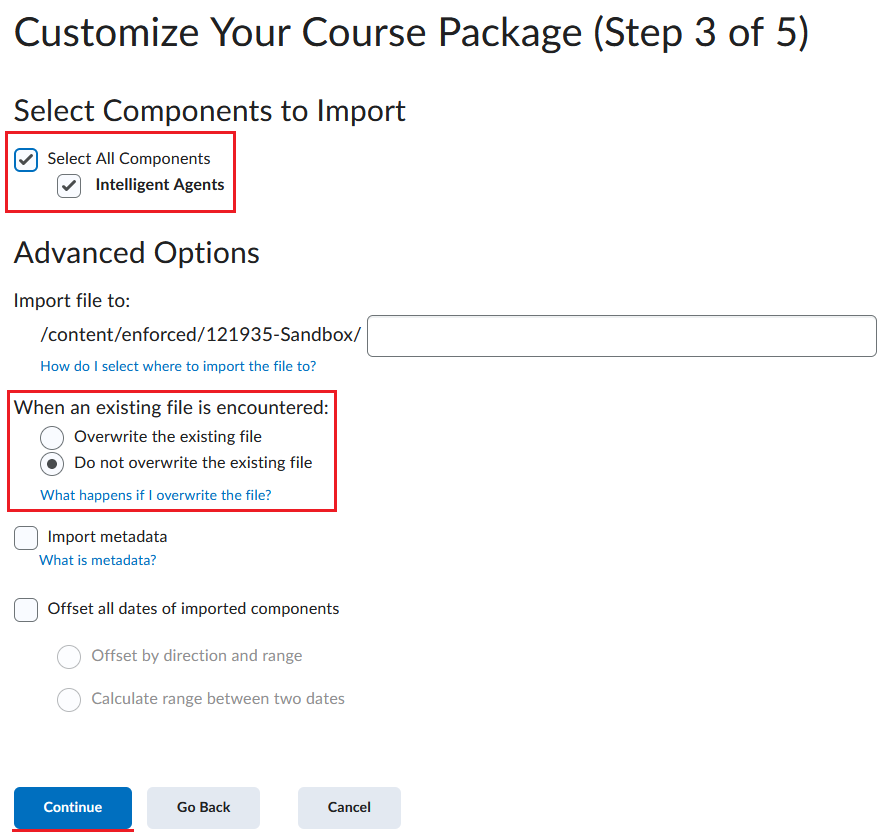
The Advanced Options… will give you option to import specific components, but it is going to read the course package first. You can still check the Select All Components checkbox to select all components. You will also have the option to Offset Dates to change the dates of the components. Note: Changing the dates in this option is not recommended as it is somewhat confusing.
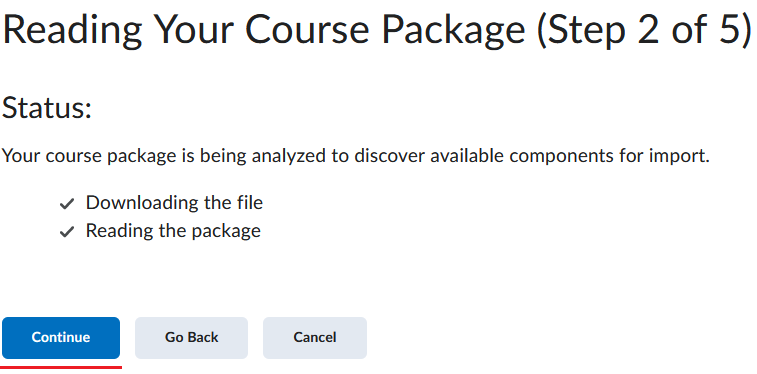
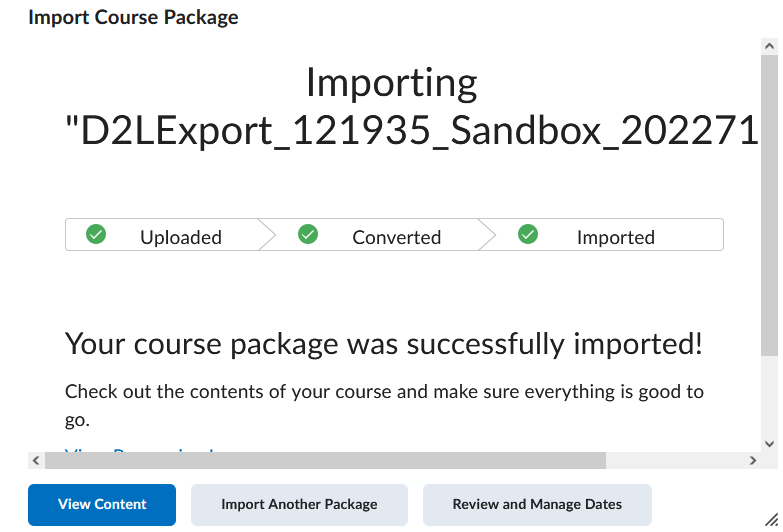
Once the importing process is complete, you will receive an import successful message in a new window.
Note: You would need a Brightspace package, Common Cartridge, or Thin Common Cartridge file to import it to Brightspace. The file you want to upload must be less than 2 GB otherwise you cannot upload it on Brightspace.
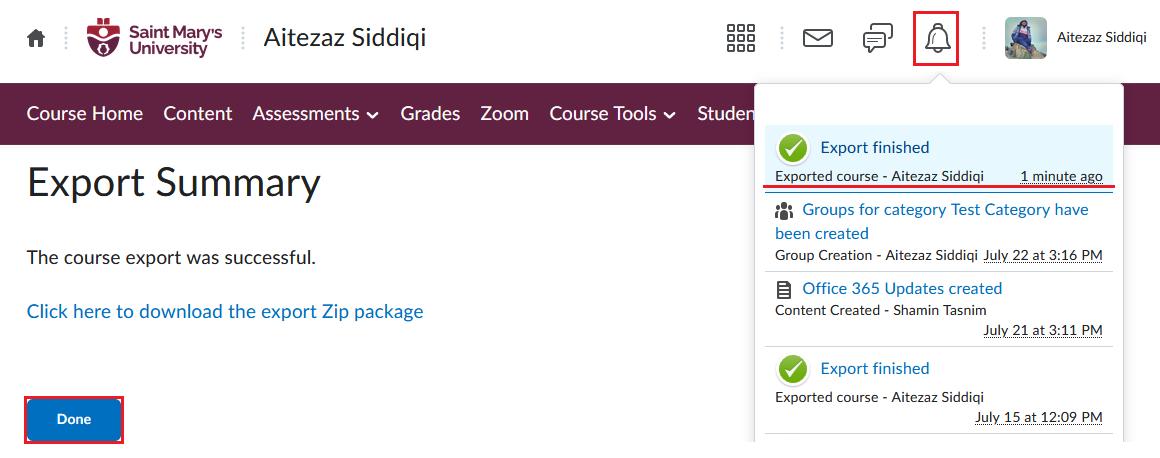
How to Export your course to use in another Brightspace Instance
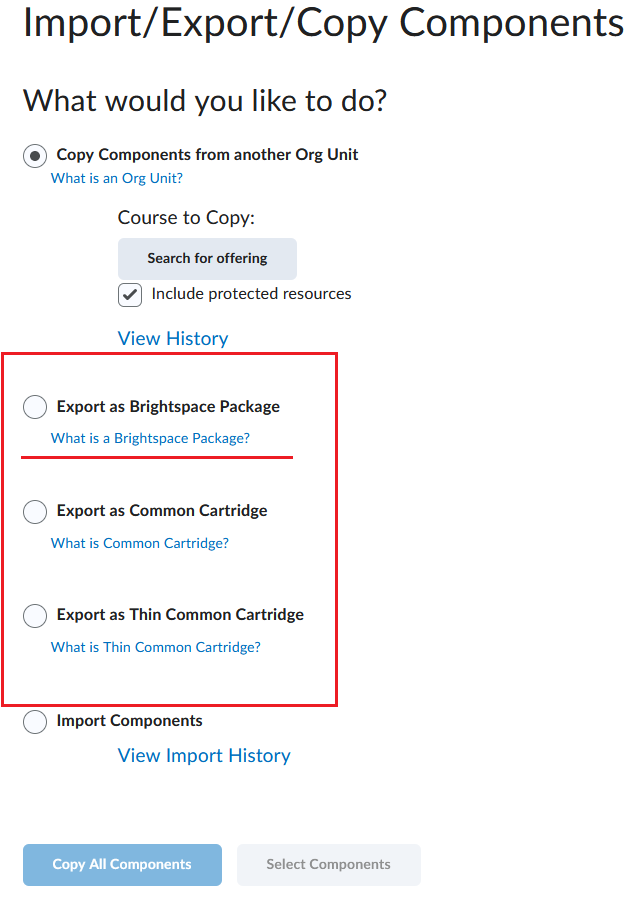
To export components from Brightspace, click on the Import/Export/Copy Components button and choose any of the three options.
- Export as Brightspace Package - This is usually the most used among the three options. The Brightspace Package is the standard export for Brightspace LMS. It contains all the necessary resources you need to share your course with another Brightspace site.
- Export as Common Cartridge - Common Cartridge is a specification developed by the IMS Global Learning Consortium. The specification describes a set of open standards for content, assessment, and digital content that allows publishers and content creators to create LMS-independent course packages. Brightspace exports as IMS Common Cartridge 1.3. This export type is rarely to never used.
-
Export as Thin Common Cartridge - Thin Common Cartridge (Thin CC) is a specification developed by the IMS Global Learning Consortium. The Thin CC standard is a subset of Common Cartridge developed to package Learning Tools Interoperability (LTI) Links, Web Links, and metadata. Brightspace exports as IMS Thin CC 1.3. This export type is rarely to never used.
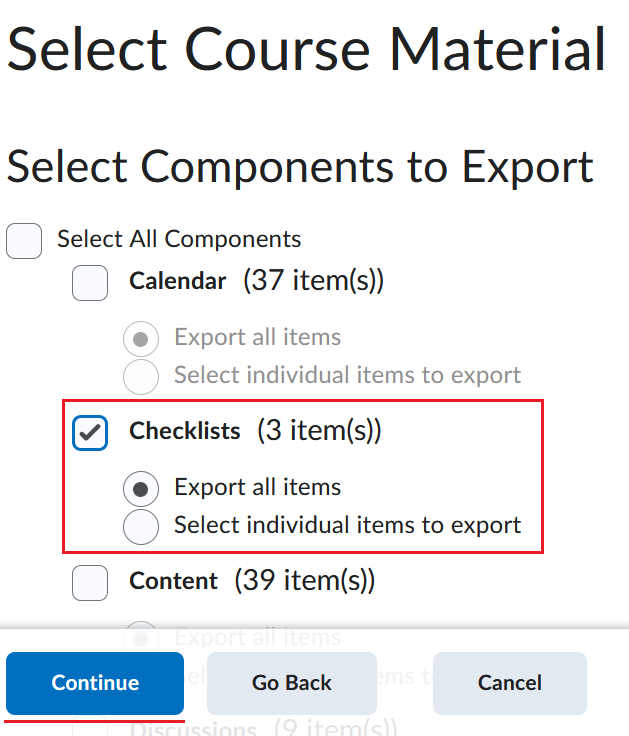
You then have the option to export all the components by selecting Select All Components or you can choose individual components and further choose to Export all items from that individual component or Select individual items to export to export individual items from that specific individual component.
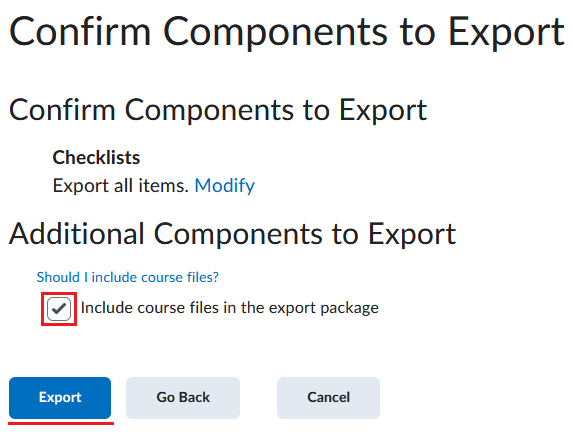
You will then get a confirmation page showing you all the components selected. Under Additional Components to Export, you can check the Include course files in the export package checkbox to include all the course files that has been uploaded by the current instructor of the course. Note: This option will not include any of the files uploaded by any students on the course.
The groups tool can be used to organize users’ work on assignments and projects or for creating a special work area for users with different learning needs. To access the Groups tool, go to Course Tools > Edit Course and select Groups from the Learner Management sub menu.
Important: Groups have a maximum enrollment of 200 users. If there are more than 200 users in a course, you can create new group categories; there is no limit on the number of group categories in a course.
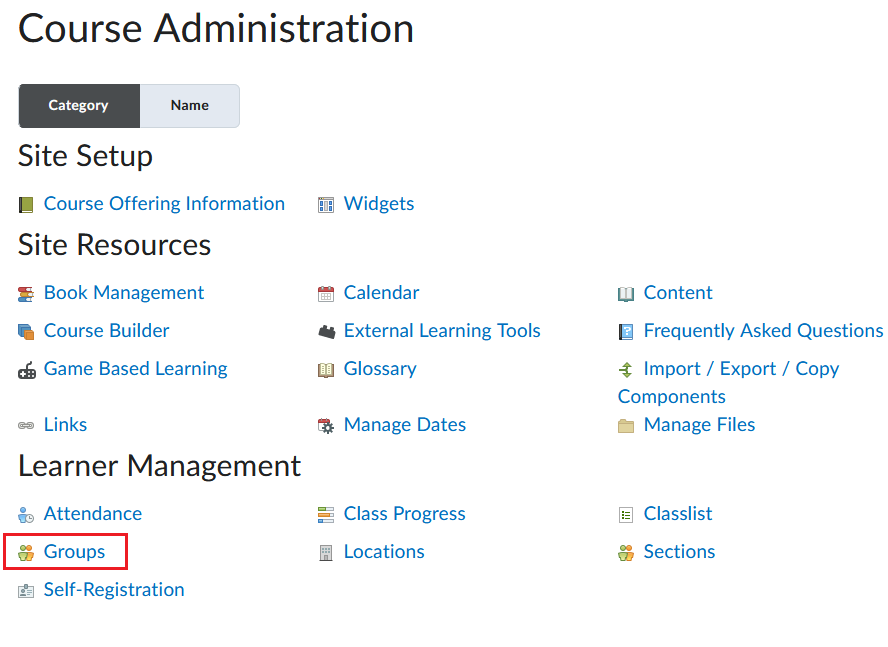
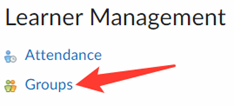
If you don’t have the Groups button, click Course Tools on the navbar and click Edit Course from the drop-down menu. In the Learner Management section, click Groups. (Please contact the Software and Application Support Centre at sas@smu.ca to have the Groups button added to your navbar).
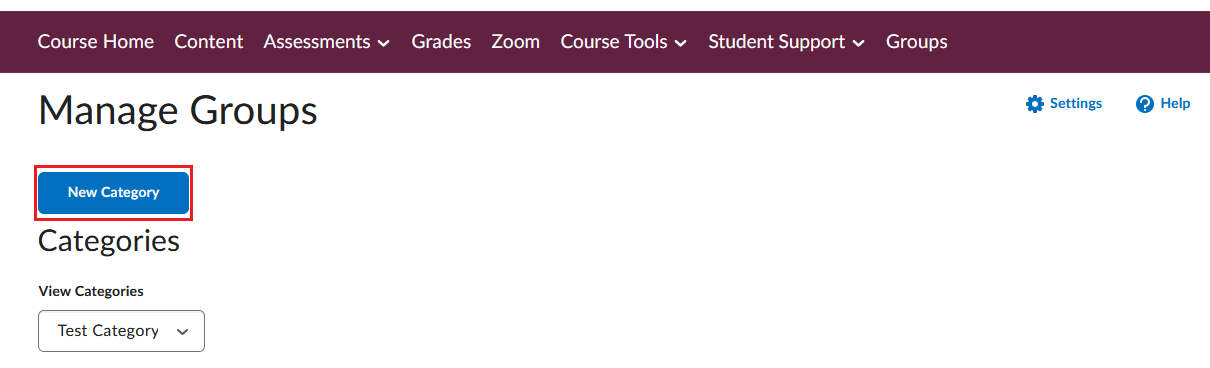
Creating Groups Category
Create categories to set up, organize, and manage related groups.
- On the navbar, click Groups.
- On the Manage Groups page, click New Category.
- Enter a Category Name and Description.
-
Select an Enrollment Type from the drop-down list.

- # of Groups – No Auto Enrollments: This option enables you to choose the number of groups with no automatic enrollment feature. So, users would have to be manually put into the groups.
- Groups of #: This option allows you to set the numbers of users per group. Therefore, the number of groups will be automatically created based on how many users there are if auto enrollment is selected.
- # of Groups: This option allows you to set the number of groups. Therefore, the number of users will be distributed evenly amongst the groups if auto enrollment is selected.
- e Groups of # - Self Enrollment: This option allows you to choose the number of users per group, thus, the number of groups created will be dependent on the number of users.
- # of Groups, Capacity of # - Self Enrollment: This option enables you to choose both the number of groups and the number of users per group.
If you want to know more details about the different enrollment types, go to this link.

-
After choosing an Enrollment Type, you can give a distinctive code/prefix to each group name. If this option is left blank, the prefix will default to ‘Group.’ Meaning, the names of all the groups would be whatever the prefix is set as with a number beside it (starting from 1).

-
Under Advanced Properties, few options will only be available depending on the Enrollment Type chosen. Example –
-
If option a is chosen from the Enrollment Type, you will have one checkbox option.
- Make category and group descriptions visible to group members: Checking this box will allow the group members to see the category and group descriptions for their group.
-
If option b or c is chosen from the Enrollment Type, you will have three checkbox options available -
- Auto-enroll new users: It will enable the auto-enroll feature and will add new users to the group with fewest users automatically.
- Randomize users in groups: This option will enable the randomization option. It will enroll users into groups randomly if chosen. Otherwise, users will be enrolled based on their order in the Classlist.
- Make category and group descriptions visible to group members: Checking this box will allow the group members to see the category and group descriptions for their group.
-
If option d, e, or f is chosen from the Enrollment Type, you will have two checkbox options available.
- Set Self Enrollment Start Date: If this checkbox is checked, users will not be able to self enroll themselves before the start date.
- Set Self Enrollment Expiry Date: If this checkbox is checked, users will not be able to self enroll themselves after the expiry date. You also have the option to check the Allocate unenrolled users after Self Enrollment Expiry Date checkbox if you want unenrolled users to be automatically enrolled randomly in a group. This checkbox/option will only work after the self enrollment expiry date passes. It also adds group members beyond the capacity of groups, if applicable. The automatic enrollment recurs at a set interval after the expiry date to ensure that all users are assigned to a group.
- Note: If neither the start nor the expiry date is checked, the groups will always be available for enrollment. Instructor can also manually enroll students even if self enrollment option is selected.
-
If option a is chosen from the Enrollment Type, you will have one checkbox option.
-
Under Additional Options, you can create separate workspace for the each of the groups. You can check the Set up discussion areas or the Set up assignments checkbox to create a separate discussion area or create assignment, respectively.
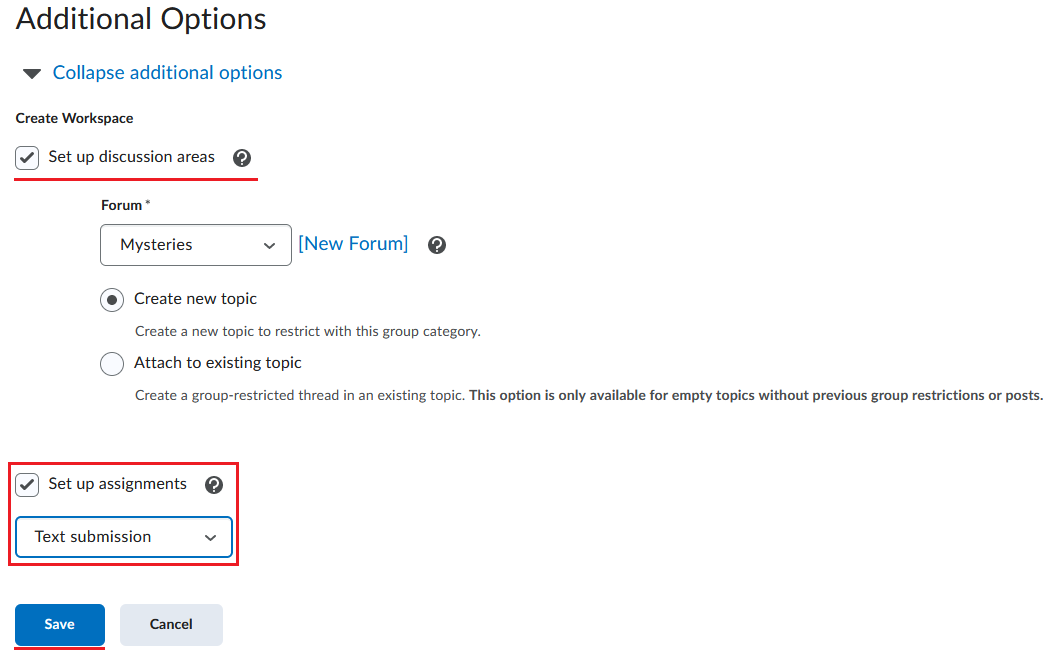
You can limit the assignment submission if you check the Set up assignments box to file, text, on paper submission or observed in person submission types. If you do choose to set up an assignment by checking the box, you will be taken to the Create Assignments page to complete the assignment creation process.
Tip: Enable the options in the Create Workspace area only after you have customized your group names. The discussions areas are then created with the customized group names right away, and you do not have to edit their names manually later.
Assigning Students or TAs to Groups
The way to enroll TAs into groups depends on whether they have access to all groups or only select groups. TAs should have access to all groups if they are responsible for mediating, grading, and working on material for the entire class. They should have access to select groups if they are only responsible for mediating, grading, or working on material for a particular group.
- On the Manage Groups page, select the category from the View Categories drop down list.
- Click the group you want to enroll users in.
-
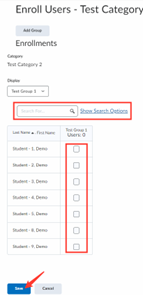
Click the Enroll Users button.
- Select the check boxes next to the students’ names to add them to the group or you can search for students in the search box.
- Click Show Search Options to filter students by Enrolled or Not Enrolled
-
When done click the blue Save button.
- Repeat the process with the other groups.
Note: Alternatively, In the Manage Groups page, select the category from the View Category drop down list. Click the drop-down arrow next to your category name and click Enroll Users. In the following page you can see a table with every user and every group. You make changes by clicking the checkboxes to add/remove students or TAs in groups.
Changing Group or Category Names
To change a category name:
-
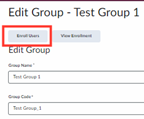
From the Manage Groups page, click the drop-down arrow next to your category name and click Edit Category.

- Change the name in the Category Name field.
- Click the blue Save button when done.
To change a group name:
- Click on the group from the Manage Groups page
- Change the name in the Group Name field.
- Click the blue Save button when done.
Adding a Group to a Category
To create a new Group in a category:
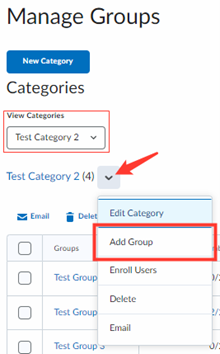
- On the Manage Groups page, from the View Categories drop-down list, select the category you want to add a group to.
- Click the drop-down arrow next to your category name, click Add Group from the drop-down list.
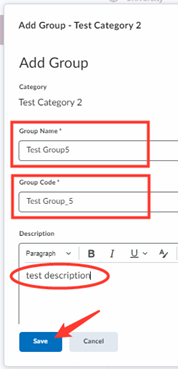
- If you do not want to use the default name provided, enter a group name.
- If you do not want to use the default group code provided, enter a group code.
- Enter a description for the group.
-
Click Save.
Manage your Groups
View your Groups Categories and Groups
From your course home page, click the Groups button on the navbar. Alternatively, click Course Tools, select Edit Course from the drop-down menu and in the following page click Groups in the Learner Management section.
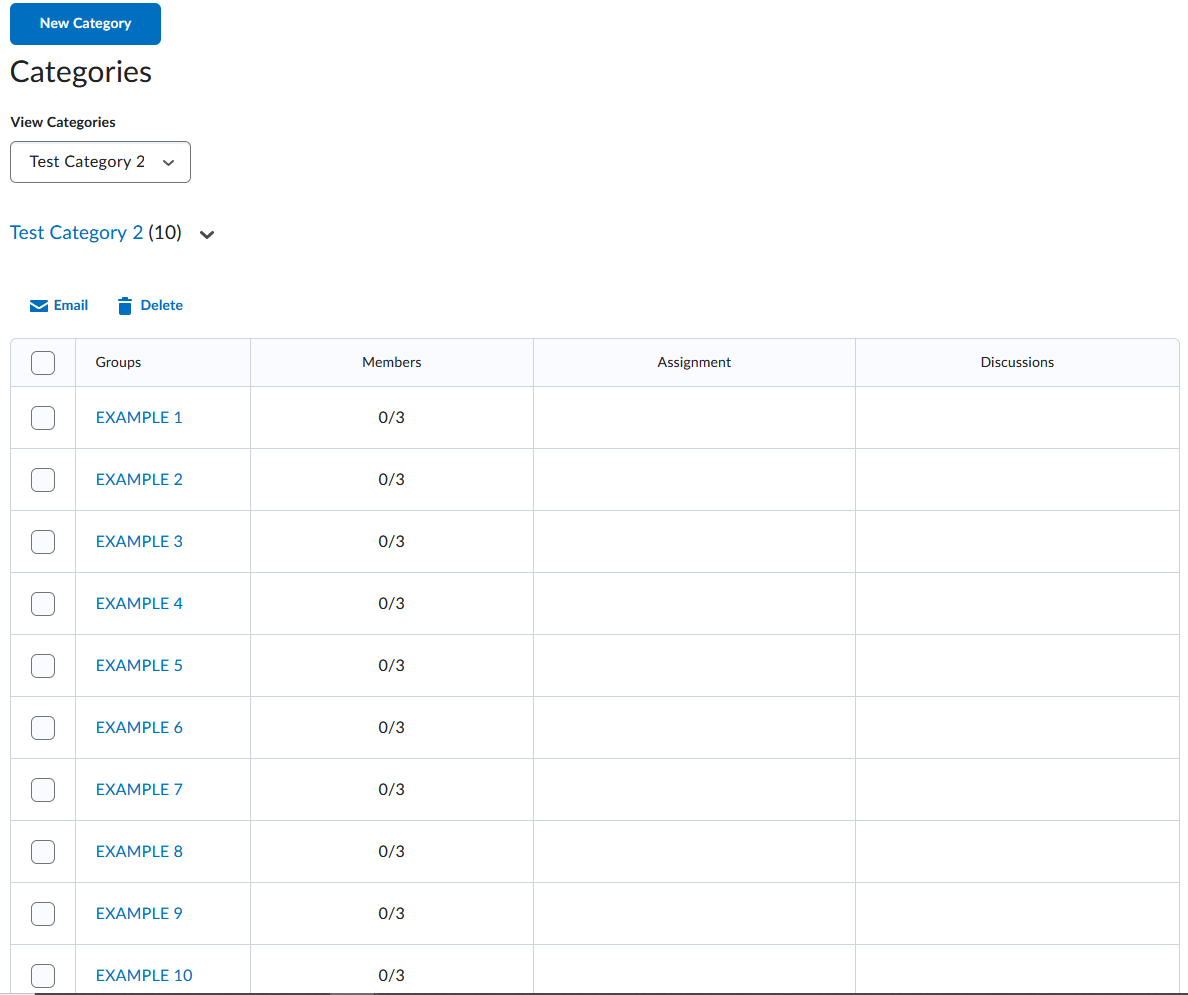
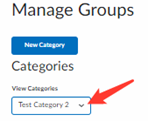
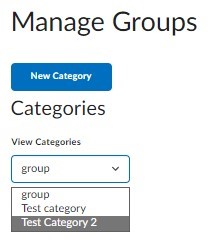
Now in the Manage Groups page you can view your categories from the View Categories drop down list.
Click on the category you want to view and the groups in that category will appear below.
Edit Categories
In the Manage Groups page, from the View Categories drop-down list, select the category.
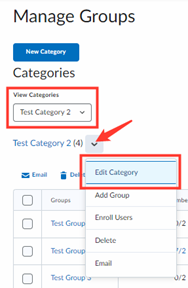
Click the drop-down arrow next to your category name and select Edit Category.
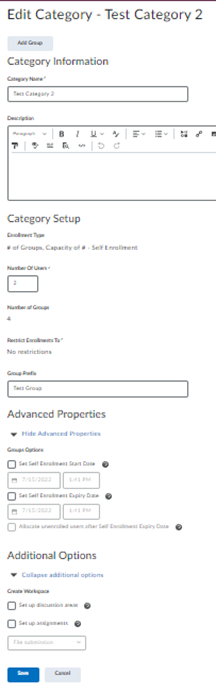
In the following page you can edit the category name, description, group prefix, enrollment start and expiry dates, the option to create workspace and some enrollment options depending on the enrolment type you preciously selected.
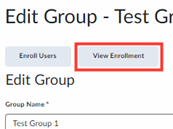
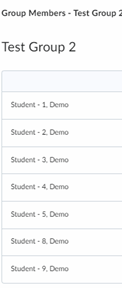
Check Which Students are Enrolled in What Group
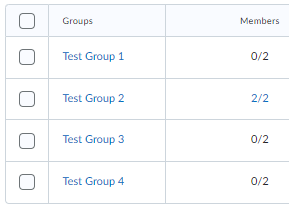
In the Manage Groups page, select the category from the View Category drop down list. Click on the group you want to check from the list below. Click the View Enrollment button to see a list of students in the selected group. Repeat the process with other groups to see the students in other groups.
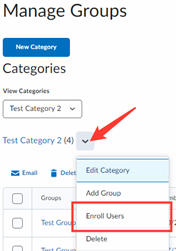
Alternatively, In the Manage Groups page, select the category from the View Category drop down list. Click the drop-down arrow next to your category name and click Enroll Users. In the following page you can see a table with every user and every group. You make changes by clicking the checkboxes to add/remove students or TAs in groups.

Delete Categories
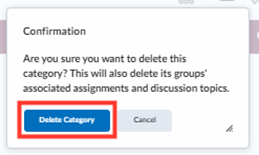
In the Manage Groups page, select the category from the View Category drop down list. Click the drop-down arrow next to your category name and click Delete. Click the blue Delete Category button.
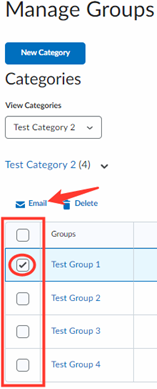
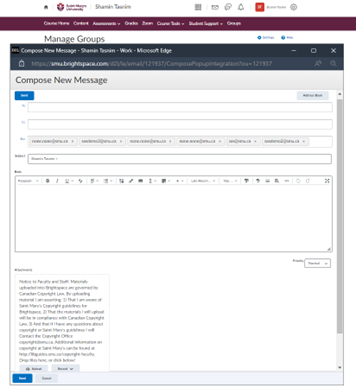
Send an Email to all Students in a specific Group
In the Manage Groups page, select the category from the View Category drop down list. From the list of groups below, select the checkbox of the group you want to email and click the blue Email button. A new pop-up window will appear where you can compose your email.
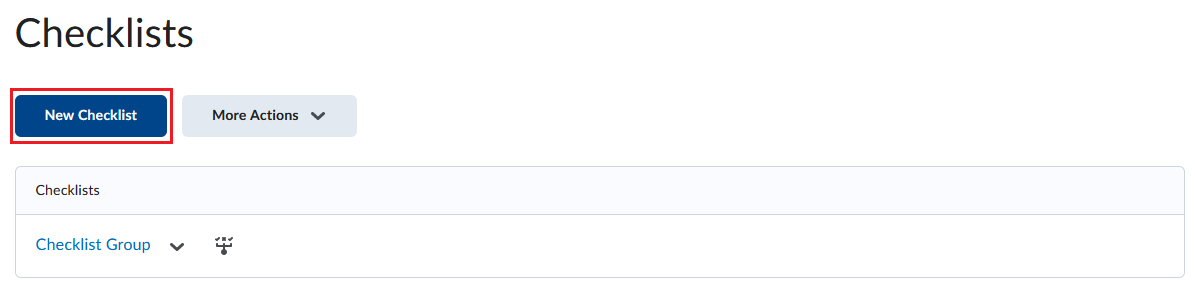
The checklist tool can be used to organize and manage week-specific course items. A checklist contains categories which are used to organize checklist items with due dates.

To access the Checklist tool, go to Course Tools > Edit Course and select Checklist.
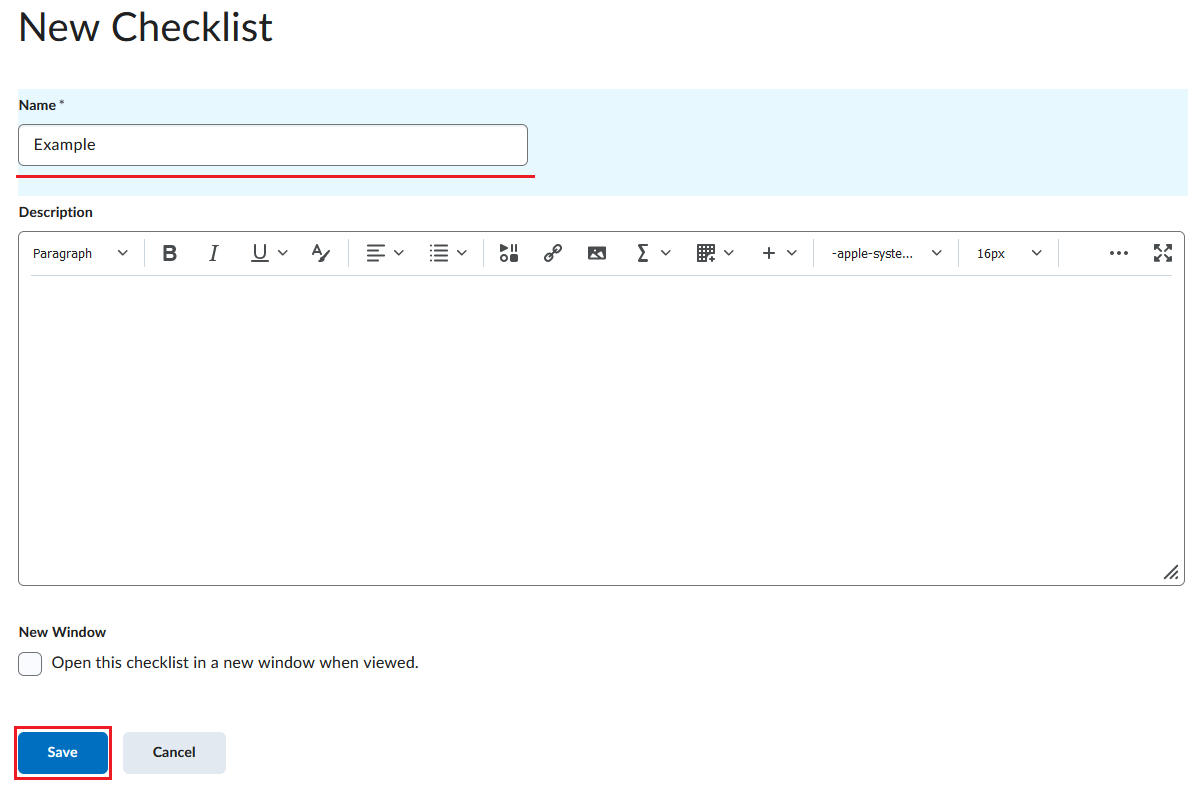
-
Click the blue New Checklist button and enter your checklist details. You will be taken to the Edit Checklist page after you select Save.
-
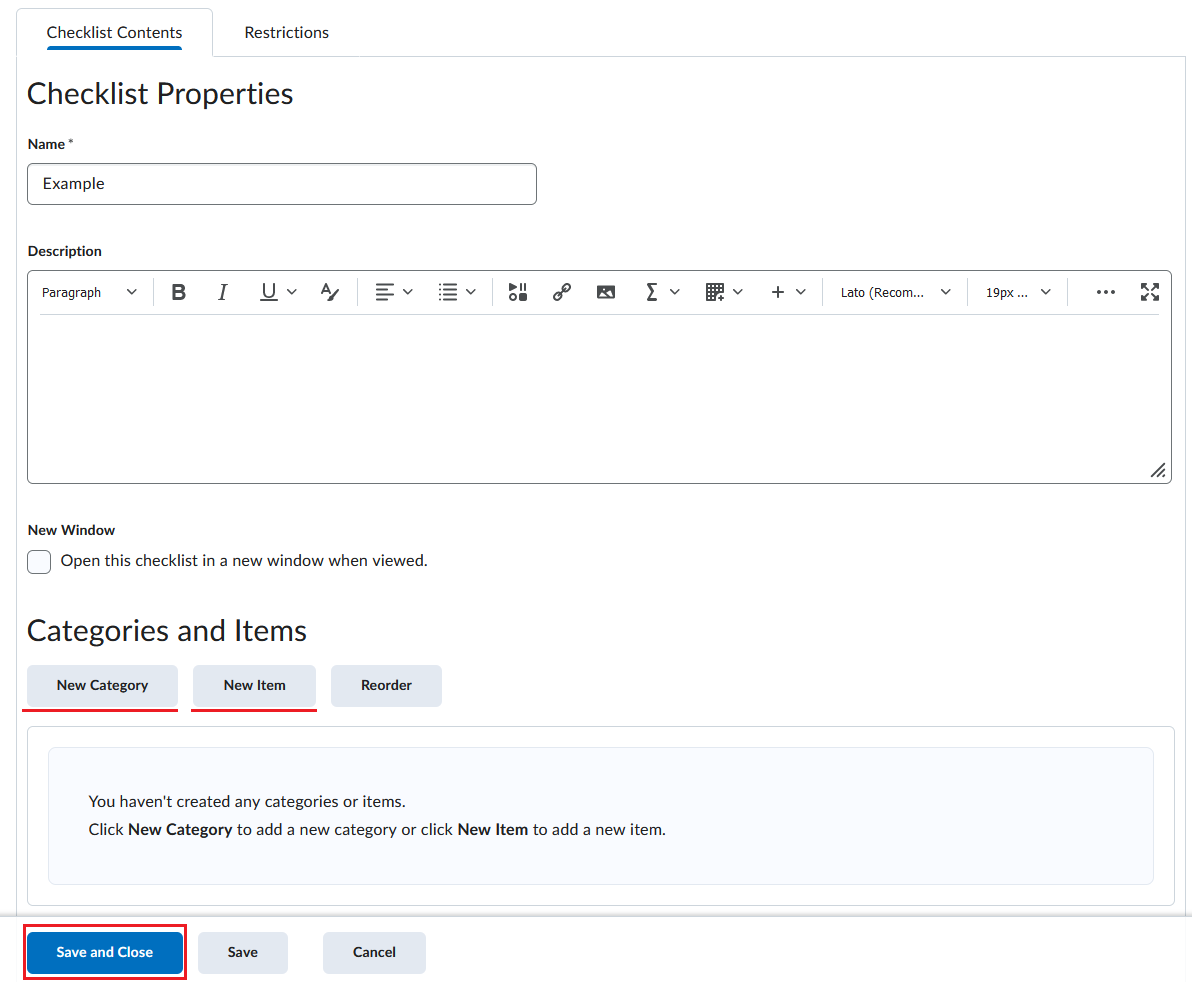
Then, under the Categories and Items area, you can add categories or items. To add a category, click on New Category, enter your category details, and click on Save.

-
To add an item to the checklist, click New Item and choose a category to put it under. Then add in the details for your checklist item.

Finally, click on Save and Close to save your checklist item.
Note: The default due date for a checklist item is one month from the current date.

The Survey tool is an excellent way to solicit feedback from participants regarding any aspect of a course. You can gather anonymous or non-anonymous opinions and information from users. Unlike Quizzes, survey questions do not have to have right or wrong answers and Likert-style rating questions are possible.
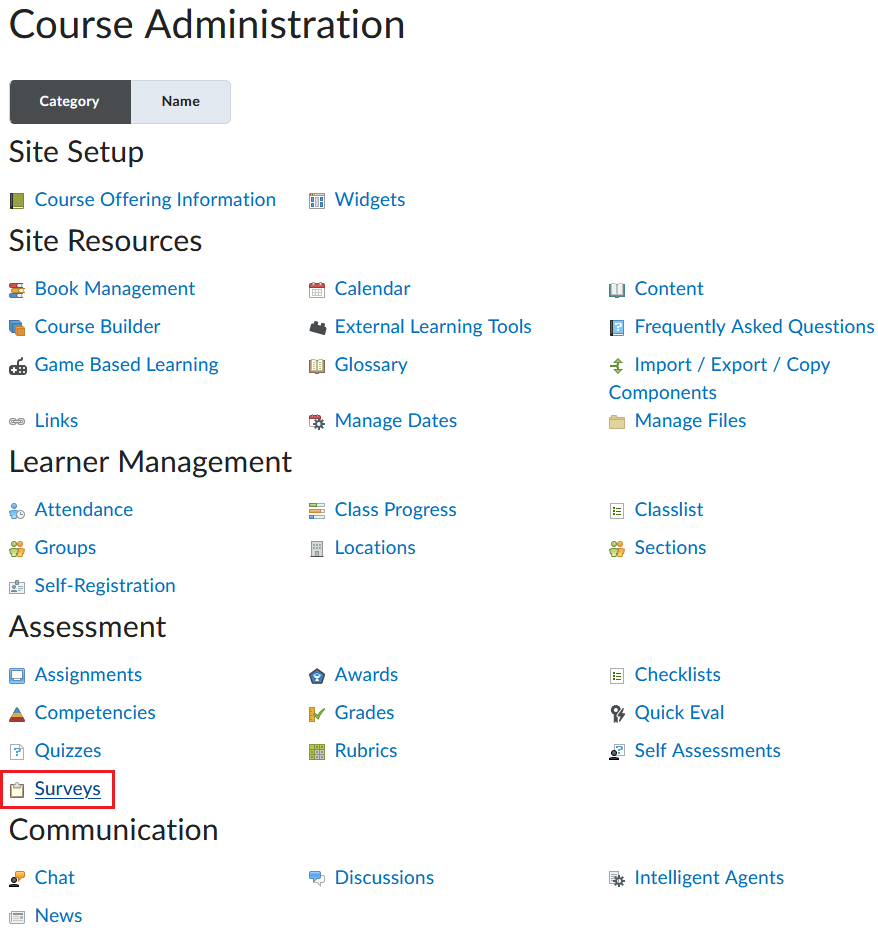
To use the Survey tool, go to it by going to Course Tools > Edit Course and select Surveys.
-
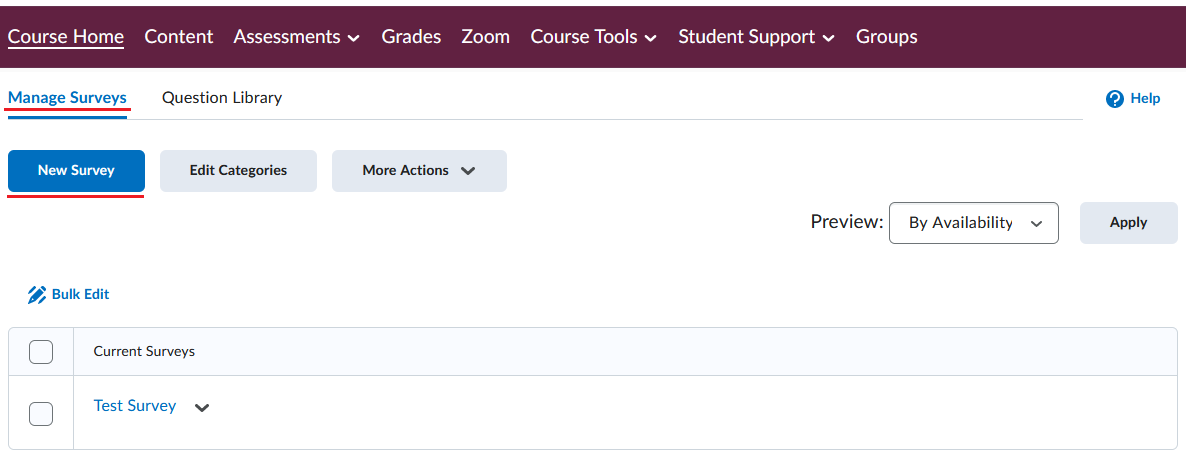
From the Manage Surveys page, click on the blue New Survey button and put in the survey details.
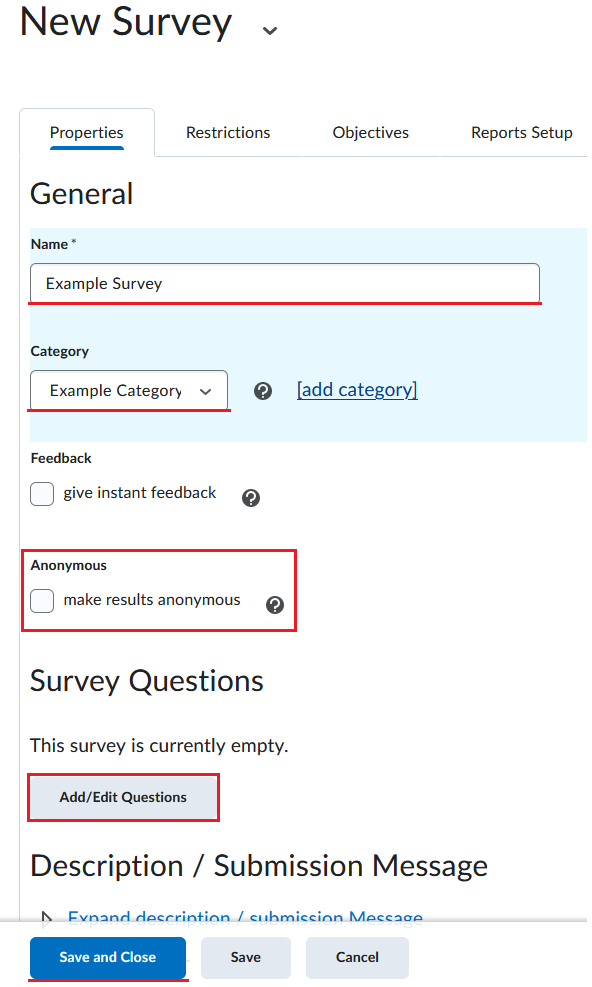
- The option for anonymous submission is the make results anonymous checkbox. Enabling this checkbox will make the survey results anonymous.
-
You have two ways of adding questions into the Survey – directly adding them or importing them from an existing question library.
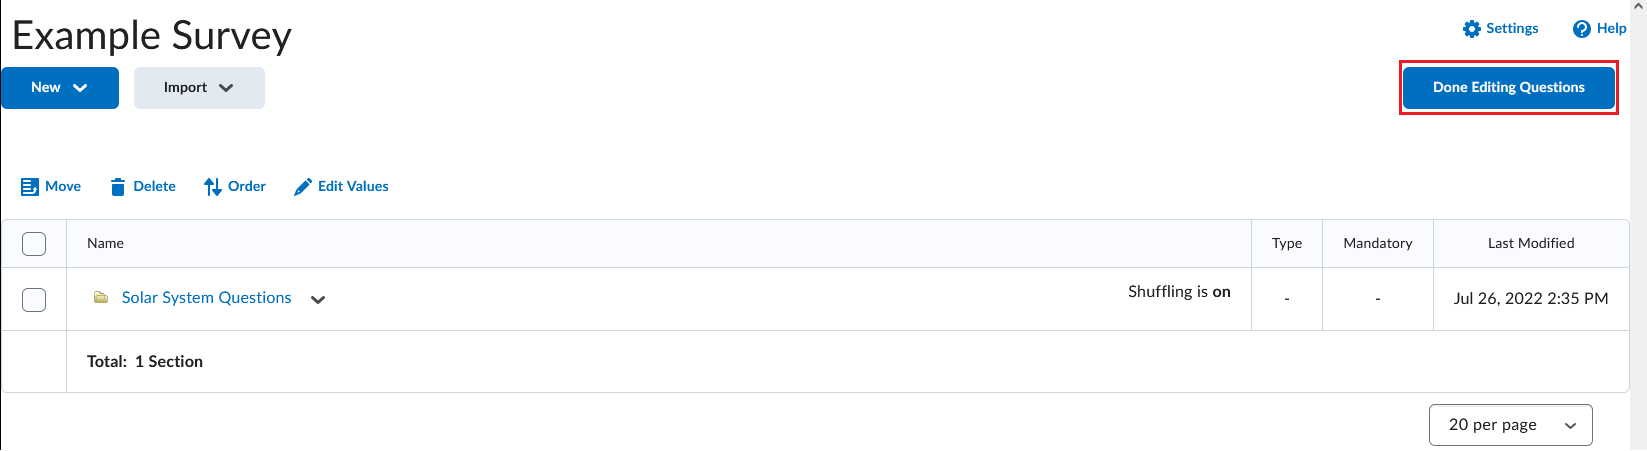
- To add questions directly, click on the Add/Edit Questions button then click on the blue New button and choose a question type. After adding your question, click on Save. Finally, click on the blue Done Editing Questions button on the top right.
-
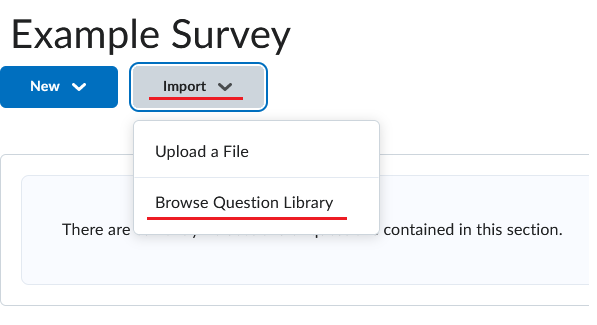
To import questions, click on the Add/Edit Questions button, then click on Upload and then Browse Question Library. Select your questions from the question library and click on the blue Import. Finally, click on the blue Done Editing Questions button on the top right.
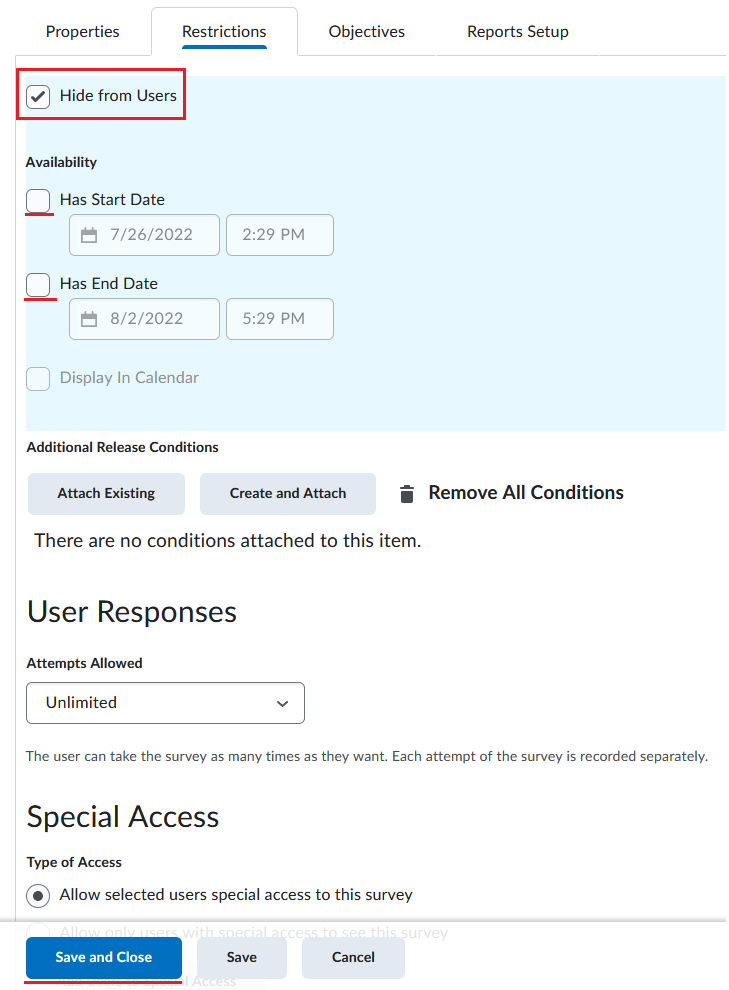
- After adding the questions, you can switch to the Restrictions tab, uncheck the Hide from Users checkbox to make the Survey active. You also have the access to change the start/end date, attach any release conditions, give users special access, and change the number of attempts that can be made on the Survey.
-
When you are okay with all the settings of the Survey, click on the blue Save and Close button.
Note: Once the option for anonymous submission is selected, it is not reversible. A survey cannot be made anonymous if it has any release conditions or if any release conditions are ever created using the survey as one of the conditions.
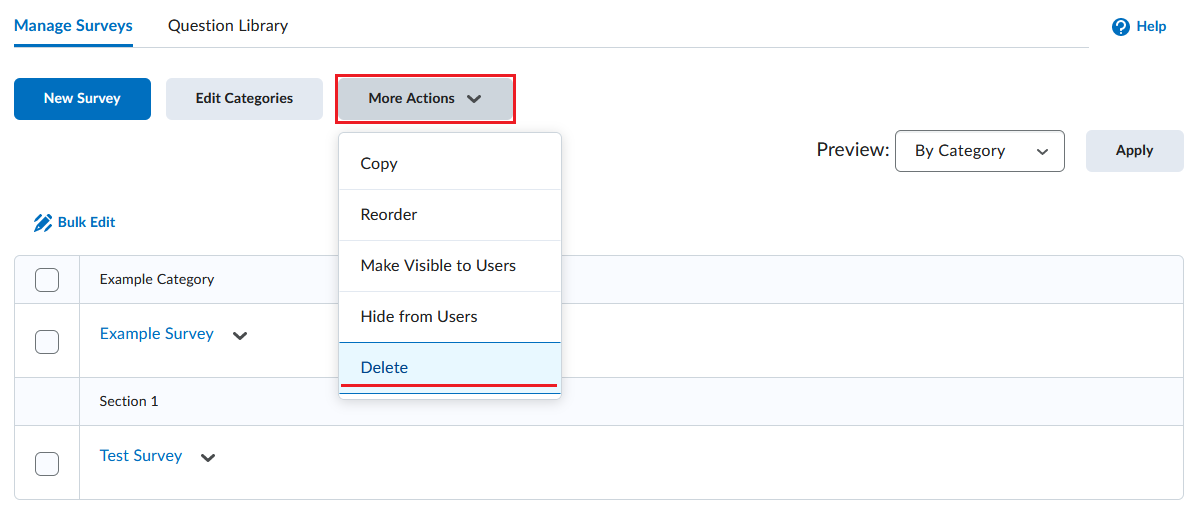
To delete a survey, from the Manage Surveys page, click on the More Actions button and choose Delete. Then, choose the Survey you want to delete and click on the blue Delete button.
The Self Assessments tool is a formative assessment tool that enables you to provide students with a series of questions and immediate feedback for responses. Question types available are like quizzes, however, student responses are not graded, and self assessment questions do not have a points value or difficulty level indication. The omission of numeric evaluation enables students to make reflective learning and course material comprehension their main priorities during a self assessment.
To use the Self Assessments tool, go to:
-
Course Tools > Edit Course and click on Self Assessments, under the Assessments submenu.
-
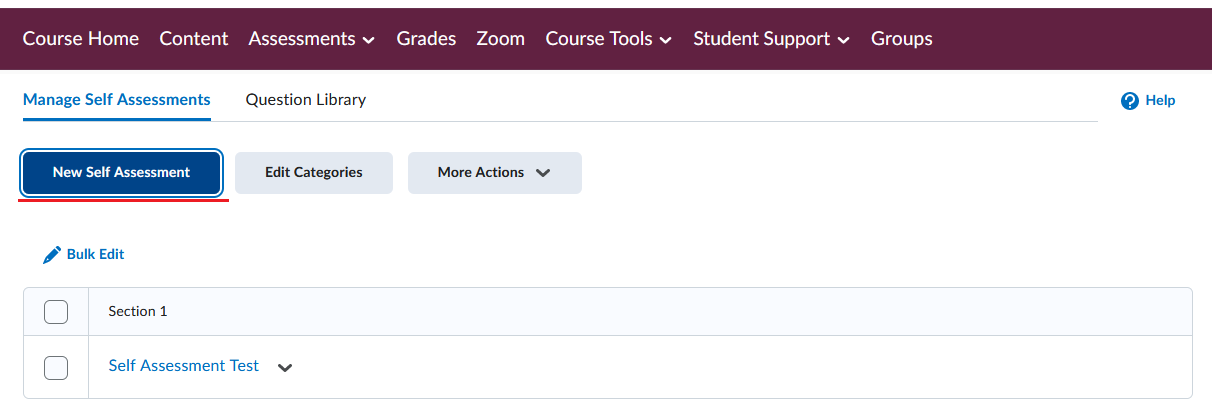
From the Manage Self Assessments page, click on the blue New Self Assessments button and then, give it a name and a category.
-
You have two ways of adding questions into the Self Assessments – directly adding them or importing them from an existing question library.
- To add questions directly, click on the Add/Edit Questions button then click on the blue New button and choose a question type. After adding your question, click on Save. Finally, click on the blue Done Editing Questions button on the top right.
-
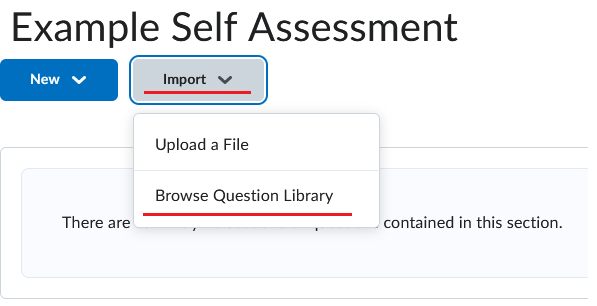
To import questions, click on the Add/Edit Questions button, then click on Upload and then Browse Question Library .Select your questions from the question library and click on the blue Import. Finally, click on the blue Done Editing Questions button on the top right.
To delete a Self Assessment, from the Manage Self Assessments page, click on the More Actions button and choose Delete. Then, choose the specific Self Assessment you want to delete and click on the blue Delete Selected button. Choose Yes on the confirmation dialogue box to proceed with the deleting process.
Note: Each self assessment belongs to a single course and cannot be shared among other courses unless you copy your course material into another course.
The Awards tool enables instructors to provide merit-based awards to students. There are two types of awards: Badges, and Certificates. Currently, only the badge awards are ready to use. You can manually give an award to a student or automate the process so that the student receives an award based on certain criterion.
Create a new award
- From the top Navigation panel, go to Course Tools > Edit Course.
- Sort the tools by Category and select the option Awards under Assessments.
-
Navigate to Course Awards and then click Add Award to Course.

-
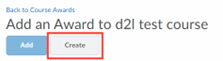
Click Create.
-
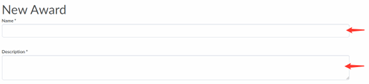
Enter a name and description for the new award.
-
Select an award type from the drop-down list. It can be either Badges or Certificates.

-
Under Availability, you can select the awards to be distributed for all your courses or distribute the award to all other instructors.

-
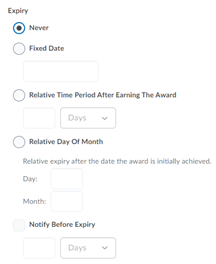
Under Expiry, select different expiry options for your awards.
- If the award will not expire, select Never. Examples of awards that never expire are certificates of merit for passing a course, or badges for perfect attendance.
- If the award will expire on a specific date, select Fixed date. Examples of awards that will expire on a specific date are certifications for a skill that must be renewed, such as first aid training and WHMIS training.
-
If the award will expire on a day relative to the day the award was granted, select Relative Day of the Month. Examples of awards that expire on a relative date are badges for Learner of the Week or for having achieved 100% on a test or assignment.
-
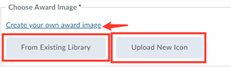
In the Choose Award Image area, do one of the following:
- If the image already exists in the image library, click From Existing Library.
- If you want to add a new icon to the image library, click Upload New Icon.
- If you want to add a new icon to the image library, click Upload New Icon.
-
To launch the OpenBadges website, click Create your own award image. OpenBadges is a free website that allows you to create custom icons.
-
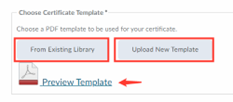
If you have set the Awards type to certificate, you also have to choose certificate template., in the Choose Certificate Template area, do one of the ollowing:
- If the PDF template already exists in the image library, click From Existing Library.
- If you want to add a new template to the image library, click Upload New Template.
-
You can also preview the certificate template by clicking Preview Template.
-
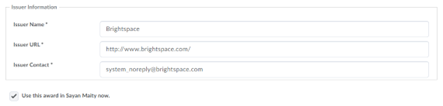
Verify that the Issuer Information is correct.
-
Click Save and Close.

If you want to notify the award recipient before an award expires, select the check box, and indicate the number of days of lead time.
Add release conditions to an award
Setting up a release condition will automatically release the awards once it has been earned. For example, the student received a certain score on a Quiz, or completed an Assignment, or posted in a discussion forum, etc.
- From the top Navigation panel, go to Course Tools > Edit Course.
- Sort the tools by Category and select the option Awards under Assessments.
-
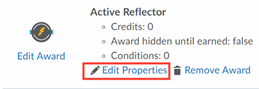
Under a specific award, click Edit Properties.
-
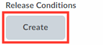
Under Release Conditions, Click Create.
-
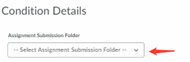
From the Condition Type drop-down list, select the release condition.

-
Complete the associated Condition Details.
-
Click Create.

-
Click Save.
View Awards for a Classlist
- From the top Navigation panel, go to Course Tools > Edit Course.
- Sort the tools by Category and select the option Awards under Assessments.
-
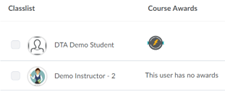
Click Classlist Awards.

-
Select the sort order.

-
Review the Classlist and associated Course Awards.
Manually Grant Awards
- From the top Navigation panel, go to Course Tools > Edit Course.
- Sort the tools by Category and select the option Awards under Assessments.
-
Click Classlist Awards.
-
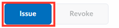
Select one or more learners in the Classlist. And click Issue.
-
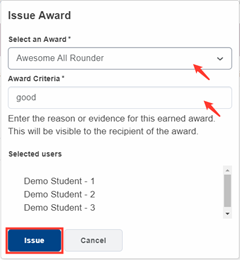
From the drop-down list, Select an Award. and in the Award Criteria field, enter a reason for granting the award. Click Issue.
Revoke Awards
- From the top Navigation panel, go to Course Tools > Edit Course.
- Sort the tools by Category and select the option Awards under Assessments.
- Click Classlist Awards. And select one or more learners in the Classlist.
-
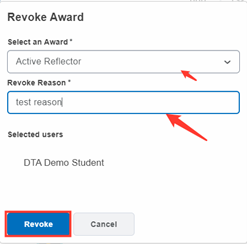
Click Revoke.
-
From the drop-down list, select an award. In the Revoke Reason field, enter a reason for revoking the award. Click Revoke.
The Game Based Learning tool is a way to design any kind of learning activity in conjunction with a common game framework, to imitate game-like traits. To use the Game Based Learning tool, click on it from the navigation bar or you can also access it by going to Course Tools then Edit Course and Game Based Learning.
- In the Course Game Maps, click on New Game Map to create a new game map. You will be taken to Create Game Map page.
-
In the step - Description, give the game map a name in the section Map Name. After that click Next.

-
In the next step – Background, choose a background of your liking. You can choose one of the three default ones, or you can upload your own image sing the Upload Image button. After that click on Next.

-
In the next step – Tiles, select from the available brushes and click on the map background to place items on the map. You can use the Tools to remove any tile. Once, all tiles are added, click Next.

-
In the next step – Objects, select from the available objects and click on the map background to place them on the map. You can use the Tools to remove any object. Once all objects are added, click Next.

-
In the next step - Activities, you will assign activities into different places in the Map.
-
Locate the
 Start and
  Finish nodes on either side of the map.
- Drag and drop the nodes to place them in their desired positions.
-
Click Start, then click
 Edit to edit the activity and add a Name and Description.
-
Click
 Add to add a new activity node.
-
Click an activity node’s Edit option to link to an activity (quiz or assignment), select a file, or create a file.

-
Drag and drop the
 Branch from one node to another to create a branching path. This gives learners more than one route through the activities to complete the Game Map.
-
Use
 Delete to remove unwanted nodes or connections between nodes.
-
Use Branch to connect the final activities to the Finish node.
-
Locate the
- Any nodes that do not have associated activities, or do not include a name they are listed above the map for the instructor to correct before continuing.
- Preview the Game Map to ensure the nodes and activities are linked properly and click Save.
Note: The next three steps are for designing you Game Map. These steps are Not Necessary for you Game map to work. You can ignore these steps.
Once you have created all nodes and connections, and linked each node with an activity or file, click Next.
Here is an example of a Game Map:

Add a Game Map in a module of the course content
- Go to Content from the top navigation panel in your course and navigate to the module where you wan to add the game map.
- To create a new game map from here click on New and from the dropdown menu select New Game Map.
- To add an existing Game Map, click on Add Existing Activities and select Game Map.
Track learner progress in Game Maps
- From the top navigation panel of your course, go to Course Tools > Edit course.
- In the Course Administration Page, sort the items as Categories. Then under the section Site Resources click on Game Based Learning.
-
Below the game map you want to examine, click Map Progress.

???Nothing on Guide???
???Nothing on Guide???
???Nothing on Guide???


